
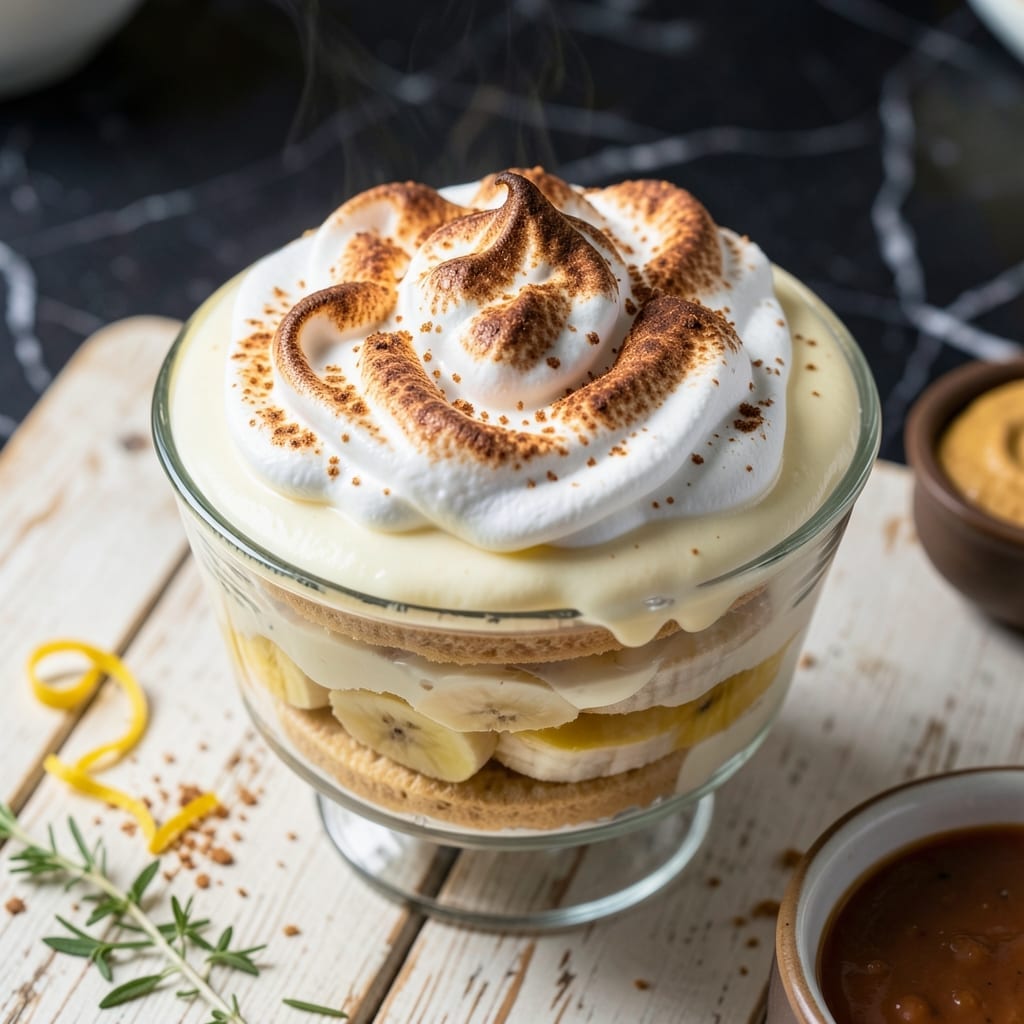
There’s a reason this layered dessert remains a Southern classic—it’s the perfect balance of creamy, crispy, and fresh in every bite. This version elevates the traditional with a foolproof method for velvety pudding and strategic layering that keeps the vanilla wafers crisp.
I’ve refined this recipe over years of potlucks and family gatherings, focusing on texture as much as flavor. The key is assembling it while the pudding is still warm, allowing the cookies to soften just enough without turning soggy.
What emerges after 4 hours of chilling is a dessert with distinct layers: tender bananas, rich custard, and wafers with just the right amount of give. It’s a crowd-pleaser that feels nostalgic yet impossible to resist.
Serve it in a glass trifle bowl to showcase the stripes or portion into individual cups for easy serving. The results speak for themselves.
Ingredients for Banana Pudding Recipe Pioneer Woman
Simple ingredients, showstopping results. Every layer matters in this timeless dessert.
| Ingredient | Amount | Notes |
|---|---|---|
| Vanilla Wafers 🍪 | 1 box | 11 oz package, about 45 wafers |
| Ripe Bananas 🍌 | 6 whole | Sliced into rounds |
| Granulated Sugar 🧂 | 1 ½ cups | Divided for pudding and meringue |
| All-Purpose Flour 🌾 | ¼ cup | For pudding thickening |
| Salt 🧂 | ¼ tsp | Table salt fine |
| Whole Milk 🥛 | 2 cups | Full-fat for creaminess |
| Large Eggs 🥚 | 4 whole | Separated, whites for meringue |
| Vanilla Extract 💧 | 2 tsp | Pure extract preferred |
| Unsalted Butter 🧈 | 2 tbsp | For pudding base |
| Cream of Tartar 🧂 | ½ tsp | Stabilizes meringue |
The vanilla wafers are non-negotiable here—Nilla brand is what you want for that perfect crisp-to-soft ratio. I’ve tried store brands, but they either turn to mush or stay rock-hard. Bananas should be ripe with brown speckles (the starchier the better for holding shape). For the milk, whole fat makes the pudding luxuriously thick, but 2% works in a pinch.
No vanilla wafers? Shortbread cookies are your next best bet, though they’re sweeter. Out of cream of tartar? Lemon juice at half the amount works for the meringue. Want to skip the meringue entirely? Whipped cream adds a lighter finish. The pudding thickens as it cools, so don’t panic if it seems thin straight off the stove.
Assemble this in a glass dish so you can admire the layers. It needs a full 4 hours to set—rushing it means soggy wafers. Leftovers keep 2-3 days refrigerated, but the meringue weeps a bit. Still delicious.
Why You’ll Love This Recipe
- Minimal Effort: I just layer, mix, and chill—no fancy techniques, and the flour-thickened pudding comes together on the stovetop in minutes.
- Nostalgic Crunch: The vanilla wafers soften just enough to soak up the creamy custard, but still give that little snap with every bite.
- Potluck Hero: I bring this to every picnic, and the dish is always scraped clean—even my picky nephew goes back for seconds.
- Wallet Friendly: Ripe bananas and pantry staples like sugar and flour mean I can make this for pennies per serving. Honestly, it’s cheaper than a box of cereal.
Step-by-Step Instructions for Layered Vanilla Wafer Banana Pudding
Here is the tested method that ensures perfect layers and creamy texture every time.
Step 1: Prepare the Pudding Base
In a medium saucepan, whisk together 1.5 cups Granulated Sugar, 0.25 cup All-Purpose Flour, and 0.25 tsp Salt. This dry mix prevents lumps when you add the liquids.
Gradually whisk in the 2 cups Whole Milk until smooth. Place the saucepan over medium heat and cook, stirring constantly, until the mixture thickens and comes to a gentle boil. This should take about 8-10 minutes.
Remove from heat and stir in 2 tbsp Unsalted Butter and 2 tsp Vanilla Extract until the butter melts completely. The pudding should coat the back of a spoon thickly—this is your visual cue it’s ready.
Step 2: Temper and Cook the Egg Yolks
Separate the 4 whole Large Eggs, placing the yolks in a bowl and reserving the whites for the meringue. Slowly whisk about 1 cup of the hot pudding mixture into the yolks to temper them—this prevents curdling when they meet the heat.
Pour the tempered yolk mixture back into the saucepan with the remaining pudding. Return to medium heat and cook for an additional 2-3 minutes, stirring constantly, until the pudding thickens further. You’ll notice it becomes glossy and holds its shape when stirred.
Step 3: Layer the Pudding and Bananas
Slice the 6 whole Ripe Bananas into ¼-inch rounds. Begin layering in a 9×13-inch baking dish or individual serving glasses: start with a layer of Vanilla Wafers, followed by a layer of banana slices, then a portion of the warm pudding.
Repeat the layers, ending with pudding on top. Press down gently on each layer to eliminate air gaps—this ensures every bite has a perfect ratio of wafer, banana, and cream. Cover with plastic wrap directly touching the surface to prevent a skin from forming.
Step 4: Prepare the Meringue Topping
In a clean bowl, beat the reserved egg whites with 0.5 tsp Cream of Tartar on medium-high speed until soft peaks form. Gradually add the remaining ½ cup Granulated Sugar (from the divided 1.5 cups), 1 tablespoon at a time, beating until stiff, glossy peaks form.
This should take about 4-5 minutes. The meringue is ready when it holds its shape and the bowl feels cool to the touch. Spread it evenly over the layered pudding, sealing the edges to the dish to prevent shrinking.
Step 5: Brown the Meringue and Chill
Bake at 350°F for 10-12 minutes until the meringue is golden brown. Watch closely during the last few minutes to avoid over-browning. Remove from the oven and let cool to room temperature, then refrigerate for at least 4 hours.
This chilling time allows the layers to set and the flavors to meld. Serve cold with additional Vanilla Wafers on top for crunch. The pudding will keep in the refrigerator for up to 3 days, though it’s best enjoyed within 24 hours.
Pro Tips For Making Banana Pudding Recipe Pioneer Woman
- Chill Before Layering: Let the pudding cool completely in the fridge for at least 30 minutes—layers stay crisp and don’t turn soggy. I learned this the hard way after my first attempt turned into banana soup.
- Slice Bananas Thin: Cut bananas into 1/4-inch slices so they soften just enough without overpowering the wafers. Sounds fussy, but it actually changes the outcome.
- Press Wafers Firmly: Gently press each vanilla wafer into the pudding so it soaks up flavor without collapsing. My grandmother swore by this, and she was right.
- Use Very Ripe Bananas: Pick bananas with plenty of brown speckles—they’re sweeter and blend better into the pudding. I was skeptical until I tried it, but it makes a real difference.
Make-Ahead Tips for Leftovers
Prep the Night Before
You can cook the pudding base and prepare the banana slices up to 1 day ahead. Store the pudding in an airtight container in the fridge, and keep sliced bananas in a bowl with 1 tbsp lemon juice to prevent browning. This splits the work in half. 💡
Assemble Early
Layer the pudding, bananas, and wafers in your dish up to 6 hours before serving. Cover tightly with plastic wrap pressed directly onto the surface to prevent a skin from forming. Hold off on adding the meringue until you’re ready to bake.
Meringue Timing
Whip and bake the meringue just before serving for the best texture. If you must make it ahead, bake the meringue, let it cool, and refrigerate the entire dish for up to 4 hours. The meringue may weep slightly, but it stays delicious.
Individual Portions
For easy grab-and-go desserts, assemble in mason jars or small cups. Layer wafers, bananas, and pudding, then add the meringue. These can be refrigerated for 24 hours—just bake the meringue the next day. ✨
Freezing Option
Without the meringue, this freezes well for up to 1 month. Thaw overnight in the fridge, then top with fresh meringue and bake. The wafers will soften more than usual but still taste great.
Serving Temperature
This dessert is best served chilled. If you’re in a hurry, 30 minutes in the freezer can help set the layers faster. Always let it sit at room temperature for 10 minutes after baking the meringue before refrigerating.
Nutrition Facts
Frequently Asked Questions
Can I use instant pudding mix instead?
Yes, but the texture will differ. Instant pudding sets faster and may not layer as smoothly. For best results, stick with the homemade version for that creamy, custard-like consistency.
Why do my vanilla wafers get soggy?
Over-chilling or assembling too far in advance can cause this. For crisp layers, assemble while pudding is still warm and refrigerate for exactly 4 hours. Pressing plastic wrap directly on the surface also helps.
Can I make this without eggs?
You can substitute the egg yolks with 2 tbsp cornstarch for thickening, but the meringue will need an egg white substitute like aquafaba. The flavor and texture won’t be identical, but it’s a workable alternative.

- 6 Egg Cake Recipe with Oil: Light as Air With Buttery Moisture - October 4, 2026
- 4 Bean Casserole Recipe: One-Pan Heartiness With Smoky Paprika Depth - October 4, 2026
- 3-Ingredient Keto Mug Cake Recipe: Microwave Magic in 2 Minutes - October 4, 2026