
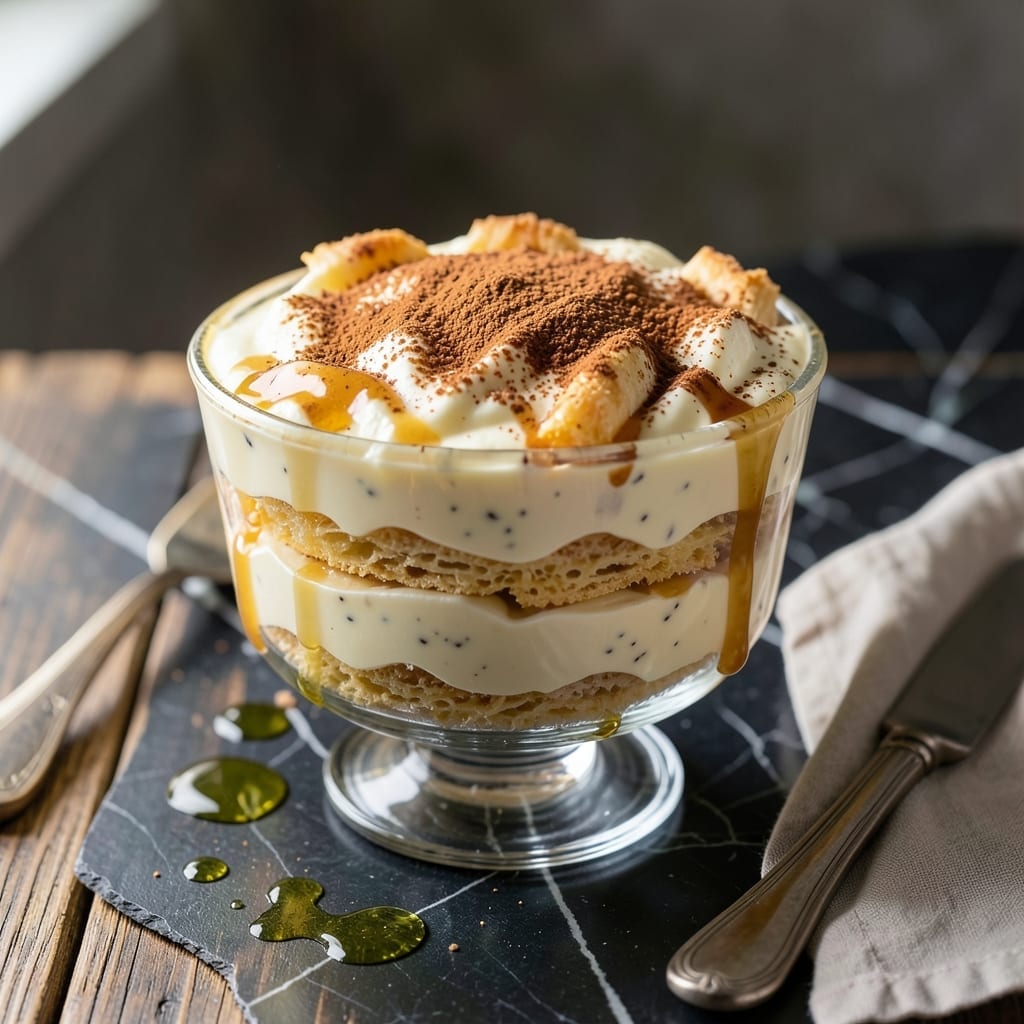
This recipe reimagines classic banana pudding by focusing on the creamy vanilla custard that defines the dish. The result is just as rich and comforting as the original, proving that the custard is the true star.
Vanilla wafers soften beautifully in the custard, creating that signature layered texture without needing bananas. The custard itself is silky smooth, with a depth of vanilla flavor that stands on its own.
What you get is a dessert that delivers the same nostalgic experience, with the same creamy consistency and sweet vanilla profile. It’s a straightforward method that honors tradition while offering a new twist.
Perfect for those who love the texture but want something different. Here’s how to make it.
Ingredients for Banana Pudding Recipe Without Bananas
Rich custard and crisp wafers create that signature layered dessert texture everyone loves.
| Ingredient | Amount | Notes |
|---|---|---|
| Whole Milk 🥛 | 3 cups | Full-fat for creaminess |
| Granulated Sugar 🍚 | ¾ cup | Divided for custard and meringue |
| All-Purpose Flour 🌾 | ¼ cup | For thickening custard |
| Salt 🧂 | ¼ tsp | Fine sea salt preferred |
| Large Egg Yolks 🥚 | 4 whole | Room temperature for best results |
| Vanilla Extract 🌿 | 2 tsp | Pure extract for best flavor |
| Vanilla Bean 🌱 | 1 whole | Optional, for intense flavor |
| Unsalted Butter 🧈 | 2 tbsp | For richness in custard |
| Vanilla Wafers 🍪 | 36 pieces | Classic variety preferred |
| Heavy Cream 🥛 | 1 cup | For whipped topping |
| Powdered Sugar 🍚 | 2 tbsp | For sweetening whipped cream |
| Vanilla Extract 🌿 | ½ tsp | For whipped cream flavor |
The custard base demands full-fat dairy for that velvety texture. Whole Foods 365 or Organic Valley whole milk and heavy cream deliver consistent quality. For vanilla, Nielsen-Massey extract or Rodelle pure vanilla beans provide the deepest flavor profile (the beans are worth it for special occasions). Avoid low-fat milk—it produces a thin, watery custard that won’t set properly.
No vanilla bean? Double the extract to 1 tablespoon. Out of wafers? Shortbread cookies or ladyfingers work as substitutes, though the texture differs slightly. For a lighter version, replace half the heavy cream with whole milk in the whipped topping (but expect less stability). The flour can be swapped for cornstarch at 1:1 ratio if needed, though the custard will be slightly more translucent.
Assemble the pudding just before serving—wafers soften within 2 hours at room temperature. Custard keeps 3-4 days refrigerated in an airtight container, but the wafers lose their crispness after the first day. Whipped cream is best used fresh but can be stored for 24 hours if stabilized with a touch of powdered sugar.
Why You’ll Love This Recipe
- One-Bowl Wonder: I love that I can mix everything—milk, sugar, flour, and egg yolks—in a single pot without fussing over extra dishes.
- Velvety Richness: The egg yolks and whole milk create this impossibly smooth, creamy texture that’s honestly better than the original.
- Potluck Hero: It’s my go-to for parties because it feeds a crowd and no one misses the bananas. Between us, they ask for seconds.
- Pantry Staples: I always have these ingredients on hand, so I can whip this up on a whim without a grocery run.
Step-by-Step Instructions for Creamy Vanilla Custard With Wafers
This method ensures a silky custard and perfectly layered dessert with minimal effort.
Step 1: Prepare the Vanilla Custard Base
In a medium saucepan, heat the 3 cups Whole Milk over medium heat until it just begins to simmer. While it heats, split the 1 whole Vanilla Bean lengthwise and scrape the seeds into the milk, then add the pod as well.
In a separate bowl, whisk together the 0.75 cup Granulated Sugar, 0.25 cup All-Purpose Flour, and 0.25 tsp Salt. Gradually whisk in the 4 whole Large Egg Yolks until the mixture is smooth and pale yellow. Slowly temper the egg mixture by adding ½ cup of the hot milk while whisking constantly to prevent curdling.
Step 2: Cook the Custard to Silky Perfection
Return the tempered egg mixture to the saucepan with the remaining milk. Cook over medium heat, stirring constantly with a wooden spoon, for 8-10 minutes until the custard thickens enough to coat the back of the spoon.
Remove the saucepan from heat and stir in the 2 tbsp Unsalted Butter and 2 tsp Vanilla Extract. Continue stirring until the butter is fully melted and the custard is glossy and smooth. Strain the custard through a fine-mesh sieve to remove any lumps or the vanilla pod, then cover with plastic wrap pressed directly onto the surface to prevent a skin from forming.
Step 3: Whip the Cream for Topping
In a chilled bowl, combine the 1 cup Heavy Cream, 2 tbsp Powdered Sugar, and 0.5 tsp Vanilla Extract. Using a hand mixer or stand mixer, whip on medium-high speed until soft peaks form, about 2-3 minutes.
Be careful not to over-whip—the cream should hold its shape but still be soft and billowy. This light, sweet topping will contrast beautifully with the rich custard and crisp 36 pieces Vanilla Wafers.
Step 4: Assemble the Layers and Chill
Arrange a layer of Vanilla Wafers in the bottom of a serving dish or individual glasses. Spoon a portion of the warm custard over the wafers, then repeat with another layer of wafers and custard, finishing with a final layer of custard on top.
Spread or pipe the whipped cream over the custard. Cover the dish and refrigerate for at least 4 hours, or preferably overnight. This chilling time allows the wafers to soften slightly and the flavors to meld, creating that classic creamy texture.
Serve chilled, with extra Vanilla Wafers on top for crunch if desired.
Pro Tips For Making Banana Pudding Recipe Without Bananas
- Whisk Egg Yolks First: Beat your egg yolks separately before adding them to the milk mixture—this prevents scrambling and gives you a smoother custard base every time.
- Use Cold Milk: Start with cold whole milk to avoid lumps when mixing with flour; it blends more evenly and reduces the risk of early curdling.
- Watch the Heat: Keep the temperature at a gentle simmer, not a boil, or your pudding will curdle. I learned this the hard way after ruining two batches.
- Add Pinch of Salt: Don’t skip the salt—just 1/8 teaspoon enhances all the flavors in the pudding, even without bananas. Sounds small, but it actually changes the outcome.
Common Mistakes When Making This Recipe
Skipping the Tempering Step
Pouring hot milk directly into egg yolks without tempering causes scrambled eggs in your custard. Always add ½ cup hot milk gradually while whisking to slowly raise the egg temperature. I learned this the hard way my first attempt. 💡
Undercooking the Custard
Removing custard from heat too early results in a runny pudding. Cook until it coats the back of a spoon and leaves a clear path when you draw your finger through it—this takes about 8-10 minutes at medium heat.
Not Straining the Custard
Lumps in your custard ruin the silky texture. Always strain through a fine-mesh sieve after cooking to remove any cooked bits or vanilla pod pieces. This small step makes a huge difference in the final result.
Skipping the Plastic Wrap
Leaving custard uncovered as it cools forms a skin on top. Press plastic wrap directly onto the surface before chilling to maintain that perfect smooth texture. No one wants to peel off a rubbery layer.
Overwhipping the Cream
Whipped cream turns grainy if overmixed. Stop at soft peaks—when the whisk leaves trails that hold their shape briefly. This takes about 2-3 minutes on medium-high speed with chilled cream. 💫
Rushing the Chilling
Assembling and serving immediately prevents the wafers from softening properly. Chill for at least 4 hours, preferably overnight, to let flavors meld and textures develop that classic pudding experience.
Nutrition Facts
Frequently Asked Questions
What can I use instead of vanilla wafers?
Shortbread cookies or ladyfingers work well as substitutes. They’ll soften similarly in the custard, though the flavor and texture may vary slightly from classic vanilla wafers.
Why does my custard turn out lumpy?
Lumps usually mean the custard wasn’t strained or the eggs curdled. Always strain through a fine-mesh sieve and temper the eggs properly to achieve a silky texture.
Can I make this ahead of time?
Yes! The custard keeps for 3-4 days refrigerated. Assemble the layers just before serving so the wafers stay crisp until chilled for 4 hours or overnight.
How do I prevent a skin from forming on the custard?
Press plastic wrap directly onto the surface of the warm custard before chilling. This creates a barrier that prevents a skin from developing as it cools.

- 6 Egg Cake Recipe with Oil: Light as Air With Buttery Moisture - October 4, 2026
- 4 Bean Casserole Recipe: One-Pan Heartiness With Smoky Paprika Depth - October 4, 2026
- 3-Ingredient Keto Mug Cake Recipe: Microwave Magic in 2 Minutes - October 4, 2026