
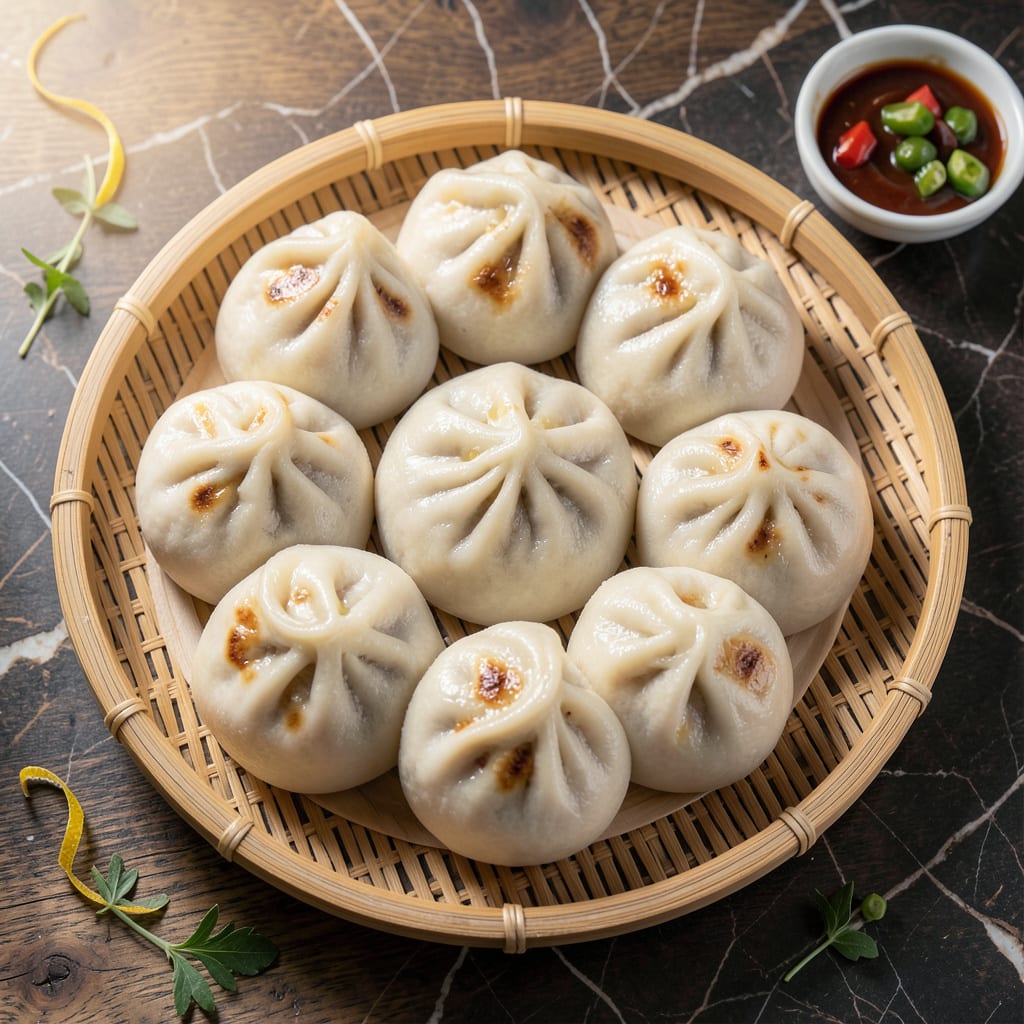
No steamer? No problem. I figured out how to make fluffy bao buns using just a pot, a rack, and a lid.
The dough comes together in minutes, and the stovetop method delivers the same cloud-like texture you’d get from traditional steaming. Perfect every time.
Ingredients for Bao Bun Recipe Without Steamer
Simple pantry ingredients create those pillowy, cloud-like buns you love without any special equipment.
| Ingredient | Amount | Notes |
|---|---|---|
| All-Purpose Flour 🌾 | 3 ½ cups | Plus extra for dusting |
| Instant Yeast 🍞 | 2 tsp | Or active dry yeast |
| Granulated Sugar 🍚 | ¼ cup | For activating yeast |
| Warm Water 💧 | 1 ¼ cups | About 110°F, not hot |
| Neutral Oil 🫒 | 2 tbsp | Vegetable or canola oil |
| Baking Powder 🧂 | 1 tsp | For extra lift |
| Salt 🧂 | 1 tsp | Fine sea salt preferred |
| White Vinegar 🍋 | 1 tbsp | For tenderness |
| Sesame Oil 🫒 | 1 tsp | For authentic flavor |
The flour is key here—King Arthur or Gold Medal all-purpose are my go-tos (avoid bread flour, it’s too dense). Yeast should be fresh; if it’s been in your pantry for over a year, grab a new packet. Warm water can’t be hot—just warm to the touch (like a baby bottle). I use a kitchen thermometer for peace of mind, but your finger works too (test it on your wrist first).
No instant yeast? Use active dry, but let it bloom in the warm water with sugar for 5-10 minutes until foamy. Out of vinegar? Lemon juice works in a pinch. For the oil, any neutral kind is fine, but avoid olive oil—it’s got too much flavor. If you want extra-rich buns, swap the water for warm whole milk (non-vegan, but delicious).
Dough rises best in a warm spot (I turn on my oven light and let it sit in there). Once shaped, buns can rest 30 minutes before cooking. Leftovers? Store in an airtight bag for 2-3 days and reheat with a damp paper towel.
Why You’ll Love This Recipe
- No Steamer Needed: I just use a pot lid and a damp towel—works every time.
- Pillowy Soft: The instant yeast and sugar make them fluffy like a cloud, with that slightly sweet taste.
- Endless Fillings: Honestly, I’ve stuffed them with everything from pork to tofu to jam.
- Budget Friendly: A bag of flour and a few pantry staples feed a crowd for pennies.
Step-by-Step Instructions for Bao Buns Without a Steamer
This stovetop method delivers the same soft, fluffy texture you love without any special equipment.
Step 1: Activate the Yeast and Mix the Dough
In a small bowl, combine the 2 tsp Instant Yeast, 0.25 cup Granulated Sugar, and 1.25 cups Warm Water. Stir gently and let it sit for 5-7 minutes until the mixture becomes foamy and bubbly. This confirms your yeast is active and ready to work.
In a large mixing bowl, whisk together the 3.5 cups All-Purpose Flour, 1 tsp Baking Powder, and 1 tsp Salt. Create a well in the center and pour in the yeast mixture, 2 tbsp Neutral Oil, 1 tbsp White Vinegar, and 1 tsp Sesame Oil. The vinegar helps tenderize the dough, while the sesame oil adds that signature aroma.
Use a wooden spoon or dough whisk to combine everything into a shaggy dough. It’ll look rough at first, but that’s normal.
Step 2: Knead Until Smooth and Elastic
Turn the dough out onto a lightly floured surface (use extra all-purpose flour for dusting) and knead for 8-10 minutes. Push the dough away with the heel of your hand, then fold it back over itself, turning it a quarter turn each time.
You’ll know it’s ready when the dough feels smooth, elastic, and slightly tacky but not sticky. If it sticks to your hands, add 1-2 tablespoons more flour, but avoid adding too much—this dough should remain soft for fluffy buns.
Shape the dough into a ball and place it in a lightly oiled bowl. Cover with a damp kitchen towel and let it rise in a warm, draft-free spot for 1-1.5 hours, or until doubled in size.
Step 3: Shape the Buns
Once the dough has risen, punch it down to release the air and turn it out onto your work surface. Divide it into 12 equal pieces (about 70-75 grams each) and roll each piece into a ball.
Flatten each ball with your palm, then use a rolling pin to roll it into an oval shape, roughly 3-4 inches long and ¼-inch thick. Fold the oval in half to create the classic bao shape, but don’t press the edges too tightly—leave a small gap for steam to expand.
Place each shaped bun on a square of parchment paper. This makes them easier to handle when cooking.
Step 4: Cook the Buns on the Stovetop
Heat a large, heavy-bottomed pot or Dutch oven over medium-low heat. Add ½ inch of water to the pot and bring it to a gentle simmer. Place a heatproof plate or shallow bowl upside down in the pot—it should sit above the water to create a makeshift steamer.
Arrange the buns on the plate, leaving 1 inch of space between each one to allow for expansion. Cover the pot with a tight-fitting lid and steam for 12-15 minutes. Check the water level halfway through and add more if it’s running low.
The buns are done when they’ve puffed up significantly and the dough looks glossy and slightly translucent. Avoid opening the lid during cooking, as the sudden temperature change can cause the buns to deflate.
Step 5: Finish and Serve
Carefully remove the lid and turn off the heat. Let the buns sit covered for 2 minutes to set slightly. Transfer them to a serving plate and brush the tops with a little extra neutral oil for shine, if desired.
Serve warm, filled with your favorite proteins or vegetables. The texture should be soft, pillowy, and slightly chewy, just like traditional steamed buns. If you have leftovers, reheat them gently in a steamer or microwave with a damp paper towel to restore their fluffiness.
Pro Tips For Making Bao Bun Recipe Without Steamer
- Proof in Warmth: Use your oven’s “proof” setting or turn it to 100°F with the light on—any cooler and the buns won’t rise enough before steaming.
- Check Yeast First: I learned this the hard way—mix the instant yeast with warm water and a pinch of sugar first; if it doesn’t foam in 5 minutes, your buns won’t rise.
- Skip Cold Water: Warm water should feel like bathwater, around 110°F; colder water slows the yeast, and hotter water can kill it.
- Use a Pot Lid: A wide pot with a tight lid and 1 inch of boiling water works like a steamer—just keep the heat medium-low to avoid soggy bottoms.
Pro Cooking Tips for This Dish
DIY Steamer Setup
Use a large pot with a heatproof plate or shallow bowl as your rack. The plate should sit ½ inch above simmering water. I use a 12-inch stainless steel skillet with a ceramic plate—works perfectly every time. 💡
Water Level Control
Start with ½ inch of water and maintain a gentle simmer. Too much water creates excess moisture, while too little causes uneven cooking. Check at 7 minutes and add more if needed.
Lid Sealing Trick
Prevent steam escape by covering the pot with a tight-fitting lid. Wrap a kitchen towel around the lid edge for a better seal. This traps steam effectively, ensuring even rising.
Bun Spacing
Leave 1 inch between buns on the plate—they’ll expand significantly. Overcrowding causes them to stick together. I fit 6 buns in my 12-inch pot comfortably.
Doneness Check
After 12-15 minutes, look for a glossy, slightly translucent appearance. The buns should feel light and puffy. Resist opening the lid early—sudden temperature drops cause collapse. ✨
Resting Time
Let buns sit covered for 2 minutes after cooking. This sets the structure before handling. Brush with neutral oil for shine if desired.
Nutrition Facts
Frequently Asked Questions
What can I use instead of a steamer basket?
A heatproof plate or shallow bowl works perfectly. Place it upside down in a pot with ½ inch of simmering water.
How do I know when the buns are done?
They should look glossy and slightly translucent after 12-15 minutes. Avoid opening the lid early to prevent deflating.
Can I make these ahead of time?
Yes! Shape and refrigerate buns for up to 24 hours before cooking. Let them sit at room temperature for 30 minutes first.
Why did my buns turn out dense?
Over-kneading or too much flour can cause this. Keep dough soft and knead just until smooth, about 8-10 minutes.

- 6 Egg Cake Recipe with Oil: Light as Air With Buttery Moisture - October 4, 2026
- 4 Bean Casserole Recipe: One-Pan Heartiness With Smoky Paprika Depth - October 4, 2026
- 3-Ingredient Keto Mug Cake Recipe: Microwave Magic in 2 Minutes - October 4, 2026