
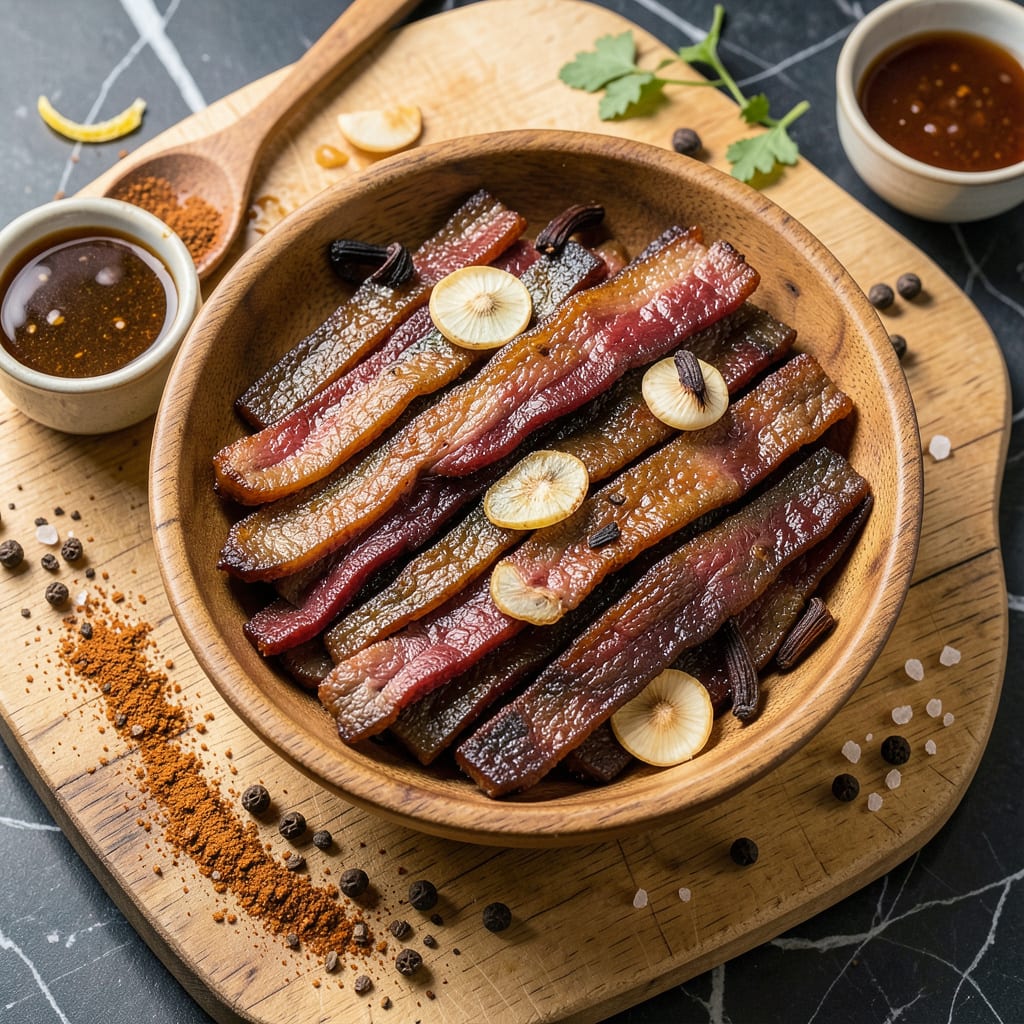
Creating perfect homemade beef jerky requires precision, but the smoky, chewy results are worth every step. This recipe transforms lean beef into tender, flavor-packed strips with a bold BBQ profile that rivals store-bought versions. The key lies in proper slicing, a well-balanced marinade, and controlled drying—whether using a dehydrator, oven, or smoker.
With just 4–6 hours of drying time and a marinade that infuses deep, tangy-sweet flavors, you’ll achieve jerky that’s both tender and shelf-stable. No specialized equipment is required—just patience and attention to detail for a snack that’s far superior to anything you’d find in a package.
Ingredients for Bbq Beef Jerky
Lean beef and bold spices transform into chewy, smoky jerky with just a few hours of drying time.
| Ingredient | Amount | Notes |
|---|---|---|
| Top Round Beef 🥩 | 2 ½ lb | Lean, sliced 1/4-inch thick against grain |
| Worcestershire Sauce 💧 | ⅓ cup | Lea & Perrins preferred |
| Soy Sauce 🫙 | ⅓ cup | Low-sodium recommended |
| Brown Sugar 🍚 | ⅓ cup | Light or dark, packed |
| Smoked Paprika 🌶️ | 1 ½ tbsp | Spanish or Hungarian preferred |
| Garlic Powder 🧄 | 1 tbsp | Freshly ground for potency |
| Onion Powder 🧅 | 1 tbsp | Sweet or regular variety |
| Black Pepper 🌶️ | 1 tsp | Coarsely ground preferred |
| Liquid Smoke 💨 | 1 tsp | Hickory or mesquite flavor |
| Cayenne Pepper 🔥 | ¼ tsp | Adjust for heat preference |
| Salt 🧂 | 1 ½ tsp | Kosher or sea salt preferred |
| Apple Cider Vinegar 🍎 | 1 tbsp | Raw or unfiltered preferred |
The beef cut is everything here. Top round gives you that perfect chewy texture without being tough—ask your butcher for the leanest piece they’ve got (or grab it pre-sliced at Whole Foods if you’re short on time). Freeze the beef for 30 minutes before slicing—makes cleaner cuts. For the soy sauce, Kikkoman low-sodium is my go-to, but any quality brand works. The brown sugar? Don’t skimp on the good stuff (organic if possible).
Out of Worcestershire? Coconut aminos plus a dash of vinegar gets you 80% there. No liquid smoke? Double the smoked paprika and add a pinch of ground chipotle. The apple cider vinegar can be swapped for lemon juice (though the flavor shifts slightly). If you’re heat-averse, skip the cayenne entirely—it’s more about depth than fire. For extra smokiness, I’ve used Colgin brand liquid smoke with great results.
Marinated beef keeps 24 hours in the fridge before drying. Finished jerky stays fresh in an airtight container for 1-2 weeks at room temp (if fully dried) or 1 month refrigerated. Freeze for up to 6 months—just thaw before eating. Pro tip: Paper towels in the storage container absorb any residual moisture and keep it crisp.
Why You’ll Love This Recipe
- No Fancy Equipment: I’ve made this with just a knife, a bowl, and my oven—no dehydrator, no special tools. The longest part is slicing the top round thin, and even that’s just 10 minutes of mindless work while I listen to a podcast.
- That Sweet-Smoky Crust: Here’s what sold me—the brown sugar caramelizes with the soy and Worcestershire, while the smoked paprika leaves this deep, campfire-like flavor that lingers. It’s the kind of jerky that makes you pause mid-chew because damn, that’s good.
- Trail Mix’s Cool Older Sibling: Honestly, I pack this for hiking trips, toss it in my kid’s lunchbox, or stash it in my desk for those 3 p.m. “I need protein now” moments. It’s way more satisfying than store-bought, and way cheaper than those fancy beef sticks.
- Meat That Waits for You: Between us, I’ve left batches of this in a ziplock for up to two weeks, and it just gets better—chewier, more concentrated in flavor. Make a double batch on Sunday, and you’ve got snacks (or last-minute charcuterie board contributions) covered for ages.
Step-by-Step Instructions for BBQ Beef Jerky
This method delivers that ideal balance of smoky, sweet, and chewy that makes great jerky irresistible.
Step 1: Prepare the Beef for Maximum Flavor Absorption
Start with your 2.5 lb top round beef that’s already sliced 1/4-inch thick against the grain. I always pat the slices completely dry with paper towels—this helps the marinade penetrate better and gives you more consistent drying. Place the beef in a large bowl or resealable plastic bag.
Here’s the thing—you want every piece to get equal flavor, so don’t just dump the marinade on top. Arrange the slices so they’re not overlapping, which ensures each piece gets fully coated and cures evenly.
Step 2: Create and Apply the BBQ Marinade
In a separate bowl, whisk together the 0.33 cup Worcestershire sauce, 0.33 cup soy sauce, 0.33 cup brown sugar, 1.5 tbsp smoked paprika, 1 tbsp garlic powder, 1 tbsp onion powder, 1 tsp black pepper, 1 tsp liquid smoke, 0.25 tsp cayenne pepper, 1.5 tsp salt, and 1 tbsp apple cider vinegar. The brown sugar should dissolve completely—this might take a minute of vigorous whisking.
Pour this marinade over the beef, making sure to coat each slice thoroughly. I like to massage the marinade into the meat with my hands (wear gloves if you’re sensitive to spices). Seal the bag or cover the bowl and refrigerate for at least 8 hours, though 24 hours gives you the deepest flavor penetration.
Step 3: Arrange for Optimal Drying
Remove the beef from the marinade and pat dry with fresh paper towels. This step is crucial—excess moisture will extend your drying time significantly. Arrange the slices on your dehydrator trays or wire racks if using an oven, leaving about 1/4-inch space between pieces to allow for proper airflow.
Real talk: don’t overcrowd the trays. I’ve made this mistake before, and you end up with some pieces that dry perfectly while others stay moist. For oven drying, place a wire rack on a baking sheet to elevate the meat and promote air circulation.
Step 4: Dry at the Right Temperature for Perfect Texture
Set your dehydrator to 160°F or preheat your oven to its lowest setting (usually around 170°F). The key here is low and slow drying—this preserves the flavor while achieving that ideal chewy texture. For dehydrators, this will take about 4-6 hours; ovens typically require 5-7 hours with the door slightly ajar.
You’ll know it’s done when the jerky bends but doesn’t snap completely. It should be dry to the touch with no visible moisture, but still pliable. I always test a piece after 4 hours and then check every 30 minutes until perfect. Remember that the jerky will continue to dry slightly as it cools.
Step 5: Cool and Store for Long-Lasting Freshness
Let the jerky cool completely at room temperature—this usually takes about 1 hour. This cooling period allows any remaining moisture to evaporate and helps the jerky firm up to its final texture. Don’t be tempted to package it while still warm, as this can create condensation and reduce shelf life.
Store your jerky in airtight containers or resealable bags in the refrigerator for up to 2 weeks, or in the freezer for 3-4 months. For the best texture, I recommend keeping it at room temperature for about 15 minutes before eating. The flavors actually develop more over the first day or two, so if you can wait, it’s worth it!
Make-Ahead Tips for This Recipe
Prep Ahead Strategy
You can slice and marinate the beef up to 24 hours before drying. I recommend doing this the night before—just store the marinated beef in the fridge in a sealed container or bag. This actually improves flavor penetration and saves you time on drying day. 💡
Marinade Make-Ahead
The BBQ marinade can be mixed and refrigerated for up to 3 days before using. I often make a double batch and keep half in a Mason jar for next time. Just give it a good shake before using, as the brown sugar may settle at the bottom.
Partial Drying Option
If you’re short on time, dry the jerky for 2-3 hours at 160°F, then refrigerate overnight. Finish drying the next day. This works well when using an oven, but dehydrators maintain more consistent temperature control.
Freeze for Later
Marinated but undried beef strips freeze beautifully for up to 3 months. Lay them flat on a tray to freeze individually, then transfer to a freezer bag. Thaw overnight in the fridge before drying—no quality loss!
Storage Prep
Before storing dried jerky, let it cool completely and pat off any surface moisture with paper towels. I like to add a silica gel packet to the storage container to absorb any residual humidity and keep it crisp.
Portion Control
For grab-and-go convenience, portion the cooled jerky into small resealable bags before storing. A 1-ounce serving (about 4-5 pieces) makes perfect single-serve packs for lunches or hiking trips. ✨
Nutrition Facts

- 6 Egg Cake Recipe with Oil: Light as Air With Buttery Moisture - October 4, 2026
- 4 Bean Casserole Recipe: One-Pan Heartiness With Smoky Paprika Depth - October 4, 2026
- 3-Ingredient Keto Mug Cake Recipe: Microwave Magic in 2 Minutes - October 4, 2026