
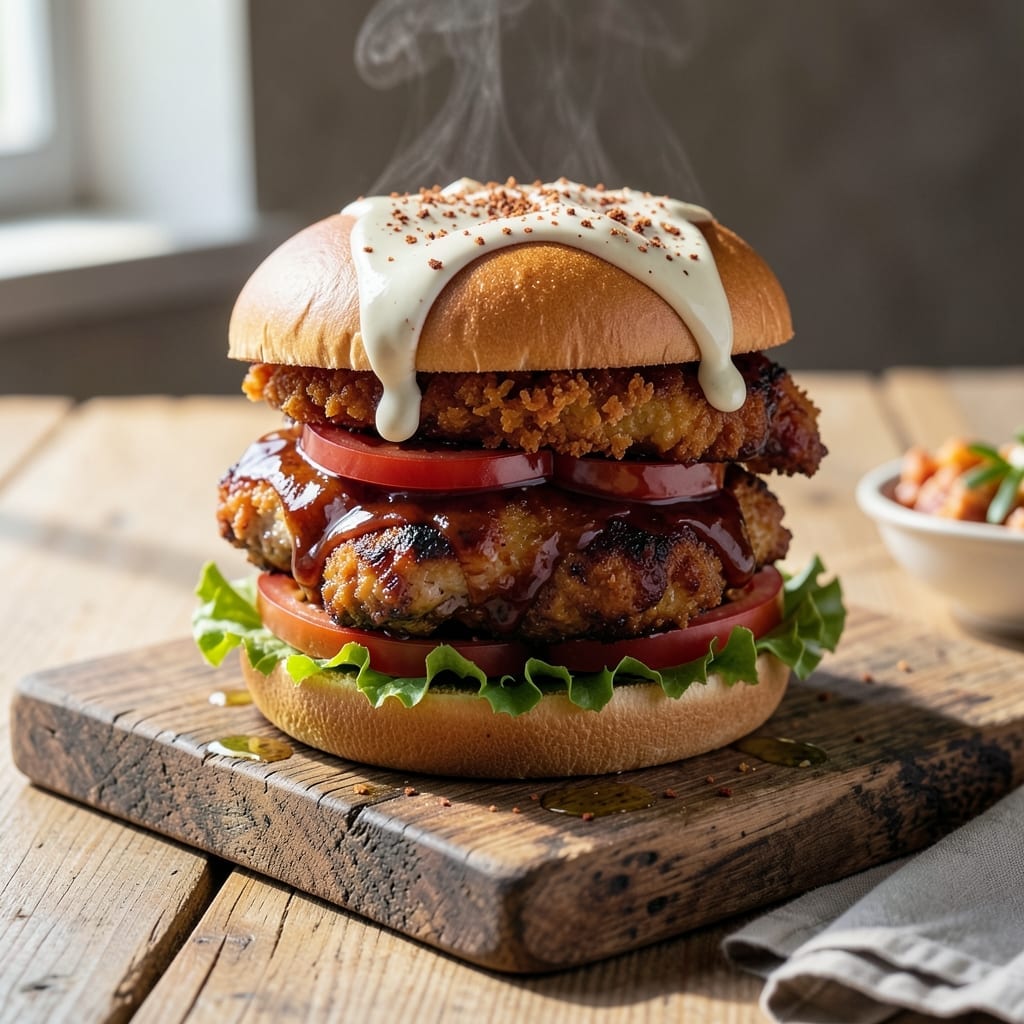
I’ve perfected a method for achieving shatteringly crispy chicken that still stays juicy under a smoky BBQ glaze. This isn’t your average pulled chicken sandwich—it’s a texture game-changer.
The secret lies in a two-step process: first, a buttermilk marinade for tenderness, then a high-heat sear to lock in that crispy coating. The BBQ sauce is brushed on last to preserve the crunch.
Each bite delivers golden, crunchy chicken with a sticky-sweet glaze, piled high on a soft bun. The contrast between the crisp exterior and saucy interior is what makes this sandwich unforgettable.
Serve with pickles and coleslaw for the full experience. This technique guarantees crispy results every time.
Ingredients for Bbq Chicken Sandwich Recipe Crispy
Crispy chicken meets smoky BBQ glaze on soft buns with classic toppings for the ultimate texture experience.
| Ingredient | Amount | Notes |
|---|---|---|
| Boneless, Skinless Chicken Thighs 🍗 | 2 lb | Patted dry for crispiness |
| Buttermilk 🥛 | 2 cups | Full-fat for best marinade |
| All-Purpose Flour 🌾 | 2 cups | For dredging coating |
| Cornstarch 🌾 | ¼ cup | Extra crispiness boost |
| Smoked Paprika 🌶️ | 2 tsp | For smoky depth |
| Garlic Powder 🧄 | 1 tsp | Uniform flavor distribution |
| Onion Powder 🧅 | 1 tsp | Savory base note |
| Kosher Salt 🧂 | 1 ½ tsp | Diamond Crystal preferred |
| Black Pepper 🌶️ | 1 tsp | Freshly ground |
| Vegetable Oil 🫒 | 1 cup | High smoke point for frying |
| BBQ Sauce 🍯 | 1 ½ cups | Smoky-sweet variety |
| Hamburger Buns 🍞 | 4 whole | Soft, toasted before serving |
| Dill Pickles 🥒 | 8 slices | For serving |
| Coleslaw 🥬 | 2 cups | Prepared, for topping |
The chicken thighs are non-negotiable here—dark meat stays juicy through the high-heat sear. Source air-chilled thighs from Whole Foods or ButcherBox for superior texture. Buttermilk should be full-fat; low-fat versions won’t tenderize as effectively. For the flour, King Arthur all-purpose is the professional standard. The cornstarch is the secret to that shatteringly crisp coating (don’t skip it).
No buttermilk? Mix 2 cups whole milk with 2 tbsp white vinegar and let sit 10 minutes. Swap thighs for breasts if you must, but they dry out faster—brine them first. Out of BBQ sauce? Combine ketchup, molasses, and liquid smoke in a pinch. The buns should be potato rolls (like Martin’s), but any soft burger bun works. For extra crunch, toast them with a little butter.
Marinate the chicken for 4-12 hours—overnight is ideal. Cooked chicken keeps 3-4 days in the fridge, but the coating loses crispness. Reheat in a 400°F oven for 10-15 minutes to revive the crunch. Assemble sandwiches just before serving (the bun gets soggy otherwise).
Why You’ll Love This Recipe
- One Pan Wonder: I love that everything from the buttermilk soak to the crispy coating happens in just a few steps—no fancy equipment needed.
- Smoky Crunch: The cornstarch and smoked paprika give that irresistible crispy edge, while the buttermilk keeps the chicken juicy inside.
- Feeds the Crew: Perfect for game day or a quick weeknight dinner, and honestly, it’s just as good cold the next day in a lunchbox.
- Budget Winner: Chicken thighs stay affordable, and a little flour and cornstarch stretch to make a big, crispy batch.
Step-by-Step Instructions for Crispy BBQ Chicken Sandwiches
Here’s the method. Straightforward, tested, works every time.
Step 1: Marinate the Chicken in Buttermilk
Combine the 2 lb Boneless, Skinless Chicken Thighs with 2 cups Buttermilk in a large bowl. I use full-fat buttermilk for maximum tenderness—the acidity breaks down proteins while the fat keeps the meat juicy. Make sure all pieces are fully submerged.
Cover and refrigerate for at least 4 hours, or preferably overnight. This extended marinating time is crucial for achieving that shatteringly crisp exterior while maintaining moist, flavorful meat. You’ll notice the chicken plumps slightly as it absorbs the liquid.
Step 2: Prepare the Crispy Coating
In a large shallow dish, whisk together 2 cups All-Purpose Flour, 0.25 cup Cornstarch, 2 tsp Smoked Paprika, 1 tsp Garlic Powder, 1 tsp Onion Powder, 1.5 tsp Kosher Salt, and 1 tsp Black Pepper. The cornstarch is key here—it creates that extra-crunchy texture that sets this apart from ordinary fried chicken.
Remove the chicken from the buttermilk, letting excess drip off, then dredge each piece thoroughly in the flour mixture. Press firmly to ensure the coating adheres completely. The pieces should look evenly dusted with no wet spots showing.
Step 3: Fry to Golden Perfection
Heat 1 cup Vegetable Oil in a large, heavy-bottomed skillet over medium-high heat until it reaches 350°F. Use a deep-fry thermometer for accuracy—this temperature ensures the exterior crisps quickly without overcooking the interior.
Working in batches to avoid crowding, fry the chicken for 4-5 minutes per side until deep golden brown and the internal temperature reaches 165°F. The coating should be rigid and audibly crisp when tapped. Transfer to a wire rack to drain, not paper towels, to maintain crispness.
Step 4: Glaze and Assemble
Warm 1.5 cups BBQ Sauce in a small saucepan over low heat for 2-3 minutes until slightly thinned. Brush the hot sauce generously over the fried chicken pieces while they’re still warm—this helps the glaze cling to every nook of the crispy coating.
Toast the 4 whole Hamburger Buns until lightly golden. Place one piece of glazed chicken on the bottom half of each bun, then top with ½ cup Coleslaw and 2 slices Dill Pickles per sandwich. Cap with the top bun and serve immediately while the chicken is still crisp.
Pro Tips For Making Bbq Chicken Sandwich Recipe Crispy
- Double Dredge: Dip the buttermilk-soaked thighs in flour first, then back in buttermilk, and finally into a cornstarch-heavy flour mix—this double coating creates that shatteringly crisp crust that holds up to saucy BBQ.
- Oil Temp Check: Use a thermometer to keep your oil at 350°F—any lower and the chicken absorbs grease instead of crisping, any higher and the outside burns before the inside cooks through.
- Pat Dry First: After the buttermilk soak, pat the chicken dry with paper towels before dredging—excess moisture steams the coating and ruins the crunch.
- Rest Before Saucing: Let the fried chicken rest 5 minutes on a rack before tossing in BBQ sauce—this keeps the coating crisp instead of soggy from the moisture.
Dietary Considerations for This Dish
Gluten-Free Option
Swap the all-purpose flour for a 1:1 gluten-free baking blend like King Arthur Measure for Measure. Add ½ tsp xanthan gum to help the coating adhere better during frying. The cornstarch already in the recipe will still deliver that shatteringly crisp texture.
Dairy-Free Adaptation
Replace the buttermilk with a mixture of 2 cups unsweetened almond milk and 2 tbsp lemon juice. Let it sit for 10 minutes to thicken slightly before marinating. The acidity mimics buttermilk’s tenderizing effect, and the chicken will still get beautifully crisp.
Use dairy-free buns like Canyon Bakehouse and check that your BBQ sauce is free of dairy derivatives. 💪
Lower-Carb Version
For a lighter option, skip the flour coating and instead use crushed pork rinds mixed with 1 tsp smoked paprika and ½ tsp garlic powder. Press the chicken into the mixture before frying. This creates a crispy, low-carb crust.
Serve the chicken on lettuce wraps or low-carb tortillas instead of buns to further reduce carbs.
Nut-Free Considerations
Ensure your BBQ sauce is nut-free—some brands use almond flour as a thickener. I recommend Sweet Baby Ray’s Original for a safe, nut-free option. Also, verify that your oil hasn’t been processed in a facility with nuts.
Egg-Free Note
The buttermilk marinade and flour coating in this recipe are naturally egg-free. However, some BBQ sauces contain egg derivatives, so always check labels. For extra binding in the coating, add 1 tbsp cornstarch slurry to the buttermilk before marinating. ✨
Nutrition Facts
Frequently Asked Questions
How do I keep the chicken crispy after cooking?
Place fried chicken on a wire rack, not paper towels, to maintain crispiness. Keep warm in a 200°F oven for up to 30 minutes. Assemble sandwiches just before serving to prevent sogginess from the sauce.
Can I bake the chicken instead of frying?
Yes, bake at 400°F on a wire rack for 20-25 minutes, flipping halfway. For extra crunch, spray with oil and broil 2-3 minutes at the end. The texture won’t be identical, but still delicious.
What if my coating isn’t sticking?
Pat chicken very dry before marinating. Let excess buttermilk drip off before dredging, and press the flour mixture firmly onto the meat. Adding 1 tbsp cornstarch to the buttermilk can also help.
Can I use chicken breasts instead of thighs?
Yes, but they dry out faster. Brine breasts in saltwater for 1 hour first, and reduce frying time to 3-4 minutes per side. Thighs are recommended for juicier results.

- 6 Egg Cake Recipe with Oil: Light as Air With Buttery Moisture - October 4, 2026
- 4 Bean Casserole Recipe: One-Pan Heartiness With Smoky Paprika Depth - October 4, 2026
- 3-Ingredient Keto Mug Cake Recipe: Microwave Magic in 2 Minutes - October 4, 2026