
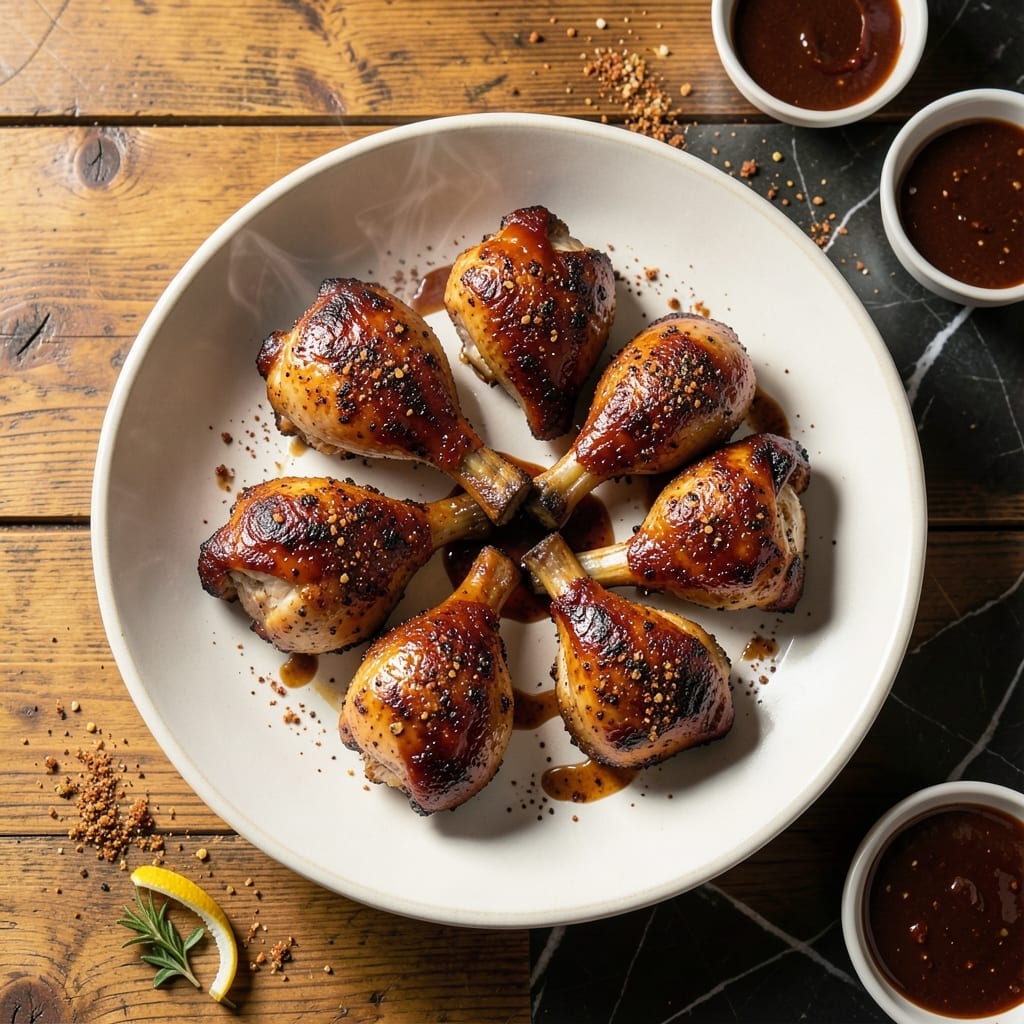
Achieving restaurant-quality barbecue chicken without a grill is absolutely possible in your oven. This method delivers smoky-sweet flavor and crispy edges that rival any outdoor cookout.
The secret lies in a high-heat roast that caramelizes the sauce while keeping the meat juicy. Bone-in, skin-on thighs stay tender as they cook, and a simple dry rub creates a flavorful base before the sauce goes on.
What emerges is chicken with sticky, caramelized barbecue coating and skin that crackles with each bite. The oven does all the work—no flipping, no flare-ups, just consistent heat that builds layers of flavor.
Serve these with classic sides for a complete meal that tastes like it came off the smoker.
Ingredients for Bbq Chicken Thighs Recipe Oven
Bone-in, skin-on thighs plus a bold dry rub and sticky sauce deliver that smoky-sweet crisp.
| Ingredient | Amount | Notes |
|---|---|---|
| Bone-In, Skin-On Chicken Thighs 🍗 | 2 ½ lb | About 8 thighs, patted dry |
| Smoked Paprika 🌶️ | 1 tbsp | For dry rub depth |
| Brown Sugar 🍚 | 2 tbsp | Light or dark works |
| Garlic Powder 🧄 | 1 tsp | Not garlic salt |
| Onion Powder 🧅 | 1 tsp | Balances the rub |
| Kosher Salt 🧂 | 1 tsp | Diamond Crystal preferred |
| Black Pepper 🌶️ | ½ tsp | Freshly ground for best flavor |
| Cayenne Pepper 🔥 | ¼ tsp | Adjust for heat preference |
| Barbecue Sauce 🍯 | 1 ½ cups | Quality store-bought or homemade |
| Olive Oil 🫒 | 1 tbsp | For coating thighs |
| Apple Cider Vinegar 🍏 | 1 tbsp | Brightens the sauce |
| Worcestershire Sauce 💧 | 1 tsp | Adds umami depth |
The chicken thighs are non-negotiable here. Bone-in, skin-on ensures juicy meat and that coveted crispy skin. Look for thighs with vibrant color and minimal bruising at your butcher counter or Whole Foods. The dry rub spices should be fresh—if your paprika smells like dust, it’s time to restock. Penzeys offers exceptional quality for spices if you’re willing to invest in the flavor foundation.
No smoked paprika? Regular paprika plus a pinch of liquid smoke can substitute in a pinch. Brown sugar can be swapped for honey or maple syrup at a 1:1 ratio, though the flavor profile will shift slightly. For the barbecue sauce, Stubb’s or Sweet Baby Ray’s are reliable store-bought options. If using homemade, ensure it’s thick enough to cling to the chicken without dripping excessively.
The dry rub keeps in an airtight container for up to 3 months. Chicken thighs can be marinated in the rub overnight for deeper flavor. Once cooked, the dish holds well in the fridge for 4-5 days—reheat in the oven to maintain that crispy skin.
Why You’ll Love This Recipe
- One Pan Magic: I toss the thighs with spices and let the oven do the work—no flipping, no fuss.
- Smoky Sweet Perfection: That brown sugar and smoked paprika rub caramelizes into a sticky, finger-licking glaze.
- Feeds My Crew: Bone-in thighs stay juicy for days, so I double the batch for easy lunches.
- Budget Winner: Cheaper than breasts, and honestly, way more flavor for my grocery buck.
Step-by-Step Instructions for BBQ Chicken Thighs Oven
This method delivers perfectly caramelized, fall-off-the-bone chicken with minimal effort.
Step 1: Create the Dry Rub and Coat the Chicken
In a small bowl, combine the 1 tbsp Smoked Paprika, 2 tbsp Brown Sugar, 1 tsp Garlic Powder, 1 tsp Onion Powder, 1 tsp Kosher Salt, 0.5 tsp Black Pepper, and 0.25 tsp Cayenne Pepper. Stir until evenly distributed and the mixture resembles fine sand.
Pat the 2.5 lb Bone-In, Skin-On Chicken Thighs completely dry with paper towels. This removes moisture that would prevent the skin from crisping. Drizzle the 1 tbsp Olive Oil over the chicken and rub it evenly across all pieces. Then coat each thigh liberally with the dry rub, pressing gently to adhere. Let rest for 10 minutes while the oven preheats.
Step 2: Preheat and Prepare for Roasting
Position the oven rack in the center and preheat to 400°F. Line a large rimmed baking sheet with parchment paper or foil for easy cleanup. The high heat will render the fat from the skin, creating that coveted crispy texture without requiring a grill.
Arrange the chicken thighs skin-side up on the prepared baking sheet, spacing them at least 1 inch apart to allow for even air circulation. This spacing prevents steaming, which would result in soggy rather than crispy skin. The thighs should sizzle when they hit the hot pan.
Step 3: Roast Until Golden and Crisp
Roast the chicken for 25 minutes at 400°F. At this point, the skin should start to turn golden brown and the fat should be rendering visibly. Carefully flip each thigh skin-side down and return to the oven for another 10 minutes to crisp the skin thoroughly.
Flip the thighs skin-side up again and roast for a final 5-10 minutes until the internal temperature reaches 175°F and the skin is deep mahogany brown and crisp to the touch. The juices should run clear when pierced with a knife.
Step 4: Glaze with Barbecue Sauce
In a small bowl, whisk together the 1.5 cups Barbecue Sauce, 1 tbsp Apple Cider Vinegar, and 1 tsp Worcestershire Sauce until smooth. The vinegar and Worcestershire add brightness and depth that elevate store-bought sauce to restaurant quality.
Brush a generous layer of the sauce mixture over each chicken thigh, coating all surfaces. Return the chicken to the oven and broil on high for 2-3 minutes, watching closely to prevent burning. The sauce should bubble and caramelize slightly, creating a glossy, sticky glaze.
Step 5: Rest and Serve
Remove the chicken from the oven and transfer to a serving platter. Let rest for 5 minutes before serving. This brief rest allows the juices to redistribute, ensuring each bite is moist and flavorful rather than dry.
Serve the thighs with any remaining barbecue sauce on the side. The skin should be crisp enough to resist a gentle press, while the meat should pull away from the bone with minimal effort. The glaze will have formed a slightly charred, finger-licking crust that defines perfect oven barbecue chicken.
Pro Tips For Making Bbq Chicken Thighs Recipe Oven
- Preheat the Pan: Start your oven at 425°F and preheat your baking sheet or cast iron—this ensures the skin on your bone-in thighs gets crispy right away instead of steaming.
- Pat Thighs Dry: Blot the chicken thighs with paper towels before seasoning; I learned this the hard way after my first few batches turned out soggy instead of sticky and caramelized.
- Skip the Overcrowding: Leave at least an inch between each thigh on the pan, or they’ll steam rather than roast—your future self will thank you when the skin stays crisp.
- Broil at the End: After 30 minutes at 425°F, switch to broil for 2-3 minutes to get that brown sugar and smoked paprika glaze bubbling and slightly charred.
Dietary Considerations for bbq chicken thighs recipe oven
Gluten-Free Friendly
This recipe is naturally gluten-free as written, provided you use a gluten-free barbecue sauce. Many store-bought sauces contain hidden gluten, so I always check labels carefully. Stubb’s offers a certified gluten-free version that works perfectly here. 💪
Lower Sugar Option
To reduce sugar, swap the 2 tbsp brown sugar in the dry rub for 1 tbsp coconut sugar or 1 tsp monk fruit sweetener. Also, choose a low-sugar BBQ sauce—G Hughes makes excellent sugar-free varieties with great flavor.
Dairy-Free and Nut-Free
This dish contains no dairy or nuts in its base recipe. Just verify your barbecue sauce is free from these allergens. Most major brands like Sweet Baby Ray’s are safe, but I always recommend double-checking the ingredients list.
Keto Adaptations
For a keto-friendly version, replace the brown sugar with 1 tbsp erythritol and use a sugar-free BBQ sauce. The 2.5 lb chicken thighs are naturally keto-approved. Each serving will have about 5g net carbs with these swaps. ✨
Sodium Considerations
To reduce sodium, use low-sodium Worcestershire sauce and cut the kosher salt in half. Many BBQ sauces are high in sodium, so I often make my own with no-salt-added tomato paste as the base.
Protein-Packed
Each serving provides about 40g of protein from the chicken alone. The bone-in, skin-on thighs stay juicier during cooking, making this a great high-protein option for active lifestyles. I love serving this after workout days.
Nutrition Facts
Frequently Asked Questions
Can I use boneless thighs instead?
Yes, but bone-in thighs stay juicier during oven cooking. Boneless may dry out faster, so reduce cooking time by 5-10 minutes and watch closely.
Why does the recipe call for such a high oven temperature?
The 400°F heat renders fat from the skin quickly, creating crispiness without drying the meat. Lower temps would steam rather than crisp the skin.
How do I prevent the sauce from burning under the broiler?
Keep the rack in the center position and watch constantly during the 2-3 minutes of broiling. Remove immediately if the sauce darkens too quickly.
What if my thighs aren’t crispy enough?
Pat the skin extra dry before seasoning and ensure proper spacing on the pan. For extra crisp, broil for an additional 1-2 minutes after saucing.

- 6 Egg Cake Recipe with Oil: Light as Air With Buttery Moisture - October 4, 2026
- 4 Bean Casserole Recipe: One-Pan Heartiness With Smoky Paprika Depth - October 4, 2026
- 3-Ingredient Keto Mug Cake Recipe: Microwave Magic in 2 Minutes - October 4, 2026