
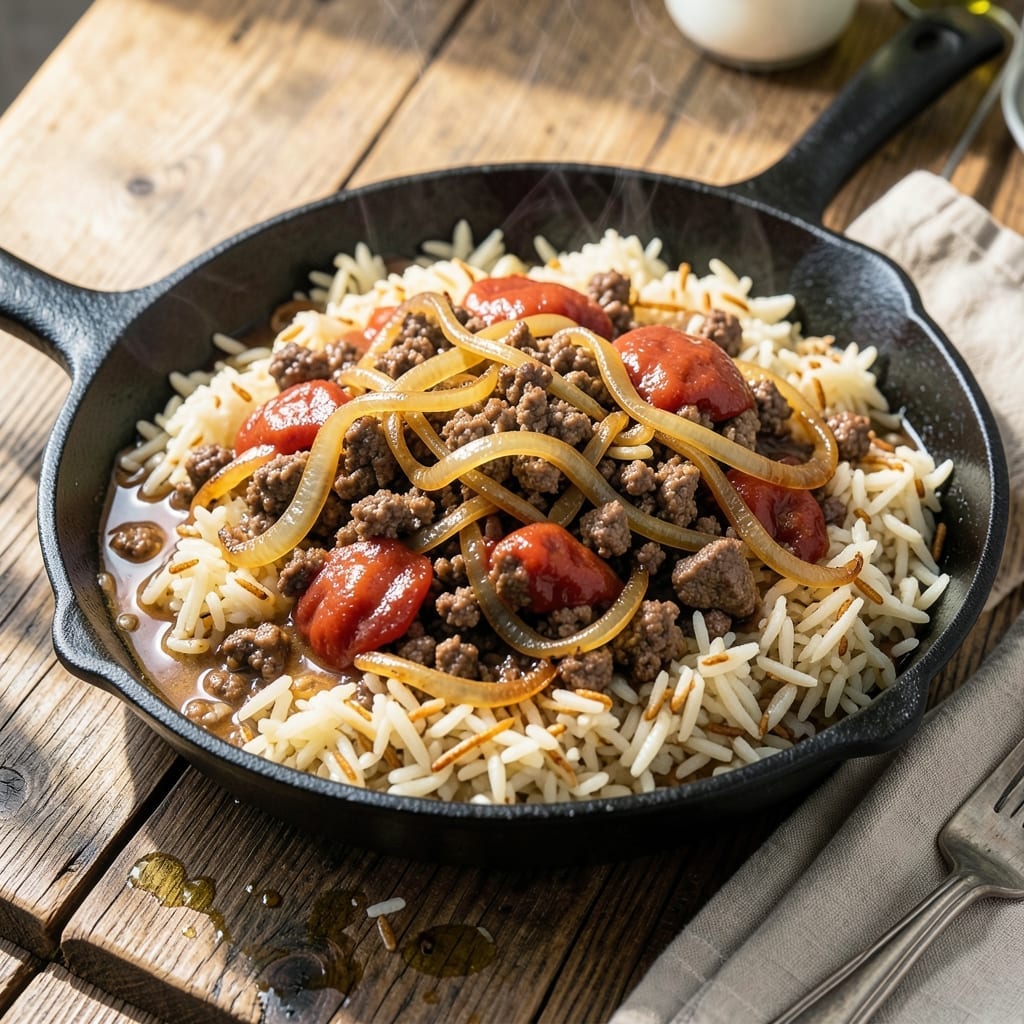
This homestyle skillet dish brings the comforting flavors of beef and savory rice together in one one-pan meal. I’ve refined this method to ensure every grain of rice absorbs the rich, beefy essence without turning mushy.
The key lies in browning the ground beef first to develop deep, savory layers before introducing the rice and seasonings. A careful balance of broth and timing guarantees perfectly tender rice with no sticky residue.
What emerges is a hearty, flavor-packed dish that’s as satisfying as it is simple. The rice soaks up every bit of the beef’s richness, creating a cohesive, comforting bite.
Ideal for busy weeknights, this skillet meal comes together quickly and leaves minimal cleanup. Here’s how to make it.
Ingredients for Beef Rice a Roni
Simple pantry staples and fresh aromatics create this hearty one-pan meal with bold flavor.
| Ingredient | Amount | Notes |
|---|---|---|
| Ground Beef 🥩 | 1 lb | 80/20 blend for flavor |
| Long-Grain White Rice 🍚 | 1 ½ cups | Uncooked, not instant |
| Beef Broth 🥣 | 2 ½ cups | Low-sodium preferred |
| Onion 🧅 | 1 whole | Medium, finely diced |
| Garlic Cloves 🧄 | 3 cloves | Minced for depth |
| Tomato Paste 🍅 | 2 tbsp | For umami richness |
| Worcestershire Sauce 🫒 | 1 tbsp | Adds savory complexity |
| Dried Thyme 🌿 | 1 tsp | Crushed between fingers |
| Dried Oregano 🍃 | 1 tsp | Mediterranean variety |
| Salt 🧂 | 1 tsp | Kosher or sea salt |
| Black Pepper 🌶️ | ½ tsp | Freshly ground preferred |
| Olive Oil 🫒 | 1 tbsp | For browning beef |
| Butter 🧈 | 1 tbsp | Optional for richness |
The ground beef is the foundation here. 80/20 blend gives you the right fat for browning and flavor development—leaner cuts can dry out. Most supermarkets carry it pre-ground, but ask the butcher for freshly ground if you want the best texture. Look for bright red color with good marbling. The rice should be long-grain white for the classic texture that holds up to the broth without turning mushy.
No beef broth on hand? Chicken broth with a splash of soy sauce works in a pinch. Fresh out of tomato paste? Ketchup at half the amount adds similar depth (just reduce other liquids slightly). The Worcestershire can be swapped for more soy sauce if needed. Dried herbs are fine—just make sure they’re not past their prime (rub between fingers to release oils).
Leftovers keep well, actually improving as flavors meld. Store in an airtight container for up to 4 days in the fridge or freeze for 3 months. Reheat gently with a splash of broth to restore moisture.
Why You’ll Love This Recipe
- One Pot Meal: I love that everything—ground beef, rice, broth—cooks together in one pan, so cleanup is a breeze.
- Rich Beefy Depth: The beef broth and garlic infuse every bite with that deep, savory flavor I crave.
- Weeknight Hero: Honestly, it’s my go-to for busy evenings when I need dinner on the table fast.
- Stretches Far: One batch feeds my family for two nights, and the leftovers taste even better the next day.
Step-by-Step Instructions for Beef Rice-A-Roni
This method delivers perfectly seasoned beef and fluffy rice with minimal effort.
Step 1: Brown the Ground Beef and Aromatics
Heat the 1 tbsp olive oil in a large skillet over medium-high heat. Add the 1 lb ground beef and cook for 5-6 minutes, breaking it into small pieces with a wooden spoon, until browned and cooked through.
Add the finely diced onion and cook for 3-4 minutes until soft and translucent. Stir in the 3 cloves minced garlic cloves and cook for 30 seconds until fragrant. This builds the flavor foundation for your dish.
Step 2: Toast the Rice with Tomato Paste
Add the 1.5 cups long-grain white rice to the skillet and stir to coat it in the beef fat. Cook for 2-3 minutes until the rice is lightly toasted and begins to smell nutty. This step enhances the rice’s natural flavor and prevents it from becoming mushy.
Stir in the 2 tbsp tomato paste, 1 tsp dried thyme, 1 tsp dried oregano, 1 tsp salt, and 0.5 tsp black pepper. Cook for 1 minute to allow the spices to bloom and deepen in flavor.
Step 3: Deglaze and Add Broth
Pour in the 1 tbsp Worcestershire sauce and scrape up any browned bits from the bottom of the skillet. This deglazing step adds rich, savory depth to the dish. Let it simmer for 30 seconds to incorporate.
Add the 2.5 cups beef broth and 1 tbsp butter, then stir to combine. Bring the mixture to a boil.
Step 4: Simmer Until Rice Is Tender
Once boiling, reduce the heat to low, cover the skillet, and let it simmer for 18-20 minutes. Resist the urge to stir during this time—disturbing the rice can make it gummy.
After 18 minutes, check the rice. It should be tender and the liquid mostly absorbed. If it’s still firm, cover and cook for an additional 2-3 minutes.
Step 5: Rest and Serve
Remove the skillet from heat and let it sit covered for 5 minutes. This resting period allows the rice to absorb any remaining liquid and steam to perfection.
Fluff the rice with a fork and serve warm. The beef should be fully cooked, the rice light and fluffy, and every bite rich with savory flavor.
Pro Tips For Making Beef Rice A Roni
- Brown the Beef Well: Cook the ground beef until deeply browned, not just gray—this builds flavor. I learned this the hard way when my first few batches tasted bland.
- Toast the Rice First: Sauté the rice in the beef fat for 2 minutes before adding liquid. Sounds weird, but it works: it adds a nutty depth to the dish.
- Use Hot Broth: Pour in preheated beef broth instead of cold. After burning three batches, I finally figured out that cold liquid slows the cooking and muddles the texture.
- Skip the Salt Early: Wait until the rice is nearly done to adjust seasoning—beef broth can be salty enough on its own. My grandmother swore by this, and she was right.
Storing and Reheating This Dish
Refrigerator Storage
Let your dish cool for no more than 2 hours before transferring to an airtight container. I use glass containers with locking lids to prevent leaks. Store in the fridge at 40°F or below for up to 4 days. The flavors actually deepen overnight. ❄️
Freezer Storage
This meal freezes beautifully for up to 3 months without texture loss. Portion into quart-size freezer bags, squeeze out excess air, and lay flat to save space. Label with the date—I always forget when I froze things otherwise.
Stovetop Reheating
Add your portion to a skillet with 2 tbsp beef broth or water. Heat over medium-low for 8-10 minutes, stirring occasionally. This method restores moisture better than the microwave. I often add a pat of butter at the end for richness.
Microwave Method
Place in a microwave-safe dish, sprinkle with 1 tbsp water, and cover loosely. Heat on 70% power for 2-3 minutes, stir, then continue in 30-second bursts until reaching 165°F. 🔥
Reviving Leftovers
If the rice seems dry after storage, add 1-2 tbsp broth per cup of leftovers when reheating. For extra flavor, sprinkle with grated Parmesan or fresh parsley before serving. The dish tastes almost as good as fresh!
Nutrition Facts
Frequently Asked Questions
Can I use ground turkey instead of beef?
Yes, ground turkey works well as a leaner alternative. Use the same 1 lb amount and follow the recipe as written. The flavor will be milder, so consider adding an extra 1/2 tsp of garlic powder.
What if my rice is still crunchy after simmering?
Add 1/2 cup more beef broth, cover, and cook for another 5-7 minutes on low heat. Avoid lifting the lid during this time to trap steam.
Can I make this in a rice cooker?
Brown the beef and aromatics in a skillet first, then transfer everything to your rice cooker. Use the standard rice setting and let it rest for 5 minutes after cooking.

- 6 Egg Cake Recipe with Oil: Light as Air With Buttery Moisture - October 4, 2026
- 4 Bean Casserole Recipe: One-Pan Heartiness With Smoky Paprika Depth - October 4, 2026
- 3-Ingredient Keto Mug Cake Recipe: Microwave Magic in 2 Minutes - October 4, 2026