
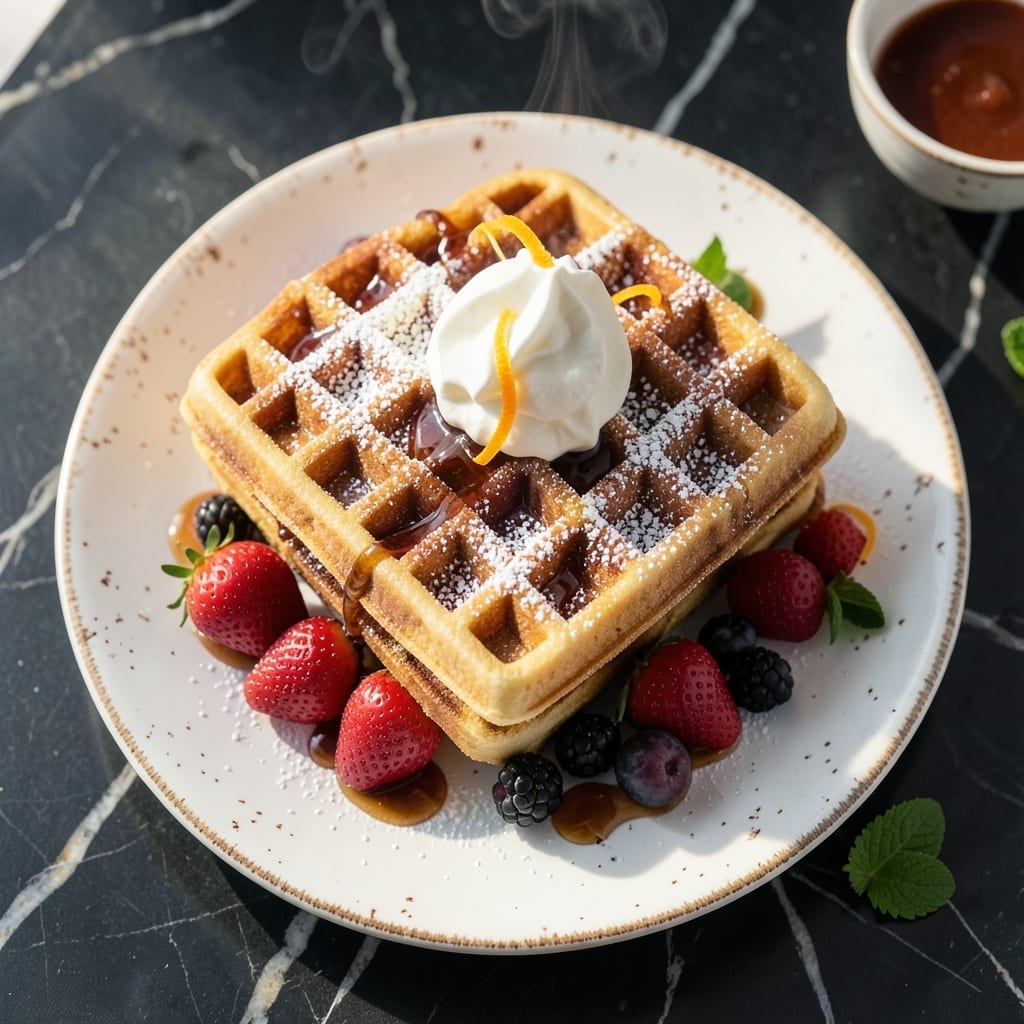
There’s a science to achieving perfect Belgian waffles with deep pockets and crispy edges. This recipe delivers the ideal balance of light, airy interiors and golden, shatteringly crispy exteriors that define authentic Belgian style.
The secret lies in the combination of yeast and baking powder for lift, plus cornstarch for that signature crispy texture. Emeril’s approach ensures each waffle emerges from the iron with those coveted deep pockets ready to hold syrup and toppings.
What sets this version apart is the attention to detail – from properly separating eggs to achieving the right batter consistency. The result is waffles that are tall, airy, and uniformly crispy from edge to edge.
Serve warm with your favorite toppings for a breakfast that’s sure to impress. The method is straightforward but yields professional-quality results every time.
Ingredients for Belgian Waffle Recipe Emeril
Quality ingredients create those tall, airy waffles with shatteringly crispy edges every time.
| Ingredient | Amount | Notes |
|---|---|---|
| All-Purpose Flour 🌾 | 2 cups | Sifted for aeration |
| Cornstarch 🌽 | ¼ cup | For signature crispy texture |
| Granulated Sugar 🍚 | ¼ cup | Fine grain for even distribution |
| Active Dry Yeast 🍞 | 1 package | 2 1/4 tsp per package |
| Baking Powder 🧂 | 2 tsp | Provides additional lift |
| Salt 🧂 | ½ tsp | Fine sea salt preferred |
| Large Eggs 🥚 | 4 whole | Separated, room temperature |
| Whole Milk 🥛 | 1 ¾ cups | Warm to 110°F |
| Unsalted Butter 🧈 | ½ cup | Melted and cooled |
| Vanilla Extract 🌿 | 2 tsp | Pure extract recommended |
| Vegetable Oil 🫒 | 2 tbsp | For greasing waffle iron |
The yeast is non-negotiable for authentic lift—Fleischmann’s Active Dry Yeast is reliable and widely available at any supermarket. Cornstarch is the secret weapon for that signature crispness; Argo or Clabber Girl are consistent brands. For the flour, King Arthur all-purpose is ideal (higher protein content supports structure). Always check your yeast expiration date—old yeast won’t activate properly, and that’s the foundation of this recipe’s airy texture.
No buttermilk? Whole milk with 1 tbsp lemon juice works as a substitute. Need to skip eggs? This isn’t a vegan recipe, but in a pinch, flax eggs won’t give the same structure. The butter must be unsalted to control sodium levels precisely. For a richer flavor, European-style butter (like Plugrá) adds depth, though it’s not traditional for Belgian waffles.
Batter can rest overnight in the fridge—actually improves flavor. Cooked waffles keep 2-3 days in an airtight container but are best served immediately. Freeze extras for up to 1 month; reheat in toaster for near-fresh crispness. Always preheat your waffle iron thoroughly for even cooking.
Why You’ll Love This Recipe
- No-Fuss Mixing: I just dump the flour, cornstarch, sugar, yeast, and baking powder in one bowl—no fancy steps, no stress.
- Crispy Yet Light: That cornstarch trick gives them a crisp exterior with a fluffy inside. Honestly, it’s the texture I crave every weekend.
- Breakfast or Dessert: I serve these with syrup for breakfast or dust them with powdered sugar for a late-night treat.
- Makes Extras Easy: Leftovers freeze beautifully. I pop one in the toaster and it’s as good as fresh.
Step-by-Step Instructions for Belgian Waffles
Achieve deep pockets and perfect crispness with this proven technique every cook should master.
Step 1: Activate Yeast and Combine Dry Ingredients
Warm the whole milk to exactly 110°F—this is the ideal temperature for activating yeast without killing it. I use an instant-read thermometer for precision. In a small bowl, sprinkle the 1 package active dry yeast over the warm milk and let it sit for 5-7 minutes until foamy and bubbly.
Meanwhile, in a large mixing bowl, whisk together the 2 cups all-purpose flour, 0.25 cup cornstarch, 0.25 cup granulated sugar, 2 tsp baking powder, and 0.5 tsp salt. The cornstarch is the secret to that signature crisp texture, while the baking powder ensures your waffles rise properly in the iron.
Step 2: Create the Batter with Proper Technique
In a separate bowl, whisk the 4 whole large eggs until well combined, then add the 0.5 cup unsalted butter (melted and cooled) and 2 tsp vanilla extract. Pour this mixture into the dry ingredients along with the yeast-milk mixture. Stir just until combined—it’s okay if there are a few lumps.
Overmixing develops gluten, which makes waffles tough rather than tender. The batter should be smooth but not perfectly uniform. Let it rest for 5 minutes to allow the flour to hydrate and the yeast to begin working. This brief rest makes a noticeable difference in texture.
Step 3: Preheat and Prepare the Waffle Iron
Preheat your waffle iron to the highest setting—this ensures the exterior crisps quickly while the interior cooks through. For Belgian waffles, you want a hot iron to create that deep golden crust. Brush the iron with vegetable oil using a pastry brush, making sure to coat all the grooves thoroughly.
This prevents sticking and helps achieve that perfect release with deep pockets. Even non-stick irons benefit from a light coating of oil. Don’t skip this step—it’s the difference between waffles that fall apart and ones that come out clean and beautiful.
Step 4: Cook to Crispy Perfection
Pour about 1 cup of batter onto the preheated waffle iron, spreading it slightly to cover about 80% of the surface. The batter will expand as it cooks. Close the lid and cook for 4-5 minutes until deep golden brown and crisp.
Resist the temptation to open the iron before 4 minutes—the steam needs time to work its magic. You’ll know it’s ready when the steam stops escaping and the waffle releases easily from the iron. The exterior should be crisp enough to support the weight of toppings without getting soggy.
Step 5: Serve Immediately for Maximum Crispness
Transfer the cooked waffle to a wire rack set in a 200°F oven while you cook the remaining batter. This keeps them warm without losing crispness. Never stack waffles directly on a plate—the steam will make them soggy.
Serve immediately with your favorite toppings. The waffles should have deep pockets perfect for holding syrup or fruit, with a crisp exterior giving way to a light, airy interior. This technique ensures every bite delivers that ideal contrast of textures that makes Belgian waffles special.
Pro Tips For Making Belgian Waffle Recipe Emeril
- Proof the Yeast: I learned this the hard way—always bloom your active dry yeast in warm water with a pinch of sugar first. If it doesn’t foam within 5 minutes, your waffles won’t rise properly.
- Whisk the Dry Mix: Sift the all-purpose flour, cornstarch, and baking powder together twice to break up lumps. Sounds tedious, but it guarantees a lighter, airier batter.
- Skip Cold Ingredients: Resist the urge to use cold eggs or milk straight from the fridge. Room-temperature liquids mix smoother and help the yeast work faster.
- Rest the Batter: After mixing, let the batter sit for 10-15 minutes before cooking. My grandmother swore by this, and it makes the waffles crispier on the outside, fluffier inside.
Storing and Reheating belgian waffle recipe emeril
Room Temperature Cooling
Let waffles cool completely on a wire rack before storing—this prevents condensation that would make them soggy. I spread them in a single layer and wait about 30 minutes. The wire rack allows air circulation on all sides, maintaining that crispy texture we worked so hard to achieve.
Fridge Storage
Store cooled waffles in an airtight container with parchment between layers. They’ll keep in the fridge for 2-3 days without losing too much crispness. I use Glasslock containers because they seal tightly and are easy to clean.
Freezer Method
For longer storage, freeze waffles in a single layer first, then transfer to a freezer bag. They’ll stay fresh for up to 1 month. I label mine with the date using freezer-safe labels to track freshness. ❄️
Toaster Reheating
Pop frozen waffles directly in the toaster on medium-high for 2-3 minutes. This restores crispness better than a microwave. For fridge-stored waffles, 1-2 minutes in the toaster works perfectly.
Watch closely—they can go from crispy to burnt quickly.
Oven Method
Preheat oven to 375°F and warm waffles on a baking sheet for 5-8 minutes. This method works best for larger batches. I use a wire rack on the sheet to maintain air circulation.
Pro Tip
Never microwave these—they’ll lose all crispness and become chewy. Trust me, the toaster or oven methods are worth the extra 2 minutes. 💡
Nutrition Facts
Frequently Asked Questions
Can I make the batter the night before?
Yes! The batter can rest overnight in the fridge, which actually enhances the flavor. Just give it a quick stir before using, as it may separate slightly.
Why do my waffles stick to the iron?
This usually means the iron wasn’t hot enough or properly greased. Always preheat thoroughly and brush with vegetable oil before adding batter. Even non-stick irons benefit from a light coating.
Can I use a regular waffle maker?
You can, but the results won’t be the same. Belgian waffle irons have deeper grids to create those signature pockets. A standard iron will make thinner waffles with shallower pockets.
How do I know when they’re done?
They’re ready when steam stops escaping and the waffle releases easily. Look for a deep golden brown color and crisp exterior. This usually takes 4-5 minutes in a properly heated iron.

- 6 Egg Cake Recipe with Oil: Light as Air With Buttery Moisture - October 4, 2026
- 4 Bean Casserole Recipe: One-Pan Heartiness With Smoky Paprika Depth - October 4, 2026
- 3-Ingredient Keto Mug Cake Recipe: Microwave Magic in 2 Minutes - October 4, 2026