
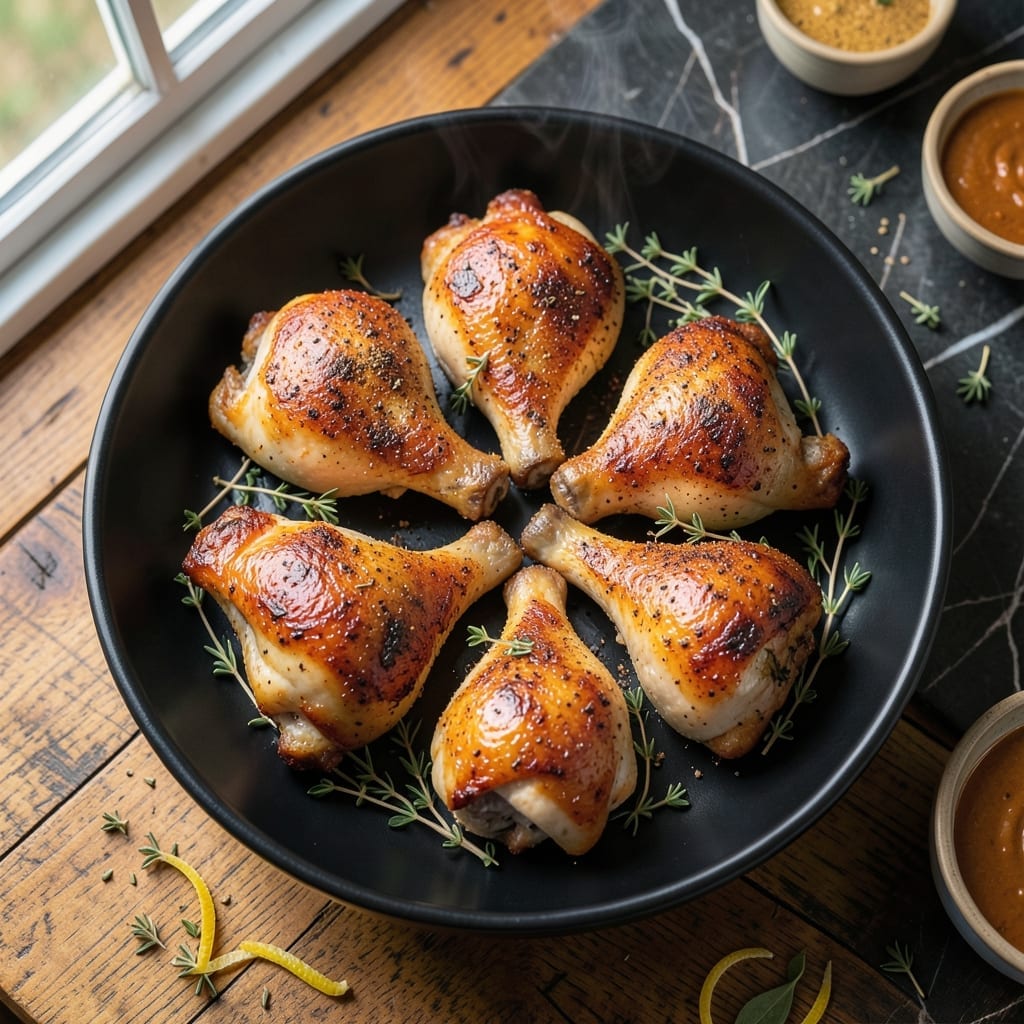
This baked chicken leg recipe delivers the best results with minimal effort and maximum flavor. The secret lies in high heat and a simple dry brine that ensures every bite is packed with taste.
By baking at 425°F, you achieve perfectly crispy skin while keeping the meat inside tender and juicy. A quick rest before serving allows the juices to redistribute for optimal succulence.
What makes this method foolproof is its simplicity—just season, bake, and enjoy. The skin crispens beautifully in the hot oven, creating that satisfying crunch with every bite.
Pair with roasted vegetables or mashed potatoes for a complete meal. This technique guarantees crispy skin and succulent meat every time.
Ingredients for Best Baked Chicken Leg
Eleven ingredients for the juiciest, crispiest chicken legs you have ever tasted.
| Ingredient | Amount | Notes |
|---|---|---|
| Chicken Legs 🍗 | 8 pieces | Drumsticks and thighs attached |
| Diamond Crystal Kosher Salt 🧂 | 2 tbsp | For dry brine, divided |
| Freshly Ground Black Pepper 🌶️ | 1 tbsp | Coarsely ground preferred |
| Garlic Powder 🧄 | 2 tsp | Not garlic salt |
| Onion Powder 🧅 | 2 tsp | Freshly ground preferred |
| Smoked Paprika 🌶️ | 1 tbsp | Sweet or hot variety |
| Dried Thyme 🌿 | 1 tsp | Crushed between fingers |
| Dried Rosemary 🌿 | 1 tsp | Crushed between fingers |
| Baking Powder 🧂 | 1 tsp | For extra crispiness |
| Olive Oil 🫒 | 2 tbsp | Extra-virgin for richness |
| Lemon 🍋 | 1 whole | Zested and juiced |
The chicken legs are the foundation—look for plump, skin-on pieces with good color (not gray or pale). Whole Foods or Costco have reliably high-quality options. Avoid pre-brined or enhanced legs, as they’ll throw off your seasoning. The dry brine (salt applied in advance) is critical here, so don’t skip the Diamond Crystal kosher salt—its coarse texture adheres better than fine table salt.
No smoked paprika? Regular paprika plus a pinch of cayenne gets you close. Fresh herbs can replace dried (use triple the amount), but the dried versions concentrate flavor better for this dry rub. Out of garlic powder? Granulated garlic at the same ratio works. The baking powder might seem odd, but it’s a pro tip for extra-crispy skin—just ensure it’s fresh and not expired.
Dry-brined chicken keeps in the fridge for 24-48 hours before cooking (or cook immediately). Leftovers stay fresh for 4 days refrigerated, though the skin loses crispness. Reheat in a 400°F oven for 10-15 minutes to revive the crunch.
Why You’ll Love This Recipe
- One Pan Magic: I toss the legs with salt, pepper, garlic and onion powder, then let the oven do the rest—no babysitting required.
- Crispy, Savory Bite: The Diamond Crystal salt pulls out just enough moisture for skin that crackles, while the spices sink deep into every bite.
- Weeknight Hero: Between us, this is my Tuesday lifesaver when I need dinner on the table fast without sacrificing flavor.
- Budget Stretcher: A pack of chicken legs costs pennies per serving, and leftovers (if there are any) reheat beautifully for lunch the next day.
Step-by-Step Instructions for Baked Chicken Legs
Achieve perfectly crispy skin and juicy meat with this professional technique.
Step 1: Dry Brine the Chicken Legs
Pat the 8 pieces Chicken Legs completely dry with paper towels. This removes excess moisture that would prevent crisping. In a small bowl, combine 2 tbsp Diamond Crystal Kosher Salt, 1 tbsp Freshly Ground Black Pepper, 2 tsp Garlic Powder, 2 tsp Onion Powder, 1 tbsp Smoked Paprika, 1 tsp Dried Thyme, 1 tsp Dried Rosemary, and 1 tsp Baking Powder.
Rub this seasoning mixture all over the chicken legs, including under the skin. The baking powder reacts with the skin to create extra crispiness. Place the legs on a wire rack set over a baking sheet and refrigerate uncovered for 12-24 hours to dry the skin thoroughly.
Step 2: Prepare for Baking
Remove the chicken from the refrigerator 1 hour before baking to bring it to room temperature. This ensures even cooking throughout. Preheat your oven to 425°F and position a rack in the center.
Drizzle the 2 tbsp Olive Oil over the chicken legs and rub to coat evenly. The oil helps the seasoning adhere and promotes browning. Zest the 1 whole Lemon over the chicken, then cut the lemon in half and reserve for later use.
Step 3: Bake to Crispy Perfection
Arrange the chicken legs on a baking sheet lined with parchment paper, leaving space between each piece for air circulation. Bake for 25 minutes at 425°F to start the crisping process.
After 25 minutes, flip the chicken legs and bake for an additional 20-25 minutes until the skin is deep golden brown and crispy. The internal temperature should reach 175°F when measured in the thickest part of the thigh. For extra crispiness, broil for 2-3 minutes at the end, watching closely to prevent burning.
Step 4: Rest and Finish
Transfer the baked chicken legs to a serving platter. Squeeze the reserved lemon halves over the chicken to add a bright, citrusy note that cuts through the richness. Tent loosely with foil and let rest for 5-10 minutes.
This resting period allows the juices to redistribute, ensuring the meat remains succulent when served. The skin will stay crispy as long as it’s not covered tightly. Serve immediately while hot for the best texture, with the crispy skin and tender meat in perfect harmony.
Pro Tips For Making Best Baked Chicken Leg
- Dry the Skin: Pat the chicken legs very dry with paper towels before seasoning—I learned this the hard way after my first few batches came out steamed instead of crispy.
- High Heat First: Start with the oven at 425°F for the first 20 minutes, then drop to 375°F to finish. This guarantees that golden crust without drying out the meat.
- Season Twice: Hit the legs with salt, pepper, garlic powder, and onion powder the night before, then again right before baking. Sounds like overkill, but it actually changes the outcome.
- Skip the Crowding: Give each leg at least an inch of space on the pan—resist the urge to cram them all in. After burning three batches, I finally figured out that steam is the enemy of crispy skin.
Flavor Customization for This Recipe
Spicy Kick
Add 1 tsp cayenne pepper to your dry rub for a noticeable heat boost. For serious spice lovers, mix in ½ tsp chipotle powder for smoky depth. I sometimes add 1 finely chopped jalapeño under the skin before baking.
Herb Variations
Swap the thyme and rosemary for 1 tbsp dried oregano and 1 tsp dried sage for a Mediterranean twist. Fresh herbs work too—use 1 tbsp chopped fresh parsley and 1 tsp fresh tarragon for a brighter profile. 🌿
Citrus Infusion
In addition to lemon zest, try adding 1 tsp orange zest to the seasoning mix. The citrus oils penetrate the meat beautifully. For extra tang, brush the legs with 2 tbsp lime juice before baking.
Sweet Heat
Balance the spice with 1 tbsp brown sugar in your dry rub. This creates a caramelized glaze on the skin. For a sticky finish, brush with 2 tbsp honey mixed with 1 tbsp sriracha during the last 10 minutes of baking.
Umami Boost
Add 1 tbsp grated Parmesan cheese to the seasoning mix for a salty depth. For extra richness, include 1 tsp mushroom powder in the dry rub. I find this works particularly well when serving with roasted vegetables.
Global Flavors
For a jerk-inspired version, add 1 tsp allspice and ½ tsp cinnamon to the seasoning. Or try a Middle Eastern twist with 1 tsp ground cumin and ½ tsp turmeric for golden color. 🔥
Nutrition Facts
Frequently Asked Questions
Why do you need to dry brine the chicken?
The dry brine draws out moisture, which helps create extra-crispy skin during baking. It also seasons the meat deeply for maximum flavor in every bite.
Can I skip the baking powder?
You can, but the baking powder reacts with the skin to create micro-bubbles that make it extra crispy. Without it, you’ll still get good results, just not as perfectly textured.
How do I know when it’s done?
Use a meat thermometer—the internal temperature should reach 175°F in the thickest part of the thigh. The skin should be deep golden brown and crisp to the touch.
What if my skin isn’t crispy?
Pat the chicken very dry before seasoning and ensure proper spacing on the baking sheet. For extra crisp, broil for 2-3 minutes at the end, watching closely.

- 6 Egg Cake Recipe with Oil: Light as Air With Buttery Moisture - October 4, 2026
- 4 Bean Casserole Recipe: One-Pan Heartiness With Smoky Paprika Depth - October 4, 2026
- 3-Ingredient Keto Mug Cake Recipe: Microwave Magic in 2 Minutes - October 4, 2026