
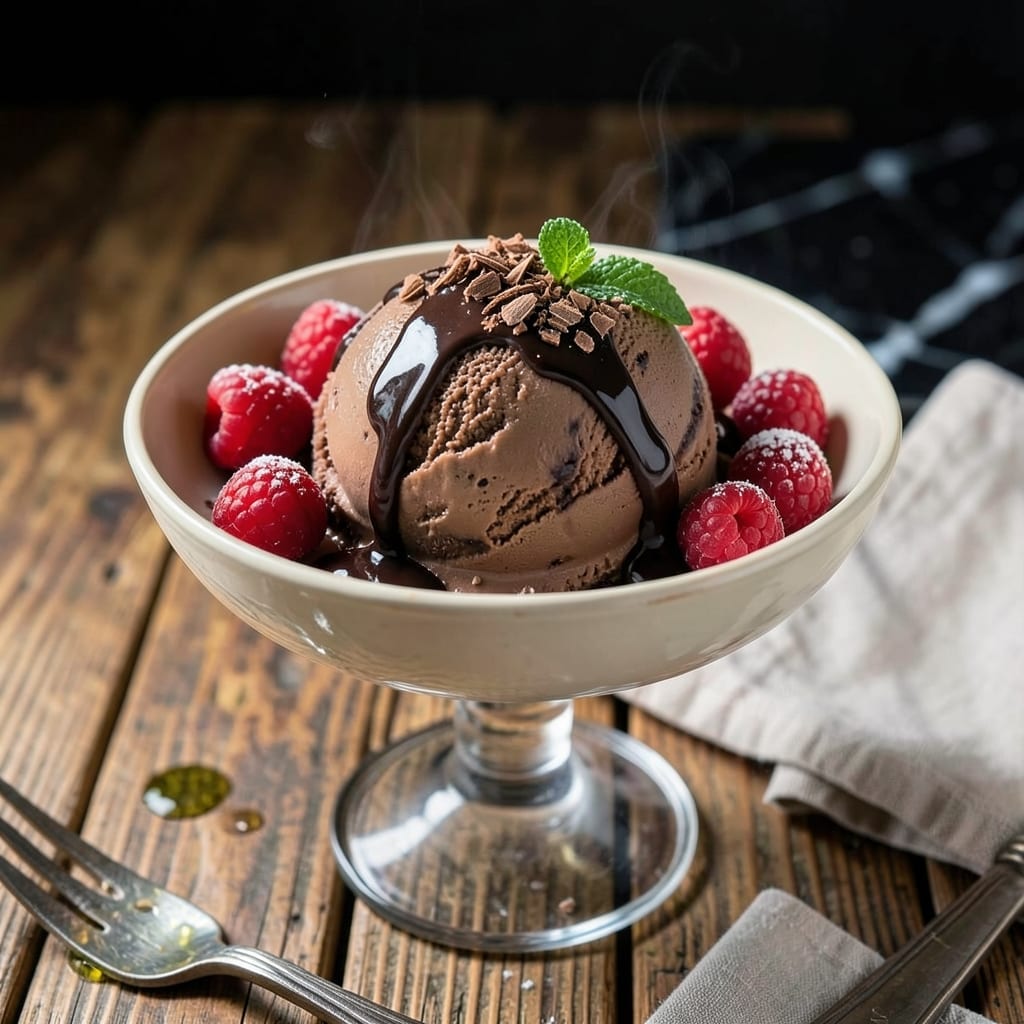
This chocolate ice cream sets the standard for homemade frozen desserts with its ultra-velvety texture and rich cocoa depth. I’ve refined this recipe through years of testing to achieve the perfect balance of sweetness and chocolate intensity.
The secret lies in using high-quality cocoa powder and whole milk for a smooth, creamy base. A touch of vanilla extract enhances the chocolate flavor without overpowering it, while just the right amount of sugar ensures a perfectly balanced taste.
What makes this version superior is its simplicity—no complicated techniques or hard-to-find ingredients. The result is a luxuriously smooth ice cream with a deep chocolate flavor that rivals any gourmet brand.
Serve it fresh from the ice cream maker or let it firm up in the freezer for a scoopable treat. This is homemade chocolate ice cream at its finest.
Ingredients for Best Homemade Chocolate Ice Cream
Nine ingredients transform into luxuriously smooth, rich chocolate ice cream with perfect texture.
| Ingredient | Amount | Notes |
|---|---|---|
| Whole Milk 🥛 | 2 cups | Full-fat for creaminess |
| Heavy Cream 🥛 | 1 cup | Cold, for richness |
| Granulated Sugar 🍚 | ¾ cup | Fine grain preferred |
| Unsweetened Cocoa Powder 🍫 | ¾ cup | High-quality Dutch-processed |
| Pure Vanilla Extract 🌿 | 1 tsp | For depth of flavor |
| Large Egg Yolks 🥚 | 6 pieces | Room temperature for smoothness |
| Pinch of Salt 🧂 | 1 pinch | Balances sweetness |
| Semi-Sweet Chocolate 🍫 | 4 oz | Chopped for texture |
| Espresso Powder ☕ | ½ tsp | Enhances chocolate flavor |
| Vanilla Bean 🌿 | 1 whole | Split and scraped |
The cocoa powder is non-negotiable here. Hershey’s Special Dark or Ghirardelli deliver that deep, complex chocolate flavor. For the chocolate itself, Ghirardelli or Guittard semi-sweet bars melt beautifully and add that signature richness. Whole milk from a local dairy (I prefer Organic Valley) gives the creamiest base. Don’t skimp on the fat content here.
Out of heavy cream? Whole milk plus melted butter at a 1:1 ratio works in a pinch, though the texture won’t be quite as velvety. No espresso powder? Instant coffee granules at the same amount get you close. For a dairy-free version (though this is vegetarian, not vegan), coconut milk can replace both milk and cream. The vanilla bean is optional but adds those gorgeous specks.
The custard base keeps in the fridge for 3 days before churning. Once churned, store in an airtight container with parchment pressed directly on the surface to prevent ice crystals. Stays fresh for 2 weeks in the freezer, though it’s best enjoyed within the first week for optimal texture.
Why You’ll Love This Recipe
- No Churn Needed: I just whisk the ingredients together and let the freezer do the work—no fancy machine required.
- Rich Chocolate Hit: The cocoa powder and heavy cream create this deep, velvety chocolate flavor that store-bought can’t touch.
- Crowd Pleaser: I’ve served this at birthday parties and random Tuesday dinners, and it’s always the first thing to disappear.
- Makes Extra: Honestly, I love having leftovers—it keeps in the freezer for weeks, so I can sneak a bowl anytime.
Step-by-Step Instructions for Homemade Chocolate Ice Cream
Master the custard base and churning technique for an exceptionally smooth, rich dessert.
Step 1: Infuse the Dairy with Vanilla and Chocolate
In a medium saucepan, combine the 2 cups Whole Milk, 1 cup Heavy Cream, 0.75 cup Granulated Sugar, 0.75 cup Unsweetened Cocoa Powder, 0.5 tsp Espresso Powder, and 1 pinch Pinch of Salt. Split the 1 whole Vanilla Bean, scrape the seeds into the mixture, and add the pod for full infusion.
Heat over medium heat, whisking constantly, until the mixture reaches 170°F and small bubbles form at the edges. The sugar and cocoa should dissolve completely, creating a smooth, glossy liquid. Remove from heat, discard the vanilla pod, and stir in the 4 oz Semi-Sweet Chocolate until melted and fully incorporated.
Step 2: Temper the Egg Yolks for a Silky Custard
In a separate bowl, whisk the 6 pieces Large Egg Yolks until pale and slightly thickened. Slowly pour about 1 cup of the hot chocolate mixture into the yolks while whisking vigorously to temper them—this prevents curdling and ensures a velvety texture.
Once tempered, return the yolk mixture to the saucepan with the remaining hot liquid. Cook over low heat, stirring constantly with a wooden spoon, until the custard thickens enough to coat the back of the spoon, about 5-7 minutes. The temperature should reach 175-180°F—do not let it boil.
Step 3: Chill the Custard Thoroughly
Strain the custard through a fine-mesh sieve into a clean bowl to remove any stray bits of cooked egg or cocoa. Stir in the 1 tsp Pure Vanilla Extract to enhance the vanilla notes already present. Press plastic wrap directly onto the surface of the custard to prevent a skin from forming.
Refrigerate for at least 4 hours, or preferably overnight. This chilling step is critical for developing the full depth of flavor and ensuring the custard is cold enough for proper churning. The mixture should be thick, smooth, and deeply aromatic when ready.
Step 4: Churn for Ultra-Creamy Texture
Pour the chilled custard into your ice cream maker and churn according to the manufacturer’s instructions, typically 20-25 minutes. The ice cream is ready when it resembles soft-serve and holds its shape when scooped.
For the best texture, transfer the ice cream to a lidded container and freeze for at least 4 hours until firm. The final product should be dense, scoopable, and intensely chocolatey with a velvety mouthfeel that melts slowly on the tongue.
Pro Tips For Making Best Homemade Chocolate Ice Cream
- Chill the Base: I learned this the hard way—let your custard base sit in the fridge for at least 4 hours, or overnight if you can. It churns smoother and faster when it’s ice cold.
- Bloom the Cocoa: Mix the cocoa powder with a little hot milk first to dissolve it completely before adding the rest. Sounds weird, but it works: no clumps, just rich chocolate flavor.
- Skip the Boil: Resist the urge to let the custard boil—heat it just until it thickens enough to coat the back of a spoon, around 170°F. After burning three batches, I finally figured out it’s all about gentle heat.
- Use Full-Fat Dairy: My grandmother swore by this, and she was right: whole milk and heavy cream make the creamiest texture. Low-fat versions just don’t cut it here.
Best Sauces and Condiments for This Dish
Hot Fudge Sauce
My go-to pairing is warm hot fudge sauce drizzled over a scoop. Use Ghirardelli hot fudge or make your own with ½ cup heavy cream, 4 oz chopped chocolate, and 2 tbsp butter. Heat until smooth, then let cool slightly before serving. 🔥
Caramel Drizzle
A silky salted caramel sauce adds sweet contrast to the deep cocoa. I love Stonewall Kitchen brand for its perfect salt balance. For homemade, simmer 1 cup sugar, ½ cup cream, and 3 tbsp butter until golden, then add ½ tsp sea salt.
Fresh Berries
Bright raspberry coulis cuts through the richness beautifully. Blend 2 cups fresh raspberries with ¼ cup sugar and strain. Alternatively, strawberry compote made with 1 lb quartered strawberries and ¼ cup sugar adds freshness. 💫
Crunchy Toppings
Add texture with toasted pecans or chopped hazelnuts. Toast 1 cup nuts at 350°F for 8-10 minutes until fragrant. I also love crushed Oreo cookies for a cookies-and-cream twist.
Chocolate Magic
For chocolate lovers, try chocolate ganache made with equal parts heavy cream and chopped dark chocolate. Heat the cream to 180°F, pour over chocolate, let sit 5 minutes, then stir until smooth. Drizzle warm over the ice cream.
Nutrition Facts
Frequently Asked Questions
Can I make this without an ice cream maker?
Yes, but texture will differ. Freeze the custard in a shallow dish, stirring vigorously with a fork every 30 minutes for 3-4 hours to break up ice crystals.
Why does my ice cream turn icy?
This usually means the custard wasn’t cold enough before churning or overchurned. Always chill for at least 4 hours and follow your machine’s time limits.
Can I substitute milk chocolate for semi-sweet?
Yes, but reduce sugar by 2 tablespoons since milk chocolate is sweeter. The flavor will be milder and creamier.
How long does it keep in the freezer?
Store in an airtight container for up to 2 weeks. Press parchment paper on the surface to prevent freezer burn.

- 6 Egg Cake Recipe with Oil: Light as Air With Buttery Moisture - October 4, 2026
- 4 Bean Casserole Recipe: One-Pan Heartiness With Smoky Paprika Depth - October 4, 2026
- 3-Ingredient Keto Mug Cake Recipe: Microwave Magic in 2 Minutes - October 4, 2026