
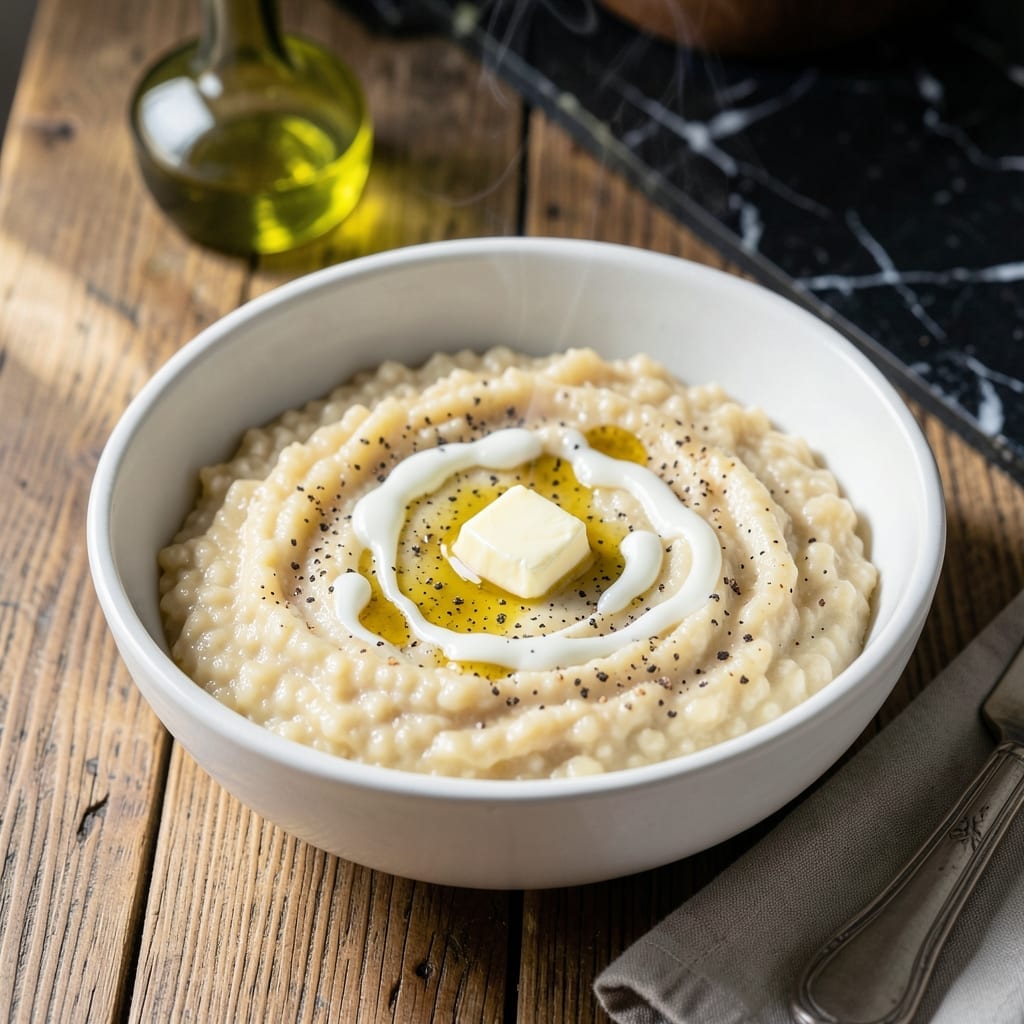
I developed this method after years of testing to create the creamiest grits without the long cook time. The secret is using the right ratio of liquid to stone-ground grits and constant stirring for a smooth, lump-free texture.
This recipe delivers on the promise of quick preparation—just 15 minutes from start to finish. The result is a bowl of grits so rich and velvety, you’ll think they simmered all day. Southern comfort doesn’t get any better.
What sets this apart is the simplicity: no fancy techniques, just quality ingredients and precise timing. The grits absorb the liquid evenly, creating a dish that’s both hearty and light.
Serve as a base for shrimp, cheese, or butter for a dish that’s best in class. Here’s how to make it perfectly every time.
Ingredients for Best Quick Grits
Quality ingredients and precise ratios make these grits irresistibly creamy and quick to prepare.
| Ingredient | Amount | Notes |
|---|---|---|
| Stone-Ground Grits 🌾 | 1 cup | Not instant or quick grits |
| Water 💧 | 4 cups | For cooking grits |
| Whole Milk 🥛 | 1 cup | Full-fat for creaminess |
| Unsalted Butter 🧈 | 2 tbsp | For richness and flavor |
| Salt 🧂 | 1 tsp | Adjust to taste |
| Black Pepper 🌶️ | ½ tsp | Freshly ground preferred |
| Sharp Cheddar Cheese 🧀 | 1 cup | Shredded, for serving |
| Parmesan Cheese 🧀 | ½ cup | Freshly grated |
| Heavy Cream 🥛 | ¼ cup | Optional for extra creaminess |
| Garlic Powder 🧄 | ¼ tsp | For depth of flavor |
| Onion Powder 🧅 | ¼ tsp | Complements the grits |
The grits are the foundation here. Stone-ground is non-negotiable—instant grits won’t give you that velvety texture. Look for brands like Anson Mills or Bob’s Red Mill at Whole Foods or well-stocked grocery stores. The milk and butter add richness, so full-fat dairy works best. Avoid low-fat versions—they’ll thin out the final texture and leave it lacking depth.
Need a swap? Half-and-half can replace the milk if that’s what you have on hand. No cheddar? Pepper Jack or Monterey Jack add a nice twist. Vegan? Use unsweetened almond milk and vegan butter—just note the texture won’t be quite as luscious. For extra flavor, a splash of chicken or vegetable stock in place of some water works wonders (just keep the total liquid at 5 cups).
Store uncooked grits in an airtight container in a cool, dark place—they’ll keep for up to 1 year. Once cooked, leftovers stay fresh in the fridge for 4-5 days. Reheat gently with a splash of milk or water to restore that creamy consistency.
Why You’ll Love This Recipe
- Ready in 20: I can have creamy grits on the table faster than it takes to fry an egg. Honestly, the stone-ground grits cook up surprisingly quick with just water and milk.
- Rich and Creamy: That whole milk and butter combo makes them so velvety smooth I could eat them plain.
- Breakfast to Dinner: I serve these with eggs at dawn and under shrimp at supper. Between us, leftovers make a killer lunch too.
- Pantry Friendly: Five basic ingredients I always have on hand, and stone-ground grits cost pennies per serving.
Step-by-Step Instructions for Southern-Style Grits
Here’s the method. Straightforward, tested, works every time.
Step 1: Bring Water to a Rolling Boil
Pour the 4 cups Water into a medium saucepan and bring to a rolling boil over high heat. Watch for large, vigorous bubbles that can’t be stirred down—that’s your signal the water is ready for the grits.
I use a heavy-bottomed saucepan to prevent hot spots that could cause the grits to scorch later. A rolling boil ensures the stone-ground grits cook evenly from the start, preventing lumps or uneven texture.
Step 2: Whisk in Stone-Ground Grits and Reduce Heat
Slowly pour in the 1 cup Stone-Ground Grits while whisking constantly. This prevents clumping as the grits absorb the hot water. Once fully incorporated, reduce the heat to medium-low to maintain a gentle simmer.
Stone-ground grits take longer to cook than instant, so patience is key. You’ll notice the mixture thicken as it simmers. Stir occasionally to prevent sticking, especially at the bottom of the pan.
Step 3: Add Milk and Seasonings for Depth
After 10 minutes of simmering, stir in the 1 cup Whole Milk, 1 tsp Salt, 0.5 tsp Black Pepper, 0.25 tsp Garlic Powder, and 0.25 tsp Onion Powder. The milk adds richness, while the seasonings build layers of flavor.
Continue cooking for another 5-7 minutes, stirring frequently, until the grits are creamy and smooth. They should be thick enough to coat the back of a spoon but still pourable. If they become too thick, add a splash of hot water to loosen.
Step 4: Finish with Butter, Cream, and Cheese
Remove the saucepan from heat and stir in the 2 tbsp Unsalted Butter and 0.25 cup Heavy Cream. The butter adds a velvety finish, while the cream enhances the richness.
Next, fold in the 1 cup Sharp Cheddar Cheese and 0.5 cup Parmesan Cheese. Stir until the cheeses melt completely and the grits are ultra-creamy. The sharp cheddar provides a bold flavor, while the Parmesan adds a salty depth.
Step 5: Rest and Serve Immediately
Let the grits rest for 2-3 minutes off the heat. This allows the flavors to meld and the texture to set slightly. The grits should be smooth, with no graininess, and have a glossy sheen from the cheese and cream.
Serve immediately while hot. The consistency will thicken as they cool, so if you’re holding them for a few minutes, stir in a splash of warm milk to maintain the creamy texture. Each bite should be rich, cheesy, and perfectly seasoned.
Pro Tips For Making Best Quick Grits
- Use a Heavy Pot: Thin pots burn grits at the bottom—I learned this the hard way after scraping charred bits out of my saucepan. A heavy-bottomed pot distributes heat evenly, especially with stone-ground grits that need steady cooking.
- Toast the Grits: Before adding liquid, cook the dry grits in the pot for 1-2 minutes over medium heat. Sounds weird, but it works: it deepens the corn flavor and prevents a raw taste.
- Skip Cold Milk: Adding cold milk straight from the fridge slows down the cooking process. Warm it slightly first, or just use all water and stir in milk at the end—your grits will reach that creamy consistency faster.
- Salt in Stages: Add half the salt at the start, then adjust at the end. Stone-ground grits absorb seasoning differently as they cook, and you can’t take it out once it’s in there.
Make-Ahead Tips for This Recipe
Overnight Prep
Mix 1 cup Stone-Ground Grits with 4 cups cold Water in a bowl and refrigerate overnight. This softens the grits, cutting morning cook time to just 5-7 minutes. Stir in 1 cup Whole Milk and seasonings as usual. 💡
Freezer-Friendly Batches
Cook a double batch, let cool completely, then portion into freezer bags. They’ll keep for 3 months. Thaw overnight in the fridge before reheating—this prevents graininess. Label bags with the date to track freshness.
Slow Cooker Method
Combine all ingredients except cheese in your slow cooker. Cook on low for 6-7 hours, stirring occasionally. Add cheeses in the last 30 minutes. This hands-off method is perfect for Sunday brunch.
Reheating Tips
Add ¼ cup liquid (milk or water) per 1 cup cooked grits before reheating. Warm on the stovetop over medium-low heat, stirring constantly. Microwave in 30-second bursts, stirring between each. 🔥
Make-Ahead Flavor Boost
Underseason slightly when prepping ahead—flavors concentrate during storage. Taste and adjust salt before serving. A pinch of garlic powder or onion powder can be added fresh when reheating.
Serving from the Fridge
Cold grits thicken significantly. For creamy results, warm with extra liquid and whisk vigorously. This works great for grits casseroles or fried grits cakes too. The texture changes but stays delicious.
Nutrition Facts
Frequently Asked Questions
Can I use instant grits instead?
No, instant grits won’t give you the same creamy texture. Stone-ground grits are essential for that rich, velvety consistency. Instant versions cook too quickly and often turn out grainy.
How do I prevent lumps in my grits?
Whisk constantly while adding grits to boiling water. This ensures even distribution and prevents clumping. A heavy-bottomed saucepan also helps maintain consistent heat.
Can I make this recipe vegan?
Yes! Substitute almond milk for dairy milk, use vegan butter, and skip the cheese or use a plant-based alternative. The texture will be slightly less creamy but still delicious.
How long can I store cooked grits?
Cooked grits keep in the fridge for 4-5 days. For longer storage, freeze for up to 3 months. Reheat with a splash of milk to restore creaminess.

- 6 Egg Cake Recipe with Oil: Light as Air With Buttery Moisture - October 4, 2026
- 4 Bean Casserole Recipe: One-Pan Heartiness With Smoky Paprika Depth - October 4, 2026
- 3-Ingredient Keto Mug Cake Recipe: Microwave Magic in 2 Minutes - October 4, 2026