
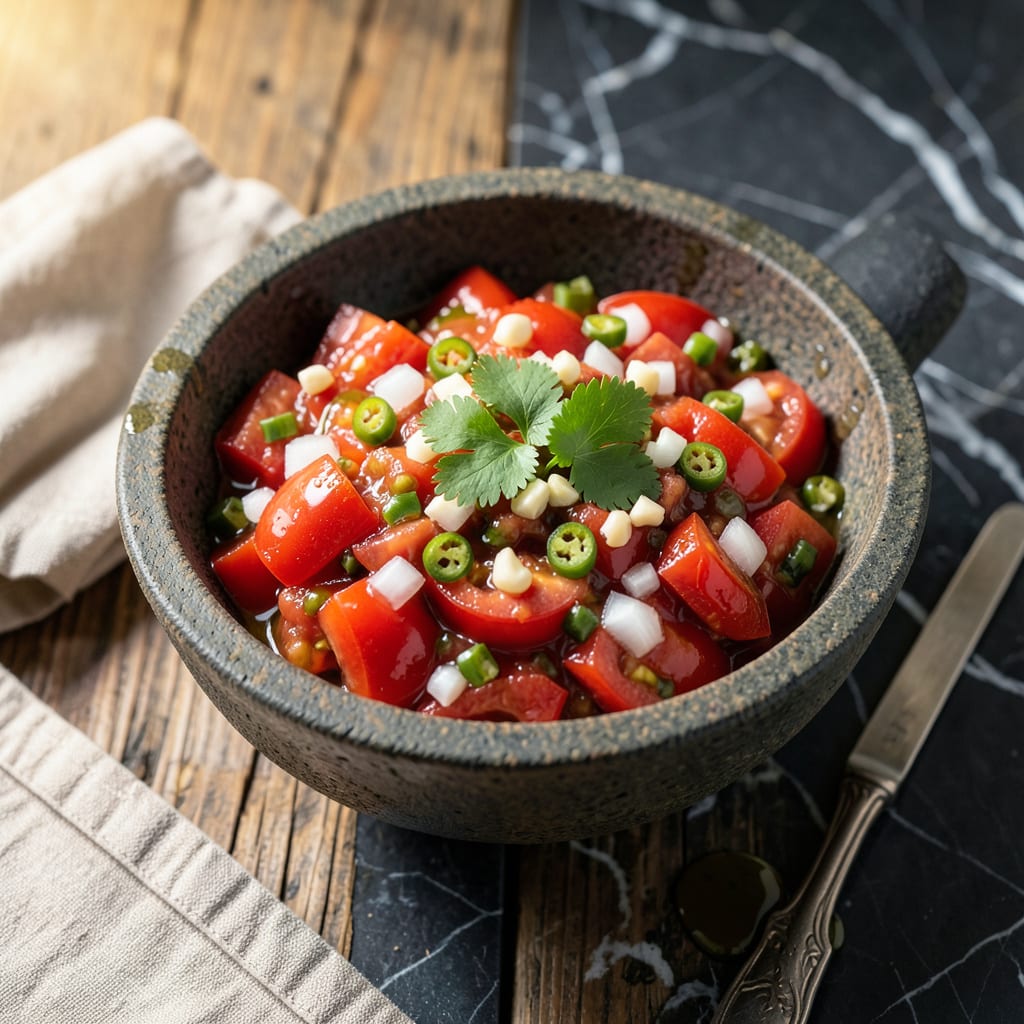
This salsa delivers the bold Tex-Mex flavors you expect from a classic recipe. I’ve perfected the balance of fresh tomatoes, onions, and peppers for a vibrant, zesty sauce.
With just 10 minutes of prep, you’ll have a versatile condiment ready to elevate tacos, chips, or grilled meats. Store in the fridge for up to a week.
Ingredients for Bill Miller Salsa
Nine fresh ingredients bring that signature bold Tex-Mex flavor to life in minutes.
| Ingredient | Amount | Notes |
|---|---|---|
| Roma Tomatoes 🍅 | 6 whole | Cored and quartered |
| White Onion 🧅 | 1 whole | Medium, roughly chopped |
| Jalapeño Pepper 🌶️ | 2 whole | Seeds removed for mild heat |
| Fresh Cilantro 🌿 | ½ cup | Stems removed, chopped |
| Garlic Cloves 🧄 | 3 cloves | Peeled and minced |
| Lime Juice 🍈 | 3 tbsp | Freshly squeezed preferred |
| Salt 🧂 | 1 ½ tsp | Kosher or sea salt |
| Ground Cumin 🌿 | ½ tsp | Toasted for deeper flavor |
| Granulated Sugar 🍚 | ½ tsp | Balances acidity |
[recipeingredientscaler]
Roma tomatoes are the secret here—they’re meatier and less watery than regular tomatoes. Look for firm, deep red ones at the store, or grab a big batch from the farmers market if they’re in season. The onion should be white (not yellow) for that authentic Tex-Mex bite. H-E-B or local Latin markets usually have the best selection of fresh jalapeños if you want that genuine kick.
No jalapeños? Serrano peppers at half the amount work in a pinch (just watch the heat). Fresh cilantro is key, but flat-leaf parsley at a 1:1 swap can save the day if you’re one of those cilantro-haters. The lime juice can be bottled if you’re desperate, but fresh really brightens everything up. For extra depth, add a pinch of smoked paprika—it’s not traditional, but it’s delicious.
This salsa tastes best after a few hours in the fridge (gives the flavors time to meld). Keeps for 5-7 days in an airtight container. I make a double batch—half gets eaten fresh, half gets frozen for up to 3 months.
Why You’ll Love This Recipe
- I’ll be real: this salsa makes every chip, taco, and burrito bowl taste like a fiesta.
- No-Fuss Chop: I just dump Roma tomatoes, onion, jalapeño, cilantro, and garlic in the blender—no fancy knife skills needed.
- Fresh Zing: The raw garlic and cilantro give it that bright, restaurant-quality punch I can’t get from store-bought.
- Taco Night Hero: I’ll be real: this salsa makes every chip, taco, and burrito bowl taste like a fiesta.
Step-by-Step Instructions for Tex-Mex Salsa
This method delivers that signature bold flavor with minimal effort and maximum freshness.
Step 1: Prep and Roughly Chop the Vegetables
Start by coring and quartering the 6 whole Roma Tomatoes. I like to remove most of the seeds to prevent a watery salsa, but leave some for texture. Next, roughly chop the 1 whole White Onion—you want medium-sized pieces that will blend well but still provide some bite.
For the 2 whole Jalapeño Pepper, slice them in half lengthwise and remove the seeds and membranes for a milder heat. If you prefer extra spice, leave some seeds in. Chop the peppers roughly, keeping the pieces similar in size to the tomatoes and onion for even blending.
Remove the stems from the 0.5 cup Fresh Cilantro and give it a coarse chop. You’ll add this later to preserve its bright, fresh flavor.
Step 2: Toast the Aromatics and Blend the Base
Peel and mince the 3 cloves Garlic Cloves. I always toast the minced garlic and 0.5 tsp Ground Cumin in a dry skillet over medium heat for 1-2 minutes until fragrant. This step deepens their flavors and removes any raw bite. Watch carefully to avoid burning.
Transfer the toasted garlic and cumin to a blender or food processor. Add the chopped tomatoes, onion, and jalapeños. Pulse until you reach your desired consistency—I prefer mine slightly chunky for texture. Avoid over-blending, or you’ll end up with a watery puree instead of a hearty salsa.
Step 3: Finish with Fresh Ingredients and Seasonings
Pour the blended mixture into a bowl and stir in the chopped 0.5 cup Fresh Cilantro, 3 tbsp Lime Juice, 1.5 tsp Salt, and 0.5 tsp Granulated Sugar. The lime juice brightens the flavors, while the sugar balances the acidity from the tomatoes and lime.
Taste and adjust the seasoning if needed. I often let the salsa sit for 10-15 minutes before final adjustments, as the flavors meld and mellow slightly. This resting time also allows the cilantro to infuse the salsa fully.
Step 4: Chill and Serve for Best Flavor
Transfer the salsa to an airtight container and refrigerate for at least 30 minutes before serving. Chilling helps the flavors marry and develops a more cohesive taste. I find the salsa tastes even better after 2-3 hours in the fridge.
Serve with tortilla chips, or use it as a topping for tacos, grilled meats, or huevos rancheros. The salsa should be vibrant in color, with a balance of spicy, tangy, and fresh herbal notes. If it seems too thick after chilling, stir in a splash of water to reach your preferred consistency.
Pro Tips For Making Bill Miller Salsa
- Roast the Veggies: Toss the Roma tomatoes, onion, and jalapeños with a little oil and roast at 425°F for 20-25 minutes—this deepens the flavor way beyond raw ingredients.
- Seed the Jalapeños: Remove the seeds and white membranes from the jalapeños unless you want a salsa that’ll light your mouth on fire. I learned this the hard way.
- Char the Garlic: Throw the unpeeled garlic cloves in with the roasting veggies, then squeeze the soft cloves out afterward. It adds a sweet, mellow depth you can’t get from raw garlic.
- Chill Before Serving: Let the salsa sit in the fridge for at least an hour after blending. Sounds weird, but it lets the flavors meld and tastes way better than served right away.
Make-Ahead Tips for This bill miller salsa
Prep Ahead Strategy
I always chop all my vegetables the night before—6 Roma tomatoes, 1 white onion, and 2 jalapeños—and store them in separate containers in the fridge. This saves 10 minutes of prep time the next day. The cold temps actually help the flavors develop overnight. 💡
Batch Blending
Double or triple the recipe with ease—just pulse your ingredients in batches to avoid overfilling the blender. I use my Ninja food processor for big batches, which handles 12 tomatoes comfortably. The key is maintaining that chunky texture, so don’t over-process.
Fridge Maturation
The salsa tastes best after 24 hours in the fridge as the flavors meld. I make mine on Sunday afternoon so it’s ready for Monday night tacos. Store in mason jars for easy grab-and-go use throughout the week.
Freezer Friendly
Portion leftover salsa into 1-cup freezer bags and freeze flat for up to 3 months. Thaw overnight in the fridge. The texture softens slightly, but the flavor remains bold. I label mine with the date to track freshness.
Quick Revive Tip
If your chilled salsa seems thick, stir in 1-2 tbsp water or lime juice. For frozen salsa, add 2 tbsp fresh cilantro after thawing to brighten the flavor. This little trick makes it taste freshly made. ✨
Nutrition Facts
Frequently Asked Questions
Can I use canned tomatoes instead of fresh?
Yes, but fresh Roma tomatoes work best for authentic flavor. Canned tomatoes can be watery, so drain and pat them dry first.
How do I adjust the spice level?
For milder salsa, remove all jalapeño seeds and membranes. For extra heat, leave some seeds in or add a pinch of cayenne pepper.
Can this salsa be canned for long-term storage?
This recipe isn’t tested for canning safety. For long-term storage, freeze in 1-cup portions for up to 3 months.
What if my salsa turns out too watery?
Strain it through a fine-mesh sieve to remove excess liquid. For prevention, seed tomatoes well and avoid over-blending.

- 6 Egg Cake Recipe with Oil: Light as Air With Buttery Moisture - October 4, 2026
- 4 Bean Casserole Recipe: One-Pan Heartiness With Smoky Paprika Depth - October 4, 2026
- 3-Ingredient Keto Mug Cake Recipe: Microwave Magic in 2 Minutes - October 4, 2026