
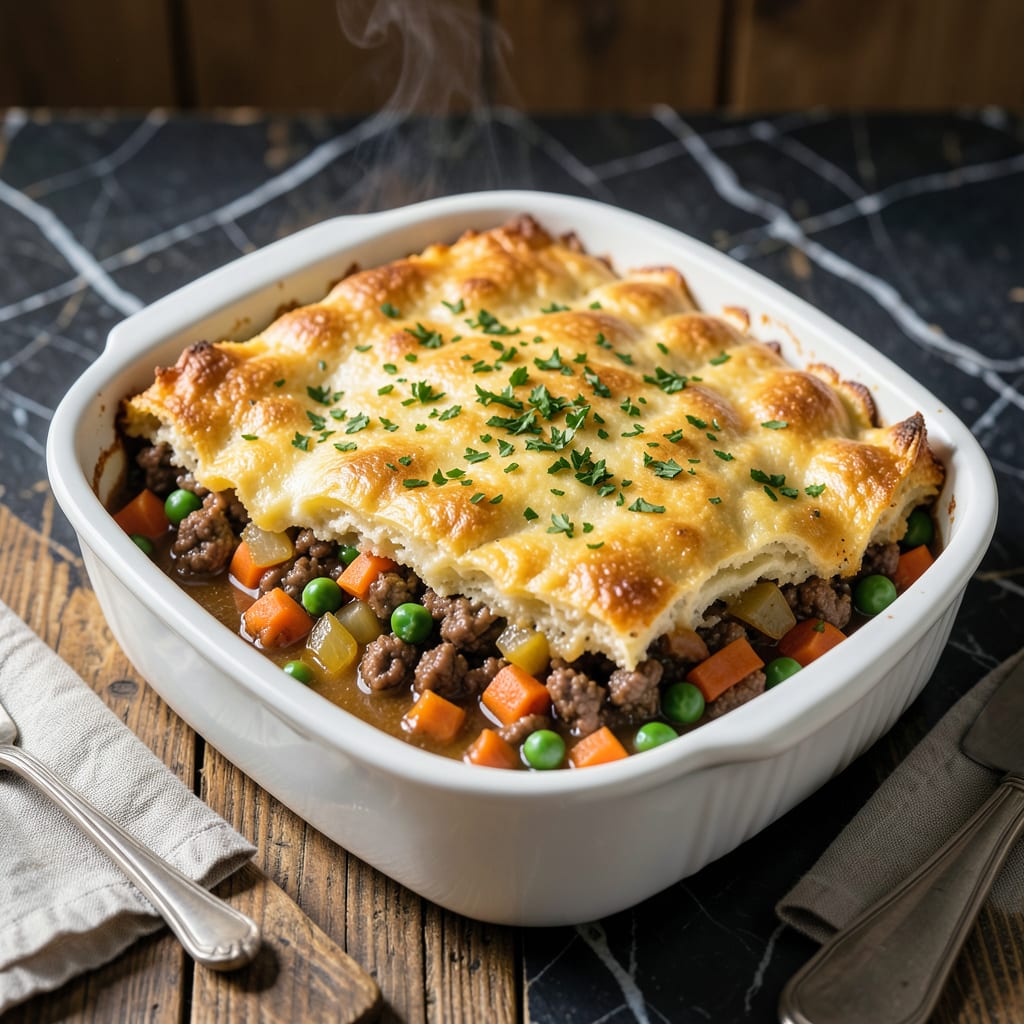
This shepherd’s pie reimagines a classic with a fluffy Bisquick topping that bakes to golden perfection. The savory ground beef filling, rich with vegetables and gravy, pairs seamlessly with the light, buttery biscuit layer above.
Ready in under an hour, this dish delivers comfort without the fuss. The Bisquick topping cuts prep time while keeping the texture tender and inviting, making it a foolproof weeknight solution.
Ingredients for Bisquick Shepherd’s Pie
Quality ground beef and Bisquick create this comforting dish with a golden biscuit topping.
| Ingredient | Amount | Notes |
|---|---|---|
| Ground Beef 🥩 | 1 ½ lb | 80/20 lean-to-fat ratio preferred |
| Yellow Onion 🧅 | 1 whole | Medium-sized, finely diced |
| Carrots 🥕 | 2 whole | Medium, peeled and diced |
| Frozen Peas 🌱 | 1 cup | No need to thaw |
| Garlic Cloves 🧄 | 3 cloves | Minced for depth of flavor |
| Beef Broth 💧 | 2 cups | Low-sodium preferred for control |
| Tomato Paste 🍅 | 2 tbsp | For savory richness in filling |
| Worcestershire Sauce 🫒 | 1 tbsp | Adds umami depth to sauce |
| All-Purpose Flour 🌾 | 2 tbsp | For thickening the gravy |
| Kosher Salt 🧂 | 1 ½ tsp | Diamond Crystal preferred for balance |
| Black Pepper 🌶️ | ½ tsp | Freshly ground for best aroma |
| Dried Thyme 🌿 | 1 tsp | Or substitute fresh at triple amount |
| Bisquick Baking Mix 🍞 | 2 cups | Original variety for topping |
| Whole Milk 🥛 | ⅔ cup | For tender biscuit texture |
| Unsalted Butter 🧈 | 4 tbsp | Cold, cubed for flaky layers |
The beef is the foundation here. Ground chuck with 80/20 fat ratio delivers the best flavor and moisture to the filling. Most supermarkets carry it pre-packaged, but ask the butcher for a fresh grind if you want to elevate it. For the Bisquick, stick with the original variety—the buttermilk version can make the topping too tangy for this classic dish.
No ground beef? Ground turkey or lamb work well, though lamb will give a more traditional flavor. Swap the frozen peas for frozen corn or diced green beans. If avoiding Worcestershire sauce (it contains anchovies), soy sauce or coconut aminos can substitute. The milk in the topping can be 2% or even half-and-half for extra richness.
Assemble and bake immediately for best results, but you can prep the filling 1 day ahead and refrigerate. Leftovers keep 3-4 days in the fridge and reheat beautifully. The biscuit topping is best fresh but still tasty warmed gently in the oven.
Why You’ll Love This Recipe
- One Pan Wonder: I love that this recipe uses Bisquick to make the topping, so there’s no extra pot to wash—just brown the beef, mix in the veggies, and bake.
- Garlic-Kissed Comfort: The garlic cloves and ground beef create this deep, savory richness that makes the whole dish taste like it simmered for hours.
- Weeknight Hero: Honestly, it’s my go-to for busy evenings—ready in under 40 minutes and still feels like a proper meal.
- Stretches Far: Between us, this one dish feeds my family for two nights, and the leftovers taste even better the next day.
Step-by-Step Instructions for Shepherd’s Pie With Biscuit Topping
This streamlined method delivers a hearty filling and golden topping with minimal effort.
Step 1: Brown the Ground Beef and Aromatics
Heat a large skillet over medium-high heat. Add the 1.5 lb Ground Beef and cook, breaking it up with a wooden spoon, until it loses its pink color, about 5-7 minutes. I drain off about half the fat at this point—enough to keep it flavorful but not greasy.
To the same skillet, add the finely diced 1 whole Yellow Onion, 2 whole Carrots, and 3 cloves Garlic Cloves. Cook for 4-5 minutes until the vegetables soften and the onion becomes translucent. The garlic should release its aroma without browning, so keep it moving.
Step 2: Create the Rich Gravy Base
Sprinkle the 2 tbsp All-Purpose Flour evenly over the beef and vegetables. Stir well to coat everything, then let it cook for 1 minute to remove the raw flour taste. This creates a roux that will thicken your filling beautifully.
Slowly pour in the 2 cups Beef Broth, 2 tbsp Tomato Paste, 1 tbsp Worcestershire Sauce, 1.5 tsp Kosher Salt, 0.5 tsp Black Pepper, and 1 tsp Dried Thyme. Stir to combine and bring to a simmer. Cook for 3-4 minutes until the mixture thickens into a rich gravy.
Remove from heat and stir in the 1 cup Frozen Peas. The residual heat will thaw them perfectly without overcooking. Taste and adjust the seasoning if needed—this is your last chance before assembling.
Step 3: Prepare the Bisquick Topping
In a separate bowl, combine the 2 cups Bisquick Baking Mix with the 0.66 cup Whole Milk. Stir just until the dry ingredients are moistened—the batter will be thick and slightly lumpy. Overmixing will make your topping tough, so resist the urge to smooth it out.
Fold in the 4 tbsp Unsalted Butter that’s been cut into small cubes. The cold butter should remain in visible pieces—this creates those flaky layers in your biscuit topping as it bakes. The dough is now ready to use immediately.
Step 4: Assemble and Bake to Golden Perfection
Transfer the beef filling to a 9×13-inch baking dish (or similar 3-quart capacity) and spread it into an even layer. Drop spoonfuls of the Bisquick topping evenly over the surface—you should have about 8-10 mounds. Don’t worry about making it perfect; the rustic look is part of the charm.
Bake in a preheated 400°F oven for 18-20 minutes until the topping is golden brown and the filling is bubbling at the edges. You’ll know it’s done when a toothpick inserted into the biscuit portion comes out clean and the top springs back when lightly pressed.
Step 5: Rest and Serve
Let the shepherd’s pie rest for 5-10 minutes before serving. This brief pause allows the filling to set slightly, making it easier to serve neat portions. The topping will also firm up just enough to hold its shape.
Scoop servings directly from the dish, making sure each portion includes a generous amount of the fluffy biscuit topping and savory filling. Serve immediately while hot—the contrast between the crisp topping and creamy filling is at its best right out of the oven.
Pro Tips For Making Bisquick Shepherd’S Pie
- Brown the Beef Well: I learned this the hard way—don’t rush browning the ground beef. Let it develop a deep color in the pan for at least 5-7 minutes, which builds the rich flavor base your shepherd’s pie needs.
- Dice Veggies Small: Chop the yellow onion, carrots, and garlic into tiny, even pieces—about ¼-inch. This ensures they soften quickly and blend seamlessly into the filling without crunchy surprises.
- Drain Excess Grease: After browning the beef, pour off most of the fat before adding veggies. Skipping this leaves your pie greasy, and the Bisquick topping won’t crisp up properly.
- Use Cold Bisquick Mix: For a fluffier topping, keep the Bisquick mix chilled until ready to use. I mix it with cold milk just before spreading it over the filling—this prevents a dense, gummy layer.
Health Benefits of This bisquick shepherds pie
Protein Powerhouse
The ground beef filling delivers a solid 24 grams of protein per 3-ounce serving, supporting muscle maintenance and keeping you full for hours. I find this especially satisfying after a long day when I need a meal that sticks with me. 💪
Vegetable Boost
Carrots provide beta-carotene, converting to vitamin A for eye health, while peas add fiber and vitamin C. Together they contribute essential micronutrients that balance the richness of the beef. The onions and garlic also offer antioxidant properties.
Iron-Rich Comfort
Beef is one of the best sources of heme iron, which your body absorbs more efficiently than plant-based iron. A single serving of this dish provides about 15% of your daily iron needs, helping prevent fatigue and supporting energy levels.
B Vitamin Complex
The beef filling is packed with B vitamins, particularly B12 for nerve function and B6 for metabolism. These nutrients work together to convert food into energy and maintain healthy red blood cells.
Bisquick Benefits
The topping adds calcium and iron from the Bisquick mix, contributing to bone health and energy. While not a primary health food, it provides a satisfying texture that makes the dish more enjoyable to eat. 🥛
Balanced Meal
This dish combines protein, vegetables, and carbs in one package. The filling’s savory depth pairs with the topping’s lightness, creating a meal that feels indulgent yet provides genuine nutritional value for your day.
Nutrition Facts
Frequently Asked Questions
Can I use a different baking mix?
Original Bisquick works best for this recipe, but other baking mixes can be used in a pinch. Avoid buttermilk varieties as they may alter the flavor. Stick to 2 cups of any plain baking mix for consistent results.
How do I know when it’s done baking?
The topping should be golden brown and the filling bubbling at the edges after 18-20 minutes at 400°F. A toothpick in the biscuit should come out clean.
Can I make this ahead of time?
Yes! Prepare the filling up to 1 day ahead and refrigerate. Assemble and bake just before serving for the freshest texture. Leftovers keep well for 3-4 days in the fridge.
Why did my topping turn out dense?
Overmixing the Bisquick batter is the most common cause. Stir just until combined—the batter should be lumpy. Also ensure your butter is cold when folding it in.

- 6 Egg Cake Recipe with Oil: Light as Air With Buttery Moisture - October 4, 2026
- 4 Bean Casserole Recipe: One-Pan Heartiness With Smoky Paprika Depth - October 4, 2026
- 3-Ingredient Keto Mug Cake Recipe: Microwave Magic in 2 Minutes - October 4, 2026