
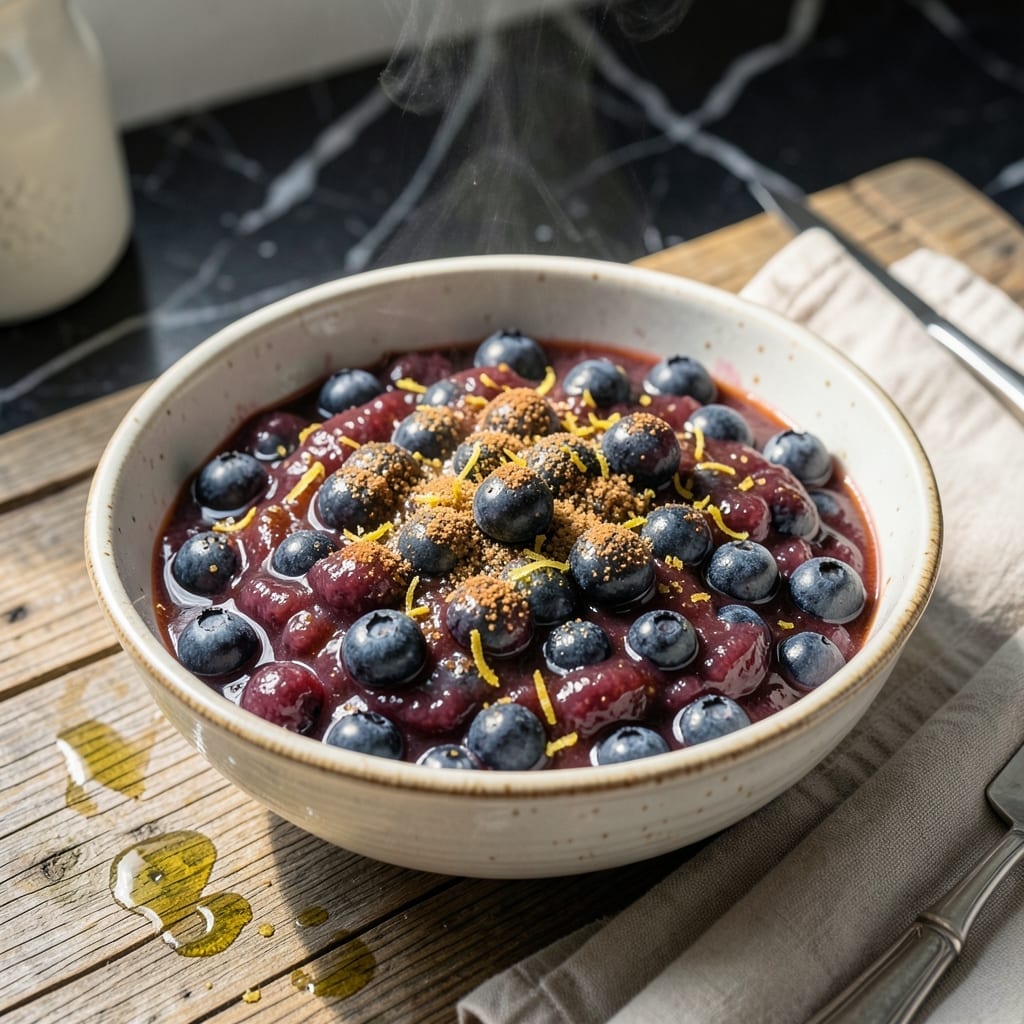
This blueberry pie filling delivers restaurant-quality results with minimal effort. The simple technique transforms fresh berries into a thick, glossy sauce perfect for pies, pastries, or ice cream toppings.
I developed this method after years of trial and error, focusing on a foolproof process that prevents a runny filling. The secret lies in the precise ratio of fruit to thickener and a short cooking time that preserves the berries’ natural flavor.
What you get is a vibrant, thick filling that holds its shape when sliced yet remains perfectly spreadable. It keeps beautifully in the fridge for up to two weeks, making it ideal for meal prep or last-minute desserts.
Use it to fill pies, top cheesecakes, or swirl into yogurt for a burst of summer flavor year-round.
Ingredients for Blueberry Pie Filling Recipe Easy
Eight simple ingredients transform into thick, glossy blueberry filling for any dessert.
| Ingredient | Amount | Notes |
|---|---|---|
| Fresh Blueberries 🫐 | 6 cups | Rinsed and drained well |
| Granulated Sugar 🍚 | ¾ cup | Adjust to berry sweetness |
| Cornstarch 🌾 | ¼ cup | For thickening the filling |
| Lemon Juice 🍋 | 2 tbsp | Freshly squeezed preferred |
| Lemon Zest 🍋 | 1 tbsp | From one medium lemon |
| Ground Cinnamon 🌿 | ¼ tsp | Optional for warmth |
| Vanilla Extract 🌿 | 1 tsp | Pure for best flavor |
| Salt 🧂 | 0.125 tsp | Balances sweetness |
The blueberries are non-negotiable—go for fresh, plump berries in season for the best flavor. Frozen works (don’t thaw first) but may need extra cooking to thicken. Trader Joe’s and Costco have great frozen options off-season. For sugar, organic granulated dissolves cleanly, but any fine sugar works. The cornstarch must be fresh; old stuff loses thickening power.
Swap the cornstarch for instant tapioca at 1:1 ratio if you prefer a glossier finish. No cinnamon? Skip it—a pinch of nutmeg adds depth without overpowering. Short on lemon? Bottled juice works in a pinch, but fresh zest makes all the difference. For a lower-sugar version, reduce sugar by half and add a splash of water to compensate.
This keeps 10-14 days in an airtight container in the fridge. Freeze in 1-cup portions for up to 6 months. The filling thickens more as it cools, so don’t over-cook it initially (it should be pourable when hot).
Why You’ll Love This Recipe
- One-Bowl Wonder: I just dump everything in a saucepan—blueberries, sugar, cornstarch, lemon—and stir. No fancy steps, no extra dishes.
- Bright & Zesty: The lemon zest cuts through the sweetness, making the blueberries taste even fresher.
- Freezer Friendly: Honestly, I double the batch and freeze half for spontaneous pie cravings later.
- Pantry Staples: Between us, I always have these ingredients on hand, so dessert is never far away.
Step-by-Step Instructions for Blueberry Pie Filling
Here is the straightforward method that guarantees a thick, glossy filling with minimal effort.
Step 1: Combine and Macerate the Blueberries
In a large saucepan, combine the 6 cups Fresh Blueberries, 0.75 cup Granulated Sugar, 2 tbsp Lemon Juice, and 1 tbsp Lemon Zest. Stir gently to distribute the sugar and citrus evenly over the berries.
Let the mixture sit for 10-15 minutes to allow the berries to release their juices. You’ll notice the sugar begin to dissolve and the blueberries soften slightly. This step enhances the natural sweetness and ensures even cooking.
Step 2: Create the Thickening Slurry
While the blueberries macerate, whisk together the 0.25 cup Cornstarch with ¼ cup of cold water in a small bowl. This creates a smooth slurry that will thicken the filling without forming lumps.
Stir in the 0.25 tsp Ground Cinnamon, 1 tsp Vanilla Extract, and 0.125 tsp Salt into the slurry. The cinnamon adds warmth, while the vanilla and salt balance the sweetness and acidity of the berries.
Step 3: Cook the Filling to Perfection
Place the saucepan with the macerated blueberries over medium heat. Stir frequently as the mixture begins to simmer. After 3-4 minutes, the berries will soften and release more liquid.
Pour the cornstarch slurry into the saucepan and stir constantly. The filling will thicken noticeably within 2-3 minutes. Continue cooking for another 2-3 minutes until it reaches a full, rolling boil.
Once boiling, cook for an additional 1 minute to fully activate the cornstarch. The filling should be thick enough to coat the back of a spoon and appear glossy. Remove from heat immediately to prevent over-thickening.
Step 4: Cool and Store the Filling
Transfer the filling to a heatproof bowl and let it cool at room temperature for 30 minutes. Stir occasionally during this time to release heat evenly and prevent a skin from forming on the surface.
As it cools, the filling will thicken further. Once cooled, it can be used immediately for pies or stored in an airtight container in the refrigerator for up to 5 days.
Pro Tips For Making Blueberry Pie Filling Recipe Easy
- Pre-cook the Blueberries: Toss the blueberries with sugar and lemon juice, then let them sit for 15 minutes before cooking. This draws out juices so the cornstarch can thicken properly—otherwise you’ll get a runny filling.
- Use a Slurry: Mix the cornstarch with a little cold water before stirring it into the hot berries. I learned this the hard way—dumping dry cornstarch in just makes clumpy, uneven filling.
- Zest First: Always zest the lemon before juicing it. Sounds obvious, but after ruining a perfectly good lemon trying to zest it after juicing, I now do it every time.
- Simmer, Don’t Boil: Keep the heat at a gentle simmer once the filling starts thickening. A rolling boil breaks down the berries too much and can make the cornstarch lose its thickening power.
Perfect Pairings for This Dish
Dessert Pairings
This filling transforms a simple store-bought angel food cake into a gourmet treat. Just slice the cake and layer with ½ cup of cooled filling between each piece. I love serving it with whipped cream and a sprinkle of toasted almonds for crunch. 💛
Ice Cream Toppings
Warm the filling slightly (about 30 seconds in the microwave) and drizzle over vanilla bean ice cream. The contrast of hot and cold is divine. For extra flair, add crumbled graham crackers or a dusting of powdered sugar.
Breakfast Uses
Swirl 2 tablespoons of filling into Greek yogurt or oatmeal for a fruity breakfast boost. It also makes an incredible topping for pancakes or waffles—just warm it up and pour like syrup.
Pastry Ideas
Fill puff pastry cups with 1 tablespoon of filling and bake at 375°F for 15 minutes until golden. Or use it as a layer in parfaits with granola and fresh berries. The possibilities are endless.
Cheese Pairings
Serve alongside a cheese board with brie or goat cheese. The tangy sweetness complements the creamy cheeses beautifully. I like to add a few fresh mint leaves for color and freshness. 🌟
Nutrition Facts
Frequently Asked Questions
Can I use frozen blueberries instead?
Yes, but don’t thaw them first. Cook from frozen, adding 1-2 minutes extra to thicken. Frozen berries release more liquid, so you may need an extra 1 tablespoon cornstarch for the perfect consistency.
How do I prevent lumps in the filling?
Whisk the cornstarch with cold water until completely smooth before adding. Stir constantly while cooking, especially as it nears boiling. If lumps appear, a quick blend with an immersion blender works wonders.
Why did my filling turn out runny?
It likely didn’t boil long enough. Cornstarch needs 1 full minute at a rolling boil to activate. Also, avoid adding extra liquid beyond the recipe. The filling thickens significantly as it cools.
What’s the best way to store leftovers?
Transfer to an airtight container once fully cooled. Refrigerate for up to 5 days or freeze for 6 months. Thaw overnight in the fridge before using.

- 6 Egg Cake Recipe with Oil: Light as Air With Buttery Moisture - October 4, 2026
- 4 Bean Casserole Recipe: One-Pan Heartiness With Smoky Paprika Depth - October 4, 2026
- 3-Ingredient Keto Mug Cake Recipe: Microwave Magic in 2 Minutes - October 4, 2026