
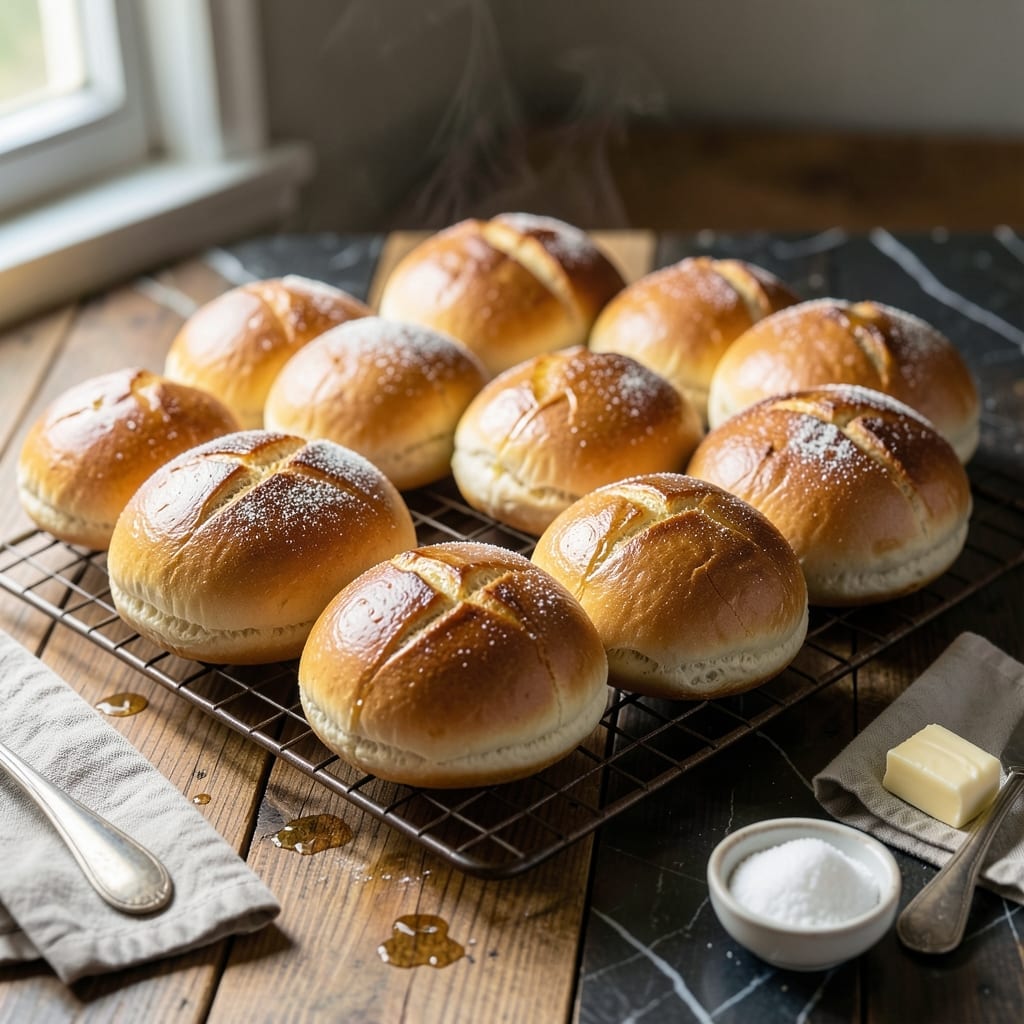
This bread maker recipe delivers soft and fluffy buns with minimal effort. The machine handles the mixing and kneading while you focus on shaping and baking.
Perfect for sandwiches or dinner rolls, these buns have a tender crumb and golden crust. The hands-off method ensures consistent results every time.
Ingredients for Bread Bun Recipe for Bread Maker
Nine essential ingredients for bread maker buns with perfect texture every time.
| Ingredient | Amount | Notes |
|---|---|---|
| Bread Flour 🌾 | 4 cups | High-protein for structure |
| Warm Water 💧 | 1 ¼ cups | 110°F for yeast activation |
| Active Dry Yeast 🍞 | 2 ¼ tsp | Or one packet, fresh |
| Granulated Sugar 🍚 | 2 tbsp | Feeds the yeast |
| Unsalted Butter 🧈 | 3 tbsp | Softened, not melted |
| Salt 🧂 | 1 ½ tsp | Fine grain for even distribution |
| Large Egg 🥚 | 1 whole | Room temperature for binding |
| Non-Fat Dry Milk 🥛 | ½ cup | For tender crumb texture |
| Olive Oil 🫒 | 1 tbsp | For pan greasing |
The flour is critical here. King Arthur Bread Flour is the gold standard for its consistent protein content (12-14%), which creates that soft yet sturdy structure. Yeast freshness is non-negotiable—check the expiration date and store unopened packets in the freezer. For best results, use a kitchen thermometer to verify water temperature. 110°F is the sweet spot for yeast activation without killing it.
No bread flour? All-purpose flour plus vital wheat gluten (1 tbsp per cup) works in a pinch. Out of dry milk? Replace with liquid milk at one-third the amount. The egg adds richness but can be omitted—substitute with 2 tbsp additional water and 1 tbsp oil. Butter can be swapped for vegetable oil or margarine without texture loss, though flavor will be milder.
Store dry ingredients in airtight containers at room temperature. Completed buns keep 3-4 days at room temperature in a paper bag, or freeze for up to 3 months. Always cool completely before freezing to prevent condensation and sogginess.
Why You’ll Love This Recipe
- Hands-Off Magic: I just dump the ingredients in, press a button, and let the machine do the kneading and rising while I sip my coffee.
- Buttery Perfection: The unsalted butter makes these buns soft inside with just the right golden crust.
- Meal Prep Hero: I bake a batch Sunday and they reheat beautifully for sandwiches all week.
- Pantry Staples Only: Bread flour, yeast, sugar—things I always have on hand, so no last-minute grocery runs.
Step-by-Step Instructions for Bread Maker Buns
Master the bread maker technique for consistently soft, pillowy buns with minimal effort.
Step 1: Activate the Yeast and Combine Wet Ingredients
Begin by adding the 1.25 cups Warm Water to your bread maker pan. The ideal temperature is 110°F—it should feel warm but not hot to the touch. Too hot will kill the yeast, too cold won’t activate it properly.
Next, add the 2.25 tsp Active Dry Yeast directly to the water. I let it sit for 5 minutes until it becomes foamy on top. Then add the 1 whole Large Egg, 2 tbsp Granulated Sugar, and 3 tbsp Unsalted Butter to the pan. The sugar feeds the yeast while the butter enriches the dough for a tender crumb.
Step 2: Incorporate the Dry Components
Add the 4 cups Bread Flour to the pan, spreading it evenly over the wet ingredients. The high-protein content in bread flour develops the gluten structure needed for soft, elastic buns.
Create a small well in the center of the flour and add the 1.5 tsp Salt and 0.5 cup Non-Fat Dry Milk. The salt regulates yeast activity and enhances flavor, while the dry milk adds tenderness to the final texture. Be careful not to let the salt come into direct contact with the yeast, as it can inhibit activation.
Step 3: Select the Dough Setting and Begin the Cycle
Secure the pan in your bread maker and select the dough setting. This cycle typically runs for 1 hour 30 minutes to 2 hours, during which the machine will knead, rise, and develop the dough. Most bread makers have a window to monitor the process.
About 10 minutes into the cycle, check that the dough has formed a smooth, elastic ball. If it appears too dry, add 1 tsp of water; if too sticky, add 1 tsp of bread flour. The dough should pull away from the sides of the pan but still be slightly tacky to the touch.
Step 4: Shape and Proof the Buns
Once the dough cycle completes, transfer the dough to a lightly floured surface. Divide it into 12 equal portions (about 3 oz each) for standard-sized buns. Roll each piece into a smooth ball by cupping your hand over the dough and rotating it against the counter.
Place the shaped buns on a baking sheet lined with parchment paper, spacing them about 2 inches apart. Lightly brush the tops with the 1 tbsp Olive Oil to prevent drying. Cover with a clean kitchen towel and let them proof at room temperature for 30-45 minutes until nearly doubled in size.
Step 5: Bake to Golden Perfection
Preheat your oven to 375°F. Once the buns have proofed, bake them for 15-18 minutes or until they turn a golden brown on top. The internal temperature should reach 190°F when fully baked.
For an extra-soft finish, brush the warm buns with melted butter immediately after removing them from the oven. Transfer to a wire rack to cool for at least 10 minutes before serving. The buns will be light, airy, and perfect for sandwiches or dinner rolls.
Pro Tips For Making Bread Bun Recipe For Bread Maker
- Test Your Yeast: Always proof your active dry yeast in the warm water with a pinch of sugar first—if it doesn’t foam within 5 minutes, your buns won’t rise and you’ll waste flour.
- Use Room-Temp Butter: Take the unsalted butter out 30 minutes before starting so it softens evenly; cold butter won’t incorporate well and leaves greasy streaks in the dough.
- Skip Overloading Flour: I learned this the hard way—stick to the exact bread flour measurement, as adding extra for stickiness makes dense, dry buns that don’t pull apart nicely.
- Let Them Cool: Resist cutting into the buns straight from the bread maker and give them 10 minutes on a rack—this prevents that gummy texture in the middle.
Pro Cooking Tips for Great bread bun recipe for bread maker
💡 Master the Dough Consistency
For the perfect bread bun recipe for bread maker, ensure your dough is soft but not sticky. If it’s too wet, add 1 tbsp of flour at a time; if too dry, add 1 tsp of water. The dough should pull away from the sides of the pan but still feel slightly tacky.
🌡️ Perfect Proofing Temperature
Let your dough rise in a warm, draft-free spot. Ideal proofing temperature is 75–85°F (24–29°C). If your kitchen is cool, place the bread maker in an oven with the light on for gentle warmth. This ensures even rising and fluffy buns.
✨ Boost Flavor and Texture
Add a touch of honey or sugar to the dough for a subtle sweetness and softer crumb. For extra richness, replace water with warm milk. Brush the baked buns with melted butter for a glossy, tender finish.
🎯 Timing Matters
Don’t rush the process! Let the bread maker complete its full cycle, including the final rise. If your machine has a dough-only setting, transfer the dough to a baking sheet for shaping and baking. This gives you more control over the final texture.
Nutrition Facts

- 6 Egg Cake Recipe with Oil: Light as Air With Buttery Moisture - October 4, 2026
- 4 Bean Casserole Recipe: One-Pan Heartiness With Smoky Paprika Depth - October 4, 2026
- 3-Ingredient Keto Mug Cake Recipe: Microwave Magic in 2 Minutes - October 4, 2026