
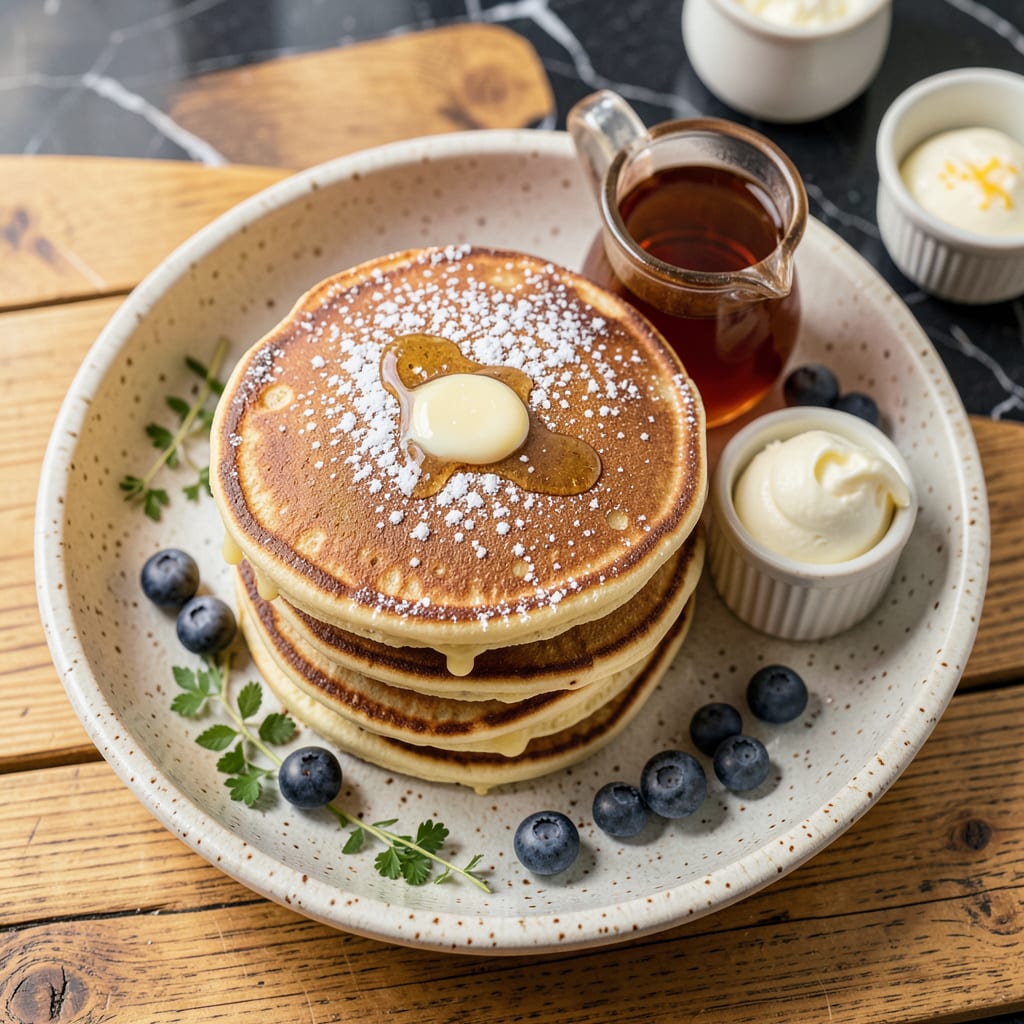
There’s a scientific reason why bread flour creates the fluffiest pancakes you’ll ever make. The higher protein content (12-14%) develops more gluten during mixing, resulting in a structure that traps air beautifully during cooking. This isn’t just another pancake recipe—it’s a texture revolution that turns ordinary breakfast into something extraordinary.
What sets these apart is the perfect balance between chewiness and lightness. The bread flour creates pancakes with substance that still melt in your mouth, while maintaining those coveted golden edges. You’ll need just 20 minutes and a few pantry staples to achieve diner-quality results at home—no special equipment required.
Ingredients for Bread Flour Pancakes
These pantry staples transform into diner-quality pancakes with just one special ingredient: bread flour.
| Ingredient | Amount | Notes |
|---|---|---|
| Bread Flour 🌾 | 2 cups | 12-14% protein content essential |
| Granulated Sugar 🍚 | 2 tbsp | Fine white sugar preferred |
| Baking Powder 🧂 | 2 tsp | Aluminum-free for best flavor |
| Baking Soda 🧂 | ½ tsp | Fresh for optimal rise |
| Kosher Salt 🧂 | ¾ tsp | Diamond Crystal preferred |
| Large Eggs 🥚 | 2 whole | Room temperature for best mixing |
| Whole Milk 🥛 | 1 ½ cups | Full-fat for richness |
| Unsalted Butter 🧈 | 4 tbsp | Melted, plus extra for cooking |
| Vanilla Extract 🌿 | 1 tsp | Pure extract, not imitation |
| Vegetable Oil 🫒 | 1 tbsp | For griddle preparation |
| Pure Maple Syrup 🍁 | ½ cup | For serving, optional |
| Fresh Blueberries 🫐 | 1 cup | Optional, for topping |
The bread flour is non-negotiable here—King Arthur or Bob’s Red Mill are my go-tos for consistent 12-14% protein. Don’t substitute all-purpose; the higher gluten content is what creates that signature fluffiness. For the baking powder, Rumford (aluminum-free) gives the cleanest flavor. The milk should be whole for richness, but I’ve used 2% in a pinch with decent results. Always check your baking soda’s freshness—drop a pinch in hot water; if it doesn’t bubble vigorously, toss it.
No buttermilk? Whole milk plus 1 tbsp lemon juice works perfectly. Out of vanilla? Maple syrup in the batter adds depth (reduce sugar slightly). For vegan pancakes, swap eggs with flax eggs (1 tbsp ground flax + 3 tbsp water per egg) and use plant-based milk. The butter can be replaced with coconut oil, but the flavor will change slightly. Blueberries can be swapped with chopped strawberries or chocolate chips—just toss them in flour first to prevent sinking.
Dry ingredients can be mixed ahead and stored in an airtight container for 1 month. The batter itself is best used immediately, but leftovers reheat beautifully in a toaster or 350°F oven for 5-7 minutes. Cooked pancakes freeze well for 2 months—layer with parchment paper and store in zip-top bags. Always bring refrigerated batter to room temp before cooking for even texture.
Why You’ll Love This Recipe
- One-Bowl Magic: I dump everything—bread flour, sugar, the leavening duo—straight into one bowl, whisk, and pour. No sifting, no separate mixing, just a single vessel to wash when I’m done.
- Chewy Meets Fluffy: That bread flour gives these pancakes structure with a slight chew, while the baking powder and soda keep them light. It’s the texture I crave: crisp edges, tender middle, no gumminess.
- Breakfast or Brinner: Honestly, I’ve made these for lazy Sunday mornings and rushed Tuesday dinners. They’re just as good with syrup as they are topped with fried eggs and hot sauce.
- Leftovers? Yes, Please: The batch keeps beautifully—stack them in the fridge for quick reheats, or freeze extras for those mornings when even toast feels like too much effort. (My kids grab them cold, no complaints.)
Step-by-Step Instructions for Bread Flour Pancakes
Here’s the method I use to create perfectly fluffy pancakes with that ideal golden-brown crust.
Step 1: Combine Dry Ingredients for Maximum Rise
In a large mixing bowl, whisk together the 2 cups Bread Flour, 2 tbsp Granulated Sugar, 2 tsp Baking Powder, 0.5 tsp Baking Soda, and 0.75 tsp Kosher Salt. I like to sift these ingredients directly into the bowl to prevent any lumps and ensure even distribution of the leavening agents.
The combination of baking powder and baking soda creates that signature lift we’re after. Make sure your baking soda is fresh—it loses potency over time. You’ll notice the mixture takes on a slightly pale yellow hue from the sugar, which will help with browning later.
Step 2: Create the Wet Mixture with Care
In a separate bowl, whisk the 2 whole Large Eggs until they’re uniformly pale yellow. Then add the 1.5 cups Whole Milk, 4 tbsp Unsalted Butter (melted and slightly cooled), and 1 tsp Vanilla Extract. Whisk vigorously for 30 seconds until the mixture is completely homogeneous and slightly frothy.
Here’s the thing—the butter should be melted but not hot, or it might cook the eggs prematurely. I always check by touching the bottom of the bowl—it should feel just warm to the touch. The vanilla will perfume the mixture beautifully, giving you that classic pancake aroma.
Step 3: Gently Combine for Tender Pancakes
Pour the wet ingredients into the dry ingredients all at once. Using a silicone spatula, fold the mixture gently just until the flour is mostly incorporated. You should still see some small lumps—this is crucial for tender pancakes. Overmixing develops gluten, which makes pancakes tough rather than fluffy.
The batter should be thick but pourable, similar to heavy cream. If it seems too stiff, add a splash more milk, but remember that bread flour absorbs more liquid than all-purpose. Let the batter rest for 5 minutes while you heat your griddle—this gives the flour time to fully hydrate.
Step 4: Cook to Golden Perfection
Heat a griddle or large skillet over medium heat and add the 1 tbsp Vegetable Oil. When the oil shimmers and a drop of water sizzles when flicked onto the surface, you’re ready. Pour ¼ cup portions of batter onto the griddle, leaving space between each pancake.
Cook for 2-3 minutes until bubbles form on the surface and the edges look set. The bubbles should be about the size of a dime and hold their shape when they pop. Flip carefully and cook for another 1-2 minutes until the second side is golden brown and the pancakes spring back when lightly pressed.
Step 5: Serve with Perfect Toppings
Transfer the pancakes to a warm plate and serve immediately. I love drizzling them with 0.5 cup Pure Maple Syrup that’s been gently warmed—it soaks into the nooks and crannies beautifully. For a fresh contrast, scatter 1 cup Fresh Blueberries over the top, letting their juices mingle with the syrup.
The bread flour gives these pancakes incredible structure—they’ll hold up to all your favorite toppings without getting soggy. Each bite should be light yet substantial, with a tender crumb and just the right amount of crispness at the edges. These are best enjoyed fresh off the griddle while still steaming hot.
Pro Cooking Tips for This Dish
Perfect Batter Consistency
The secret to these pancakes lies in the batter’s thickness—it should coat the back of a spoon but still drip slowly. Bread flour absorbs more liquid than all-purpose, so don’t panic if your batter seems thicker than usual. I aim for a consistency like Greek yogurt—thick but still pourable. If needed, add milk 1 tbsp at a time until perfect. 💡
Griddle Temperature Control
A perfectly heated griddle is non-negotiable. I use an infrared thermometer to verify my griddle hits 375°F before pouring batter. Too hot and you’ll burn the outside before the center cooks; too cool and you’ll get pale, gummy pancakes. The oil should shimmer but not smoke when ready.
Flipping Technique
Wait for bubbles to form and pop, leaving small craters on the surface. The edges should look dry and set before flipping. I use a thin, flexible spatula to slide under each pancake quickly and confidently. Only flip once—resist the urge to peek or press down, which squashes those beautiful air pockets.
Resting the Batter
This 5-minute rest isn’t optional—it allows the flour to fully hydrate and the gluten to relax. I set a timer and use this time to prep my toppings and warm the syrup. You’ll notice the batter thickens slightly during this rest, which is exactly what we want for that perfect fluffy texture.
Butter Management
Melted butter in the batter adds richness, but fresh butter on the griddle creates that crisp golden crust. I keep a small dish of melted butter and a pastry brush nearby to refresh the griddle between batches. The milk solids in butter add incredible flavor that oil just can’t match.
Stacking Strategy
Keep finished pancakes warm in a 200°F oven on a wire rack while you cook the rest. Stacking them directly would create steam and make them soggy. The wire rack allows air circulation, maintaining that perfect crispness until serving time. Serve within 10 minutes for optimal texture. 🔥
Nutrition Facts

- 6 Egg Cake Recipe with Oil: Light as Air With Buttery Moisture - October 4, 2026
- 4 Bean Casserole Recipe: One-Pan Heartiness With Smoky Paprika Depth - October 4, 2026
- 3-Ingredient Keto Mug Cake Recipe: Microwave Magic in 2 Minutes - October 4, 2026