
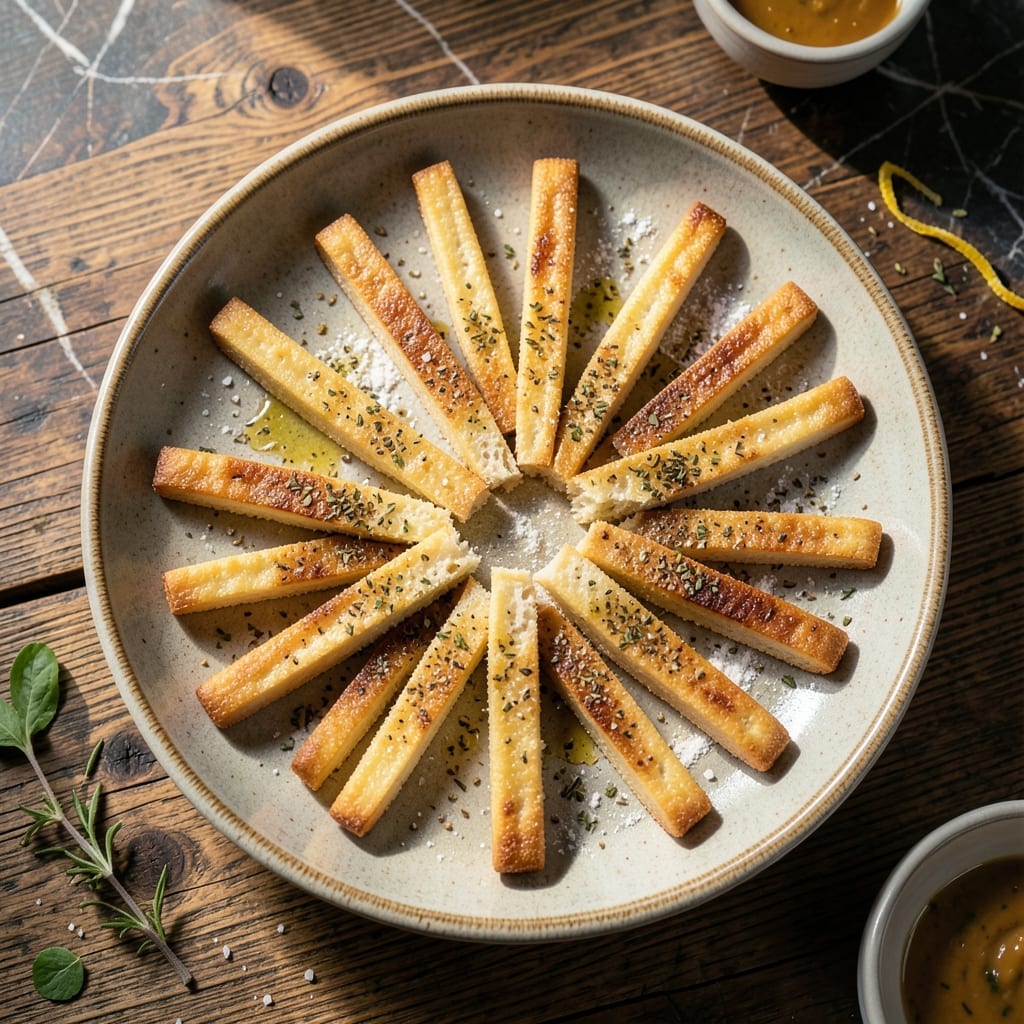
I’ve mastered the art of crispy, golden breadsticks without yeast—no waiting, no fuss. This method delivers bakery-quality results with just a few pantry staples and minimal effort.
The secret lies in using baking powder for lift and a touch of olive oil for that perfect, flaky texture. Rolling the dough thin ensures even baking and maximum crispness in every bite.
In under 30 minutes, you’ll have warm, fragrant breadsticks ready to serve with soup, salad, or as a standalone snack. Their light, airy interior and shatteringly crispy exterior make them irresistible.
No special equipment needed—just a bowl, a rolling pin, and an oven. Simple, fast, and foolproof.
Ingredients for Breadsticks Recipe No Yeast
Pantry staples come together for bakery-style breadsticks without the wait.
| Ingredient | Amount | Notes |
|---|---|---|
| All-Purpose Flour 🌾 | 2 cups | Plus extra for dusting |
| Baking Powder 🧂 | 2 tsp | For rise without yeast |
| Salt 🧂 | 1 tsp | Fine sea salt preferred |
| Olive Oil 🫒 | 2 tbsp | Extra-virgin for flavor |
| Water 💧 | ¾ cup | Warm, not hot |
| Garlic Powder 🧄 | 1 tsp | Optional for flavor boost |
| Dried Oregano 🌿 | ½ tsp | Or Italian seasoning |
| Coarse Sea Salt 🧂 | 1 tsp | For topping before baking |
| Black Pepper 🌶️ | ¼ tsp | Freshly ground preferred |
| Olive Oil 🫒 | 1 tbsp | For brushing before baking |
The flour is the foundation here. King Arthur or Gold Medal all-purpose works perfectly—no need for fancy bread flour. Baking powder is your leavening agent (make sure it’s fresh, or your sticks won’t rise). I grab mine from Whole Foods since they turn over stock quickly. The olive oil adds that flaky texture, so use the good stuff (trust me on this).
No baking powder? Baking soda plus cream of tartar (1:2 ratio) in a pinch. Out of oregano? Dried basil or thyme works too. Garlic powder can be fresh garlic (1 clove = 1/4 tsp powder). If you’re skipping the seasonings, add a pinch of sugar to help browning. The water temp matters—warm but not hot, or it’ll kill the baking powder’s lift.
Dough keeps 1 day wrapped in the fridge, but it’s best fresh. Baked breadsticks? Store in an airtight container for 2-3 days (reheat in oven to crisp). Freeze dough balls for up to 1 month—roll and bake straight from frozen.
Why You’ll Love This Recipe
- No Yeast Needed: I love that there’s no waiting for dough to rise—just mix, shape, and bake.
- Crispy & Flaky: The olive oil gives them that irresistible golden crust with a tender bite.
- Last-Minute Hero: Honestly, these save dinner when I need something warm and fast.
- Pantry Staples: All-purpose flour and baking powder mean I can make these anytime without a grocery run.
Step-by-Step Instructions for Breadsticks Without Yeast
Here’s the method that delivers crispy, golden breadsticks without the wait for yeast to rise.
Step 1: Mix the Dry Ingredients and Wet Components
In a large bowl, whisk together the 2 cups All-Purpose Flour, 2 tsp Baking Powder, 1 tsp Salt, 1 tsp Garlic Powder, and 0.5 tsp Dried Oregano. I always sift my flour first to avoid lumps in the dough.
Make a well in the center and add the 2 tbsp Olive Oil and 0.75 cup Water. Use a wooden spoon to gradually incorporate the dry ingredients into the wet until a shaggy dough forms. The dough will be slightly sticky but shouldn’t cling to your hands.
Step 2: Knead and Rest the Dough Briefly
Turn the dough out onto a lightly floured surface. I dust with a bit of extra all-purpose flour to prevent sticking. Knead gently for 2-3 minutes until smooth and elastic. Don’t overwork it—this isn’t bread dough, and too much handling makes breadsticks tough.
Shape the dough into a ball, cover with a clean kitchen towel, and let it rest for 10 minutes. This short rest allows the baking powder to start working its magic, making the dough easier to shape without springing back.
Step 3: Shape and Season the Breadsticks
Preheat your oven to 400°F. Divide the rested dough into 12 equal portions—I use a bench scraper for clean cuts. Roll each piece on your work surface into a 6-8 inch rope, about ½ inch thick. As you roll, taper the ends slightly for that classic breadstick look.
Arrange the ropes on a parchment-lined baking sheet, spacing them 1 inch apart. Brush each with the remaining 1 tbsp Olive Oil, then sprinkle with 1 tsp Coarse Sea Salt and 0.25 tsp Black Pepper. This oil helps the seasoning stick and promotes even browning.
Step 4: Bake to Crispy, Golden Perfection
Bake on the middle rack for 15-18 minutes, rotating the pan halfway through for even cooking. Watch for the edges to turn a deep golden brown—that’s your visual cue they’re crisping up properly.
The breadsticks are done when they’re firm to the touch and make a hollow sound when tapped. If they’re browning too quickly, lower the oven temperature to 375°F and extend the baking time by 2-3 minutes. Let them cool on the pan for 5 minutes before serving—they’ll crisp up even more as they cool.
Pro Tips For Making Breadsticks Recipe No Yeast
- Roll Them Thin: Aim for pencil-thin sticks—any thicker and they’ll stay doughy inside. I learned this the hard way after pulling out a batch that looked like breadsticks but ate like biscuits.
- Warm the Olive Oil: Heat the olive oil slightly before mixing—about 10 seconds in the microwave. It helps the dough come together faster and gives a smoother texture.
- Don’t Overwork Dough: Knead just until combined, about 1-2 minutes. Overworking it makes the breadsticks tough, and nobody wants a chewy breadstick.
- Bake Hot and Fast: Crank the oven to 425°F and bake for 12-15 minutes. High heat ensures they crisp up without drying out.
Make-Ahead Tips for This Recipe
Prep Ahead Dough
You can mix and knead the dough up to 24 hours in advance. After shaping into a ball, wrap it tightly in plastic wrap and refrigerate. When ready to bake, let it sit at room temperature for 15 minutes to soften before rolling. 💡
Dough Ball Freezing
Divide uncooked dough into portions and freeze on a tray for 1 hour, then transfer to a freezer bag. These keep for 1 month. Bake straight from frozen, adding 2-3 minutes to the cooking time.
Pre-Shaped Breadsticks
Roll and season the breadsticks, then cover and refrigerate for up to 12 hours. Let them sit at room temperature for 10 minutes before baking. This method works great for dinner parties.
Baked Breadstick Storage
Store cooled breadsticks in an airtight container at room temperature for up to 3 days. They’ll soften slightly but regain crispness when reheated in a 350°F oven for 5 minutes. ❄️
Reheating for Crowds
To serve a group, reheat multiple breadsticks on a baking sheet at 375°F for 3-5 minutes. Spritz lightly with water before reheating to restore freshness. Avoid the microwave—it makes them soggy.
Flavor Boost Tip
For extra flavor when reheating, brush with melted garlic butter or sprinkle with grated Parmesan. This trick makes day-old breadsticks taste fresh from the oven.
Nutrition Facts
Frequently Asked Questions
Why use baking powder instead of yeast?
Baking powder provides instant leavening without waiting for rising time. It creates air pockets that make the breadsticks light and crispy in under 30 minutes. Yeast would require 1-2 hours of proofing.
Can I make these with gluten-free flour?
Yes, but use a 1:1 gluten-free all-purpose blend with xanthan gum. The texture will be slightly denser, and you may need 1-2 tbsp extra water. Bake for 2-3 minutes longer.
How do I get extra crispy breadsticks?
Roll the dough as thin as possible (¼ inch) and bake at 400°F until deep golden. Brush with olive oil before baking for maximum crispness.
What if my dough is too sticky?
Add 1-2 tbsp more flour while kneading. Avoid over-flouring, or the breadsticks will become dry. The dough should be smooth but slightly tacky.

- 6 Egg Cake Recipe with Oil: Light as Air With Buttery Moisture - October 4, 2026
- 4 Bean Casserole Recipe: One-Pan Heartiness With Smoky Paprika Depth - October 4, 2026
- 3-Ingredient Keto Mug Cake Recipe: Microwave Magic in 2 Minutes - October 4, 2026