
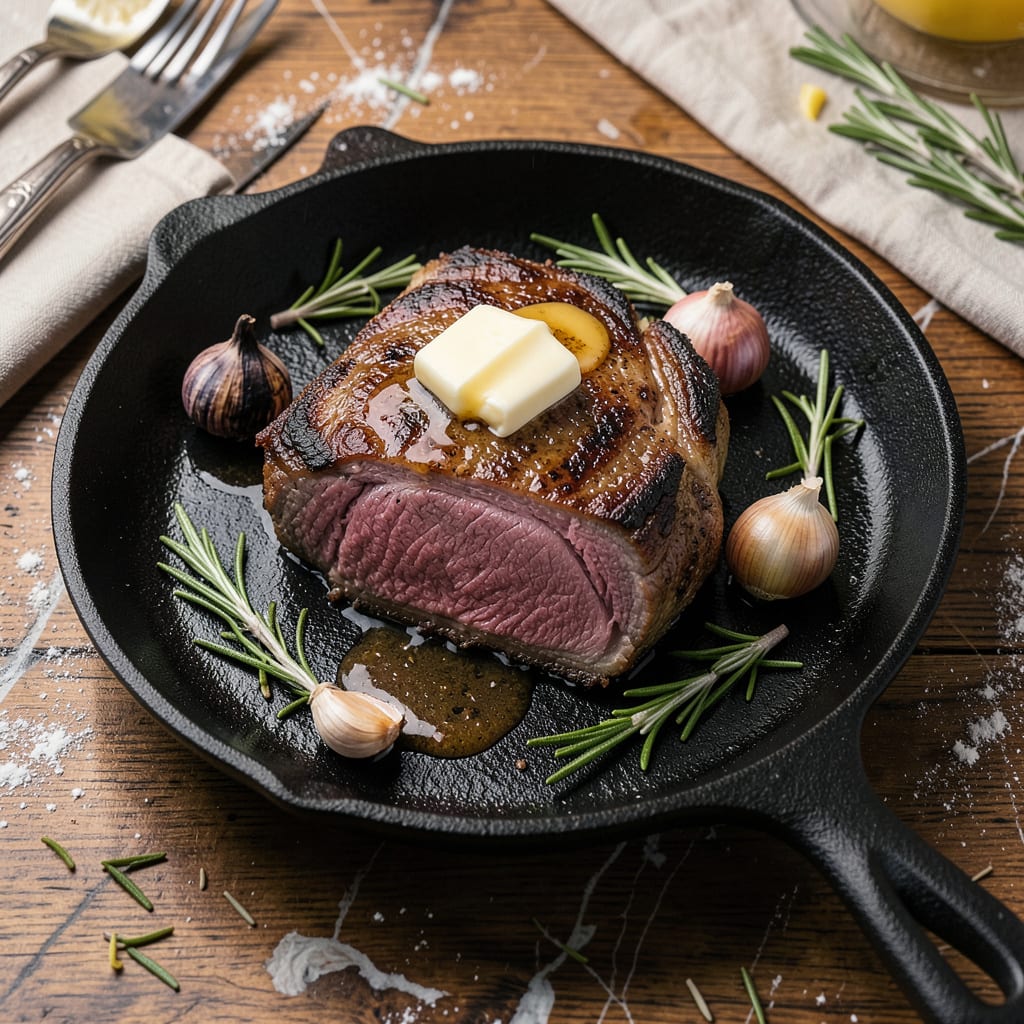
Achieving perfectly broiled ribeye steak in your oven delivers restaurant-quality results with minimal effort. This method produces a juicy, tender interior beneath a deeply caramelized crust—all without a grill. The broiler’s intense, direct heat mimics high-temperature searing while maintaining precise control over doneness.
What sets this technique apart is its simplicity and reliability. By positioning the steak close to the broiler element and monitoring internal temperature, you ensure consistent results every time. The process requires just 15 minutes of active cooking, making it ideal for weeknight dinners that feel special. No specialized equipment needed—just your oven and a reliable meat thermometer.
Ingredients for Broiled Ribeye Steak Recipe Oven
Optimal quality requires just nine ingredients to achieve restaurant-level broiled ribeye steak with caramelized crust and juicy interior.
| Ingredient | Amount | Notes |
|---|---|---|
| Ribeye Steak 🥩 | 2 whole | Bone-in, 1.5 inches thick |
| Diamond Crystal Kosher Salt 🧂 | 1 ½ tbsp | For dry-brining steak |
| Freshly Ground Black Pepper 🌶️ | 1 tbsp | Coarse grind preferred |
| Garlic Cloves 🧄 | 4 cloves | Lightly crushed, optional |
| Unsalted Butter 🧈 | 4 tbsp | European-style preferred |
| Fresh Rosemary Sprigs 🌿 | 2 whole | Optional for aromatics |
| Fresh Thyme Sprigs 🌿 | 3 whole | Optional for aromatics |
| Extra-Virgin Olive Oil 🫒 | 1 tbsp | High smoke point preferred |
| Flaky Sea Salt 🧂 | ½ tsp | For finishing (Maldon preferred) |
The ribeye selection is paramount for this technique. USDA Prime or Choice grade ensures optimal marbling—critical for juiciness under broiler heat. Source from reputable butchers or Whole Foods for consistent quality. Thickness matters: 1.5-inch steaks provide the ideal balance between crust development and internal doneness. Bone-in cuts offer superior flavor, though boneless works if necessary. Dry-brining with Diamond Crystal kosher salt (not table salt) for 1-24 hours yields the best texture and seasoning penetration.
Substitutions require careful consideration. New York strip can replace ribeye but lacks marbling—compensate with additional butter basting. For salt, avoid iodized varieties; Morton kosher salt requires half the quantity by volume. The butter must be unsalted to control seasoning—Plugrá or Kerrygold deliver superior browning. Fresh herbs can be omitted, but dried versions won’t provide the same aromatic impact. Olive oil alternatives should maintain a 480°F+ smoke point—avocado oil works well.
Storage demands precision for food safety. Raw steaks keep 3-5 days refrigerated or 6-12 months vacuum-sealed in the freezer. Post-cooking, rest steaks 10 minutes before slicing to retain juices. Leftover cooked steak maintains quality for 3 days refrigerated—reheat gently in butter to preserve texture. The dry-brined steaks can remain uncovered in the fridge overnight, developing a tacky surface ideal for crust formation. Always bring steaks to room temperature 1 hour before broiling for even cooking.
Why You’ll Love This Recipe
- I’ll be real: cold ribeye makes the best next-day sandwiches. Thinly sliced on crusty bread with a smear of mayo? Spot-on. Or chop it into fried rice—suddenly takeout feels overrated.
- No-Flip Needed: I love that the broiler does all the work—just season, slide it in, and let the oven handle the rest. No flipping, no splattering grease, just perfectly even cooking while I set the table.
- Butter-Garlic Magic: That moment when melted butter, crushed garlic, and black pepper hit the hot steak? Ridiculously good. The salt crust from the Diamond Crystal kosher salt locks in juices while the butter bastes it into something fancy-restaurant-level.
- Date Night or Tuesday: Honestly, this feels special enough for anniversary steaks but unfussy enough for a solo dinner. I’ve served it with roasted potatoes for guests and straight from the pan with toast for myself (yes, on a Tuesday night).
Step-by-Step Instructions for Broiled Ribeye Steak
The broiler method delivers restaurant-quality results with precise timing and technique.
Step 1: Season and Prepare the Ribeye
Begin by patting the ribeye steaks completely dry with paper towels. This critical step ensures maximum browning and crust development. Season both sides aggressively with the 1.5 tbsp Diamond Crystal kosher salt and 1 tbsp freshly ground black pepper, pressing the seasoning into the meat’s surface.
Let the seasoned steaks rest at room temperature for 45-60 minutes. This dry-brine period allows the salt to penetrate the meat while the surface dries further, creating ideal conditions for browning. Position an oven rack 4-6 inches from the broiler element during this resting time.
Step 2: Preheat Broiler and Prepare Aromatics
Turn the broiler to high and allow it to preheat for 10 minutes. The intense, direct heat is essential for developing a proper crust. While preheating, lightly crush the 4 garlic cloves with the flat side of your knife, keeping the skins intact to prevent burning.
Combine the 2 whole fresh rosemary sprigs, 3 whole fresh thyme sprigs, and crushed garlic on a small baking sheet. These aromatics will infuse the butter during the broiling process. Place the sheet on the lower oven rack where it will gently warm without burning.
Step 3: Broil the Steaks to Perfection
Place a heavy oven-safe skillet or broiler pan on the preheated upper rack. Add the 1 tbsp extra-virgin olive oil and swirl to coat the pan. When the oil begins to shimmer, carefully place the steaks in the pan. Broil for 4-5 minutes until the top surface develops a deep golden-brown crust.
Using tongs, flip the steaks and broil for an additional 3-4 minutes for medium-rare doneness. The internal temperature should reach 125-130°F when measured with an instant-read thermometer inserted into the thickest part. Watch closely during this phase as broiler intensity varies between ovens.
Step 4: Baste with Aromatic Butter
Remove the steaks from the oven and immediately add the 4 tbsp unsalted butter to the hot pan. As it melts, tilt the pan and spoon the foaming butter over the steaks repeatedly for 30-45 seconds. This basting technique enhances flavor and promotes even cooking.
Add the warmed aromatics to the pan and continue basting for another 15-20 seconds, allowing the garlic, rosemary, and thyme to infuse the butter. The butter should turn a light golden color but not brown, which would indicate burning.
Step 5: Rest and Serve
Transfer the steaks to a cutting board and tent loosely with aluminum foil. Allow them to rest for 8-10 minutes before slicing. This resting period enables the juices to redistribute throughout the meat, ensuring each bite remains moist and flavorful.
Slice the steaks against the grain into ½-inch thick pieces. Finish with a sprinkle of 0.5 tsp flaky sea salt for added texture and brightness. Serve immediately while the crust remains crisp and the interior stays perfectly juicy.
Troubleshooting Perfect Results
Uneven Cooking
If your steak has one side perfectly crusty while the other remains underdone, your oven’s broiler element likely has hot spots. I’ve found that rotating the pan 180 degrees halfway through cooking solves this. For stubborn ovens, try moving the steak to a different position on the rack after flipping.
Another trick is to use a heavy cast-iron skillet—it distributes heat more evenly than thin broiler pans. I keep my Lodge 12-inch dedicated for broiling because its heat retention prevents temperature fluctuations. 🔥
Overcooked Exterior
When the crust forms too quickly but the interior isn’t done, your rack is likely too close to the broiler. Start with the rack 6 inches from the element instead of 4. If using a convection broiler, reduce the temperature by 25°F—these run hotter than standard broilers.
I also recommend checking your oven’s manual—some models cycle the broiler element on/off, which can cause uneven browning. A broiler pan with slotted top helps moderate direct heat while allowing drippings to escape.
Smoke Alarm Issues
Excessive smoke usually means fat drippings are burning. Line the lower oven rack with aluminum foil to catch drippings, and always use a pan with high sides. I keep a box fan nearby to quickly clear smoke if needed—just crack a window and position it to blow outward.
For particularly fatty ribeyes, trim any large exterior fat caps before cooking. The 1 tbsp olive oil in the pan should be just enough to prevent sticking without creating smoke. Open windows before starting to improve ventilation.
Dry or Tough Texture
This typically results from overcooking or insufficient resting. Pull the steak at 125°F for medium-rare—the temperature will rise 5-10°F during resting. I use a ThermoWorks Thermapen for instant, accurate readings.
If you’ve already overcooked it, slice the steak thinly against the grain and serve with extra butter or a red wine pan sauce to compensate. For future cooks, remember that carryover cooking continues for several minutes after removing from the oven. ⏰
Weak Crust Development
A pale, soft crust usually means the steak wasn’t dry enough before cooking or the broiler wasn’t hot enough. Pat the steaks thoroughly dry with paper towels and let them sit uncovered in the fridge for 1-2 hours before cooking to develop a tacky surface.
Ensure your broiler is fully preheated for 10 minutes before adding the steak. The pan should be screaming hot—when you add the olive oil, it should shimmer immediately. A sprinkle of baking soda (⅛ tsp per steak) mixed with your seasoning can enhance browning.
Butter Burning
Burnt butter creates bitter flavors. The solution is timing—add the 4 tbsp butter only after removing the steak from the oven. Keep the heat on but move the pan to a cooler spot on the stovetop if your oven retains too much heat.
Use European-style butter with higher fat content (like Plugrá) as it browns more evenly. If you notice the butter turning dark too quickly, remove the pan from heat entirely while basting. The residual heat will keep the butter melted without burning. ✨
Nutrition Facts

- 6 Egg Cake Recipe with Oil: Light as Air With Buttery Moisture - October 4, 2026
- 4 Bean Casserole Recipe: One-Pan Heartiness With Smoky Paprika Depth - October 4, 2026
- 3-Ingredient Keto Mug Cake Recipe: Microwave Magic in 2 Minutes - October 4, 2026