
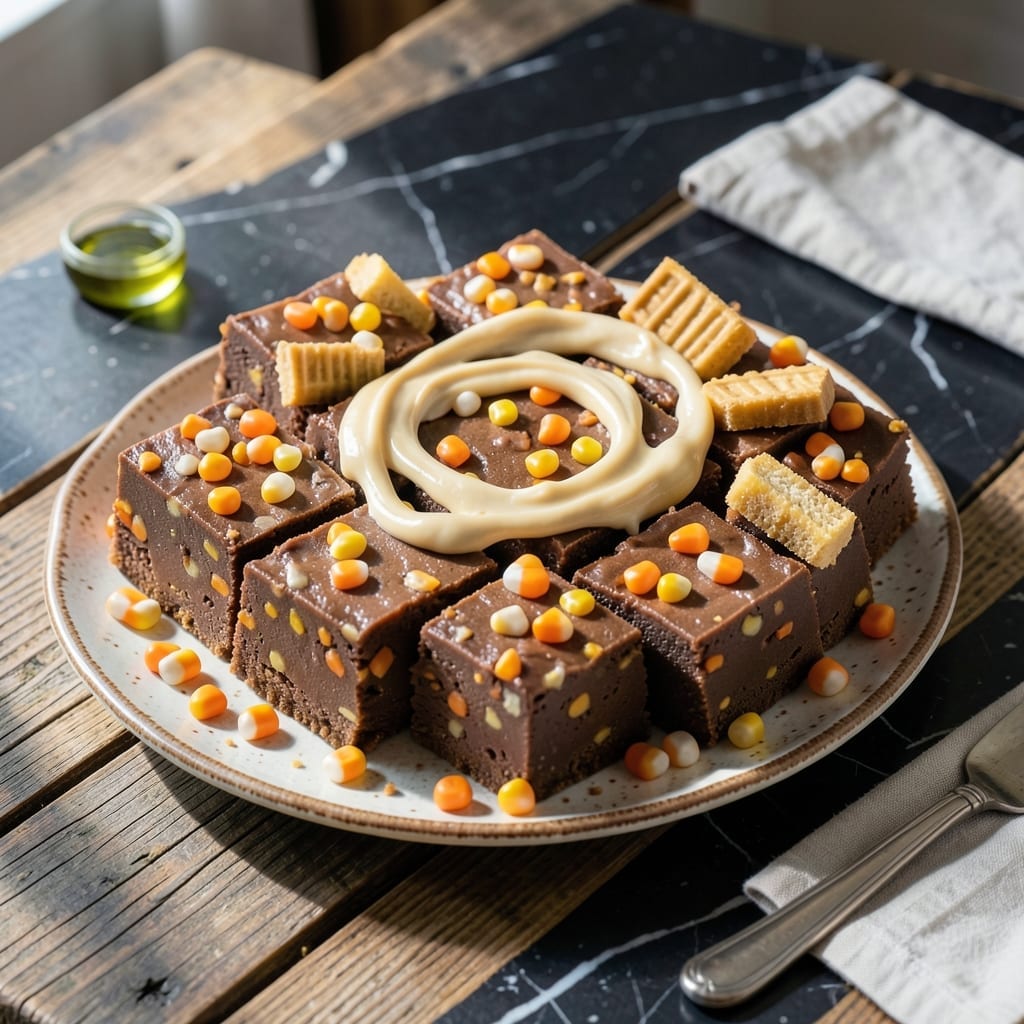
This fudge delivers the classic Butterfinger crunch without the candy bar. I developed this recipe after realizing candy corn could mimic the iconic texture when melted with peanut butter.
The secret is timing. Cook the mixture to exactly 234°F, then let it cool undisturbed for 2 hours. This ensures the signature fudgy texture with that satisfying crunch throughout.
What you get is a rich, creamy fudge with pockets of peanut butter crunch in every square. The candy corn transforms completely, leaving only the flavor and texture you expect from Butterfinger.
Perfect for holiday gifting or satisfying that peanut butter craving. Follow these steps for consistent results every time.
Ingredients for Butterfinger Fudge Recipe Using Candy Corn
Nine ingredients transform into this creamy, crunchy fudge with peanut butter magic.
| Ingredient | Amount | Notes |
|---|---|---|
| Candy Corn 🍬 | 10 oz | Classic orange and white pieces |
| Creamy Peanut Butter 🥜 | 1 cup | Smooth, no added sugar preferred |
| Granulated Sugar 🍚 | 2 cups | Fine white sugar for smooth texture |
| Unsalted Butter 🧈 | ½ cup | Cut into small cubes |
| Evaporated Milk 🥛 | ¾ cup | Full-fat for creaminess |
| Marshmallow Fluff 🍡 | 7 oz | Or 1 jar of standard size |
| Vanilla Extract 🌿 | 1 tsp | Pure extract for best flavor |
| Salt 🧂 | ¼ tsp | Fine sea salt preferred |
| Semi-Sweet Chocolate Chips 🍫 | 1 ½ cups | For rich chocolate base |
| Chopped Peanuts 🥜 | ½ cup | Optional for extra crunch |
The candy corn is non-negotiable here—Brach’s is the classic choice, but any brand with that iconic texture works. Grab it fresh (check the seasonal aisle at Walmart or Target), since stale pieces won’t melt right. Peanut butter should be creamy and well-stirred—Jif or Skippy are reliable. For the chocolate chips, Ghirardelli or Guittard give the best melt.
No evaporated milk? Heavy cream at half the amount works, but the texture will be denser. Swap marshmallow fluff for mini marshmallows (melt them first). If you’re out of semi-sweet chips, bittersweet works too—just add a pinch more sugar. The peanuts are totally optional, but if you skip them, add an extra quarter cup of candy corn for that signature crunch.
This fudge sets up fast once cooled. Store in an airtight container at room temp for up to 1 week, or freeze for 3 months. Slice before it fully sets for cleaner cuts—worth the extra minute. A layer of parchment between layers prevents sticking (don’t skip this part).
Why You’ll Love This Recipe
- One Pot Wonder: I dump everything in a single saucepan—candy corn, peanut butter, the works—and it comes together without a fuss.
- Crave-Worthy Crunch: That first bite where the creamy fudge hits the candy corn’s signature crunch? I make a second batch just to avoid sharing.
- Holiday Lifesaver: I bring this to fall potlucks, and it’s always the first thing gone. Between us, I’ve stopped telling people how easy it is.
- Pantry Friendly: I use stuff I already have—candy corn from Halloween, peanut butter from the kids’ lunches. No special shopping, just pure satisfaction.
Step-by-Step Instructions for Butterfinger Fudge Using Candy Corn
This method transforms simple ingredients into rich, crunchy fudge with minimal effort and maximum flavor.
Step 1: Melt and Combine the Sugar Base
In a heavy saucepan, combine the 2 cups Granulated Sugar, 0.5 cup Unsalted Butter, and 0.75 cup Evaporated Milk. Cook over medium heat while stirring constantly to prevent scorching. You’ll notice the butter melting first, followed by the sugar dissolving into a smooth mixture.
Continue cooking until the mixture reaches a full rolling boil. This usually takes 8-10 minutes. At this stage, the liquid will thicken slightly and develop a light caramel color. I use a silicone spatula to scrape the sides of the pan, ensuring even cooking and preventing sugar crystals from forming.
Step 2: Incorporate the Candy Corn and Peanut Butter
Once boiling, remove the pan from heat and immediately stir in the 10 oz Candy Corn. The candy will begin to melt and incorporate into the hot sugar mixture, creating a vibrant orange hue. Stir vigorously for 1-2 minutes until the candy corn is fully dissolved and the mixture is smooth.
Next, add the 1 cup Creamy Peanut Butter and 0.25 tsp Salt. The peanut butter will thicken the mixture significantly, so stir well to combine. At this point, you should have a thick, glossy caramel-peanut butter base that smells irresistibly sweet and nutty. Here’s the thing—this is the foundation of your fudge’s signature Butterfinger flavor.
Step 3: Add Marshmallow Fluff and Chocolate
Working quickly, stir in the 7 oz Marshmallow Fluff and 1 tsp Vanilla Extract. The marshmallow fluff will lighten the mixture and add a marshmallow sweetness that balances the rich peanut butter. Stir until the fluff is completely incorporated and the mixture is smooth.
Now, fold in the 1.5 cups Semi-Sweet Chocolate Chips until they’re evenly distributed and fully melted. The chocolate will turn the mixture a rich brown color and add a deep, fudgy texture. The heat from the caramel base should be sufficient to melt the chocolate chips without additional cooking.
Step 4: Fold in Chopped Peanuts and Set
For the final touch, stir in the 0.5 cup Chopped Peanuts to add that classic Butterfinger crunch. Make sure the peanuts are evenly distributed throughout the fudge mixture. I’ve found that using a wooden spoon works best for this step, as it allows you to fold the peanuts in without breaking them too much.
Immediately pour the fudge into a greased 8×8-inch pan or a pan lined with parchment paper. Use a spatula to smooth the top and ensure it’s evenly distributed. Let it cool at room temperature for 2 hours, or speed up the process by refrigerating for 1 hour until firm.
Step 5: Cut and Serve
Once the fudge is completely set, lift it out of the pan using the parchment paper and place it on a cutting board. Use a sharp knife to cut it into 1-inch squares. For the cleanest cuts, I like to heat the knife under hot water and wipe it dry between each cut.
Store the fudge in an airtight container at room temperature for up to 1 week, or refrigerate for longer storage. Each square should offer a perfect balance of creamy fudge, peanut butter richness, and crunchy peanut texture with a hint of candy corn sweetness.
Pro Tips For Making Butterfinger Fudge Recipe Using Candy Corn
- Melt Candy Corn Slow: Use low heat and stir constantly when melting the candy corn with butter—high heat will make it seize up and turn grainy. I learned this the hard way after ruining a batch by rushing it.
- Measure Peanut Butter Flat: Press your peanut butter into the measuring cup and level it off with a knife—packing it in adds too much and throws off the fudge’s texture.
- Boil Sugar Mixture Fully: Let the sugar, evaporated milk, and butter reach a full rolling boil for exactly 4-5 minutes, no less. Skipping this step leaves the fudge too soft and runny.
- Chill Before Cutting: Give the fudge at least 2 hours in the fridge before slicing—cutting too soon makes a sticky mess. After burning three batches, I finally figured out patience is the real ingredient here.
Essential Equipment for Great butterfinger fudge recipe using candy corn
Heavy Saucepan
A 3-4 quart heavy saucepan with a thick bottom is essential for even heat distribution. I use my All-Clad stainless steel pan—it prevents hot spots that could burn the sugar mixture. Thin pans will cause uneven cooking and potential scorching. 🔥
Candy Thermometer
Precision matters with fudge. A digital candy thermometer like the ThermoWorks Candy is my go-to. Clip it to the pan side and monitor closely to hit exactly 234°F. Traditional thermometers work too, but digital gives faster, more accurate readings.
Silicone Spatula
A heat-resistant silicone spatula is perfect for stirring the sugar mixture. It scrapes the pan sides cleanly and won’t melt under high heat. I prefer the OXO Good Grips model—its flexible head reaches into pan corners easily.
8×8-Inch Pan
For consistent thickness, use an 8×8-inch baking pan. I line mine with parchment paper for easy removal. Glass or metal both work, but avoid dark non-stick pans—they can cause over-browning. A USA Pan with a light finish is my favorite.
Wooden Spoon
When folding in the peanuts, switch to a wooden spoon. It gently incorporates add-ins without crushing them. A 12-inch bamboo spoon gives you the reach and control needed for thick fudge mixtures.
Parchment Paper
Don’t skip the parchment—it prevents sticking and makes removal effortless. I use pre-cut sheets from Reynolds Kitchens for convenience. Leave an overhang on all sides for easy lifting after the fudge sets. ✨
Nutrition Facts
Frequently Asked Questions
Can I use white chocolate chips instead?
Yes, but the flavor will be sweeter and less rich. Stick with semi-sweet for the classic Butterfinger taste. White chocolate works in a pinch but may overpower the peanut butter notes.
Why does the mixture need to reach 234°F?
This temperature ensures the sugar crystallizes properly for smooth, creamy fudge. Below 234°F, it may be grainy; above, it risks burning. Use a candy thermometer for accuracy.
How do I fix grainy fudge?
Reheat it gently to 234°F while stirring in 1-2 tablespoons of hot water or corn syrup. This dissolves sugar crystals for a smoother texture. Cool and set again.
Can I skip the parchment paper?
Not recommended. Parchment prevents sticking and makes removal easy. Without it, you’ll likely lose half your fudge to the pan. A light greasing isn’t enough.

- 6 Egg Cake Recipe with Oil: Light as Air With Buttery Moisture - October 4, 2026
- 4 Bean Casserole Recipe: One-Pan Heartiness With Smoky Paprika Depth - October 4, 2026
- 3-Ingredient Keto Mug Cake Recipe: Microwave Magic in 2 Minutes - October 4, 2026