
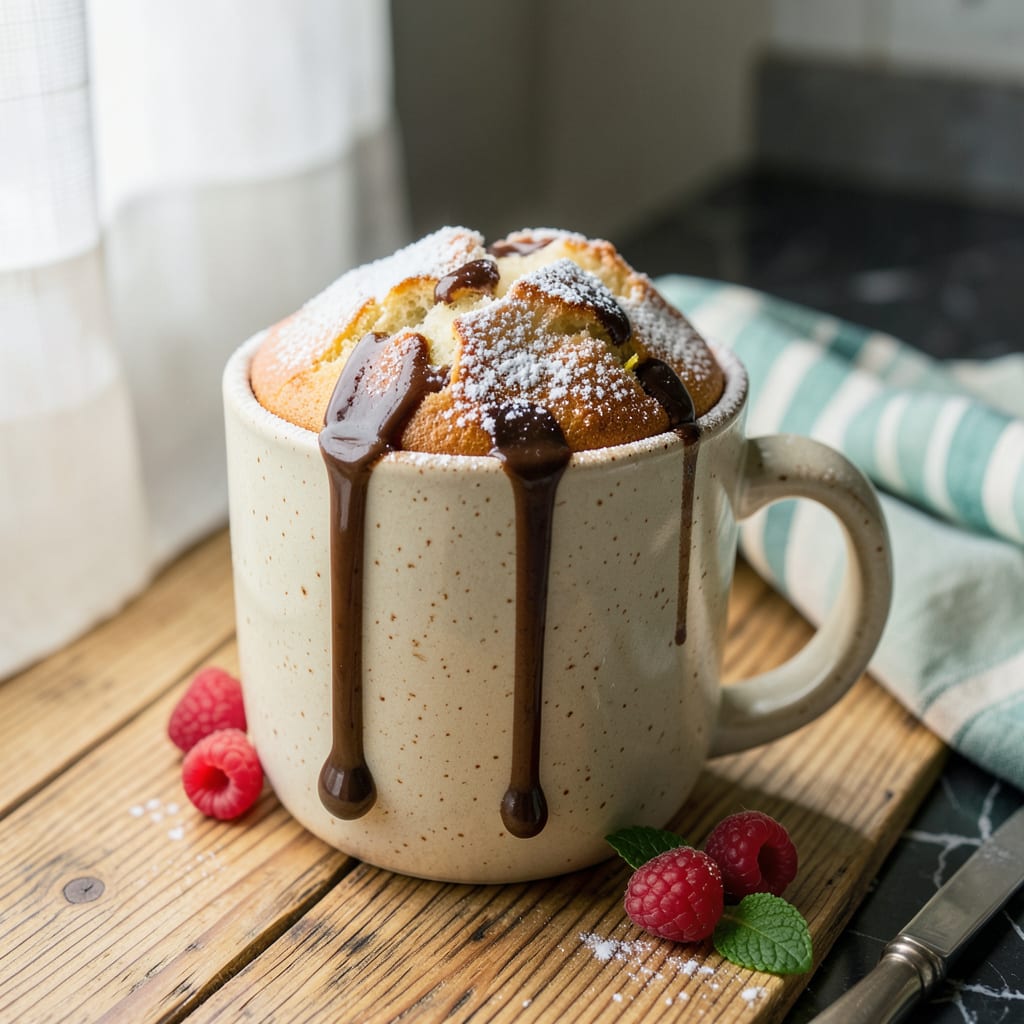
When a dessert craving strikes but you don’t want to bake an entire cake, this single-serve mug cake delivers restaurant-quality results in just five minutes. Using a simple boxed cake mix as the base, the recipe transforms pantry staples into a warm, moist cake with minimal effort—no mixing bowls or complicated steps required.
The secret lies in the precise microwave timing and ingredient ratios, ensuring a perfectly cooked center without any rubbery texture. Whether you’re satisfying a late-night sweet tooth or whipping up an impromptu treat, this method guarantees a foolproof dessert every time. Just grab a mug, mix, and enjoy.
Ingredients for Cake Mix Mug Cake
Pantry staples and a boxed mix—your five-minute dessert is just a mug away.
| Ingredient | Amount | Notes |
|---|---|---|
| Boxed Cake Mix 🍰 | ½ cup | Any flavor, dry mix only |
| All-Purpose Flour 🌾 | 2 tbsp | For structure and texture |
| Granulated Sugar 🍚 | 1 tbsp | Adjust to taste preference |
| Large Egg 🥚 | 1 whole | Room temperature preferred |
| Milk 🥛 | 3 tbsp | Any kind works (dairy or plant-based) |
| Vegetable Oil 🫒 | 2 tbsp | Or melted butter for richness |
| Vanilla Extract 💧 | ¼ tsp | Pure extract for best flavor |
| Chocolate Chips 🍫 | 1 tbsp | Optional, for extra indulgence |
| Whipped Cream 🍦 | 2 tbsp | For topping (optional) |
| Fresh Berries 🍓 | ¼ cup | For garnish (optional) |
The cake mix is your shortcut hero here. Betty Crocker or Duncan Hines work perfectly—just grab your favorite flavor. I always keep a few boxes in the pantry for emergencies (read: dessert cravings). The flour helps balance the texture since we’re microwaving, not baking. For the milk, whole milk gives the richest result, but almond or oat milk work too if that’s what you’ve got. Vegetable oil keeps it moist, but melted butter adds a little extra decadence if you’re feeling fancy.
No egg? 1/4 cup applesauce or mashed banana keeps it vegetarian and works in a pinch (texture’s slightly different but still good). Out of vanilla? Skip it—won’t ruin anything. Chocolate chips are totally optional, but mini chips distribute better in the batter. Want a fun twist? Swap them for white chocolate or butterscotch. The whipped cream and berries are just for show—I’ve eaten this plain straight from the mug more times than I’ll admit.
This is best eaten fresh, but leftovers (if there are any) keep 1-2 days covered in the fridge. Microwave for 10-15 seconds to warm it back up. The batter mixes fast, so I usually make it right in the mug—no extra dishes. Pro tip: Sprinkle a pinch of salt on top before microwaving. Sounds weird, but it makes the flavors pop.
Why You’ll Love This Recipe
- No Mixer Needed: I just grab a mug, dump in the cake mix, crack an egg, and stir with a fork—no bowls, no beaters, no fuss. The flour and sugar balance it so it’s rich but not cloying, and honestly? That’s my kind of baking.
- Better Than Boxed: Here’s what sold me—the egg and milk transform that basic cake mix into something homemade-tasting. You get that tender crumb with a slightly crisp top edge, like a mini cake that actually satisfies.
- Midnight or Breakfast: I’ve made this at 10 PM for a chocolate fix and at 7 AM when my kid wanted “birthday cake” for breakfast. Swap the mix flavor, add sprinkles, or drizzle with caramel—it’s whatever you need it to be.
- Pantry Hero: Between us, I always have a box of cake mix stashed. Five ingredients (most I already own), zero waste, and it costs pennies per mug. My secret weapon for when the dessert craving hits but the grocery budget’s tapped.
Step-by-Step Instructions for Cake Mix Mug Cake
This couldn’t be easier—just mix, microwave, and enjoy your single-serve treat in minutes.
Step 1: Combine the Dry Ingredients
Start by grabbing a microwave-safe mug that holds at least 12 ounces. I like to use a wide-mouth mug so it’s easier to mix everything without making a mess. Add the 0.5 cup boxed cake mix and 2 tbsp all-purpose flour directly to the mug.
Next, stir in the 1 tbsp granulated sugar. I use the back of a fork to really break up any lumps in the cake mix—this ensures your final cake has a smooth, even texture. The mixture should look uniform and slightly powdery at this point.
Step 2: Add Wet Ingredients and Mix Well
Crack the large egg right into the mug with the dry ingredients. I always crack it into a small bowl first to check for shell fragments, then pour it in. Add the 3 tbsp milk, 2 tbsp vegetable oil, and 0.25 tsp vanilla extract.
Now comes the fun part—mix everything together until you have a smooth batter with no dry spots. I use a small whisk for this, but a fork works too. The batter should be thick but pourable, kind of like pancake batter. If it seems too stiff, add another splash of milk.
Step 3: Customize and Microwave
Here’s where you can make it your own. Gently fold in the 1 tbsp chocolate chips if you’re using them. I like to save a few to sprinkle on top before microwaving for a pretty presentation. The chocolate chips will get melty and gooey as the cake cooks, creating little pockets of chocolate goodness.
Microwave the mug on high for 1 minute 30 seconds. Watch through the door—you’ll see the cake rise dramatically, then settle back down. Every microwave is different, so start checking at 1 minute. You want the top to look set but still slightly moist—it’ll continue cooking from residual heat after you take it out.
Step 4: Cool Slightly and Add Toppings
Let the mug cake cool for 2-3 minutes before adding toppings. This brief rest time helps the cake set completely so it doesn’t collapse when you dig in. The top should spring back slightly when pressed, and the edges will pull away from the mug.
Now for the fun part—top with 2 tbsp whipped cream and 0.25 cup fresh berries. I like to arrange the berries in a little circle on top for a pretty presentation. The contrast of warm cake with cool, creamy toppings is what makes this extra special.
Pro Cooking Tips for This Recipe
Perfect Mug Selection
Not all mugs are created equal for this recipe. I always reach for a 12-16 ounce ceramic mug with straight sides rather than tapered ones. The wider opening lets you mix thoroughly without spills. Avoid thin glass mugs—they can get dangerously hot. My favorite is a stoneware mug from Le Creuset that distributes heat evenly. 🔥
Mixing Technique Matters
Here’s my secret for lump-free batter: add the wet ingredients in stages. First mix the egg into the dry ingredients until crumbly, then add the milk and oil. This prevents flour clumps that can turn into unpleasant pockets in your finished cake. I use a mini silicone whisk—it fits perfectly in mugs and scrapes the sides clean.
Microwave Power Adjustments
If your microwave runs hot (like mine does), reduce power to 80% for 1 minute 45 seconds instead of full power. This prevents the edges from drying out before the center cooks. For 1000-watt microwaves, start checking at 1 minute 15 seconds. The cake should look slightly underdone when you pull it—it firms up as it rests.
Doneness Test
Skip the toothpick test—it’s too aggressive for delicate mug cakes. Instead, gently press the center with your fingertip. It should spring back slowly but leave a slight indentation. If the top looks shiny or wet, give it another 10-15 seconds. Remember, it keeps cooking from residual heat after you remove it from the microwave.
Texture Control Tips
For a denser, brownie-like texture, replace 1 tbsp milk with 1 tbsp sour cream. Want it lighter? Add an extra 1 tbsp milk to the batter. The flour amount is crucial—don’t skip it or your cake might turn gummy. I’ve found all-purpose flour works best, but cake flour can make it extra tender.
Serving Temperature Trick
Let the cake cool for exactly 2 minutes before adding toppings. This is the sweet spot where it’s warm enough to melt whipped cream slightly but cool enough to hold its shape. If you’re impatient (like me), set a timer. The difference between 1 minute and 2 minutes of cooling is noticeable in the final texture. ✨
Nutrition Facts

- 6 Egg Cake Recipe with Oil: Light as Air With Buttery Moisture - October 4, 2026
- 4 Bean Casserole Recipe: One-Pan Heartiness With Smoky Paprika Depth - October 4, 2026
- 3-Ingredient Keto Mug Cake Recipe: Microwave Magic in 2 Minutes - October 4, 2026