
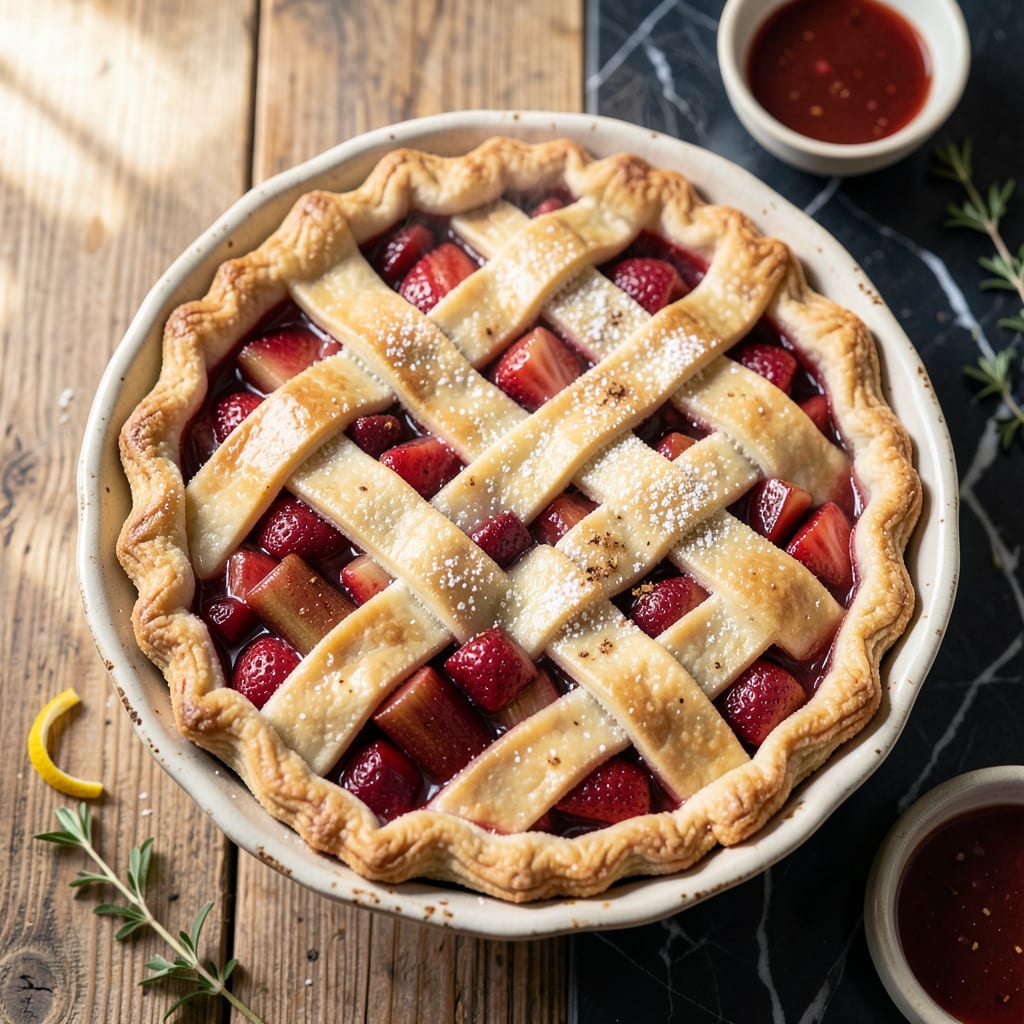
There’s something timeless about a strawberry rhubarb pie with its perfect balance of tart and sweet flavors. This version uses canned filling for convenience without sacrificing that flaky crust we all love.
I’ve refined this recipe to ensure the crust stays crisp while the filling sets just right. The result is a classic dessert that tastes like it came from a country bakery, with minimal effort required.
Ingredients for Canned Strawberry Rhubarb Pie
Pantry staples and canned filling make this iconic dessert come together fast.
| Ingredient | Amount | Notes |
|---|---|---|
| Canned Strawberry Rhubarb Pie Filling 🍓 | 2 cans | 21 oz cans, undrained |
| All-Purpose Flour 🌾 | 2 ½ cups | Plus extra for dusting |
| Granulated Sugar 🍚 | 1 tbsp | For crust sweetness |
| Salt 🧂 | 1 tsp | Fine table salt |
| Unsalted Butter 🧈 | 1 cup | Cold, cubed for flakiness |
| Ice Water 💧 | ½ cup | Plus 1 tbsp as needed |
| Large Egg 🥚 | 1 whole | For egg wash finish |
| Vanilla Extract 🌿 | 1 tsp | Pure extract preferred |
| Lemon Juice 🍋 | 1 tbsp | Freshly squeezed |
| Cornstarch 🌾 | 1 tbsp | Optional, for thickening |
| Ground Cinnamon 🌿 | ¼ tsp | For warmth in filling |
The crust is where the magic happens. Cold butter is non-negotiable—cut it into small cubes and keep everything icy until it hits the oven. I use Gold Medal flour (all-purpose, nothing fancy), but any brand works if it’s fresh. The canned filling at Walmart or Kroger is usually Comstock or Lucky Leaf brands, and they both deliver that perfect tart-sweet balance without the hassle of fresh fruit prep.
No canned filling? Simmer 2 cups chopped rhubarb with 2 cups sliced strawberries, sugar, and cornstarch until thick. Out of butter? Vegetable shortening works in a pinch (though the flavor won’t be as rich). Need to skip the egg wash? A quick brush of milk or cream gives a decent sheen. The vanilla is optional but adds a nice depth—imitation vanilla works fine if that’s what you’ve got.
The pie keeps well at room temperature for 2 days (covered loosely with foil). For longer storage, refrigerate for up to 5 days or freeze for 3 months. Reheat slices in a toaster oven to revive that flaky crust—microwave makes it soggy.
Why You’ll Love This Recipe
- No-Fuss Filling: No peeling or chopping—just open the can of strawberry rhubarb filling and pour. Honestly, it’s the laziest way to a homemade-tasting pie.
- Buttery Crust Love: That flaky, golden crust made with just flour, butter, and a pinch of sugar? It hugs the tangy-sweet filling like they were made for each other.
- Potluck Hero: I’ve brought this to picnics, brunch, and even a last-minute dinner party. Between us, it’s always the first to disappear.
Step-by-Step Instructions for Canned Strawberry Rhubarb Pie
Here’s how I make that perfect flaky crust with a filling that’s tart-sweet every time.
Step 1: Prepare the Enhanced Filling
Empty the 2 cans Canned Strawberry Rhubarb Pie Filling into a bowl. Stir in the 1 tbsp Lemon Juice and 0.25 tsp Ground Cinnamon until evenly combined. I always taste it here—if you want it thicker, mix the 1 tbsp Cornstarch with a splash of water and stir it in.
The lemon brightens the sweetness, while the cinnamon adds warmth that pairs beautifully with the strawberry rhubarb. This step takes 2 minutes and ensures the filling has that homemade depth of flavor.
Step 2: Make the Flaky Pie Dough
In a large bowl, whisk together the 2.5 cups All-Purpose Flour, 1 tbsp Granulated Sugar, and 1 tsp Salt. Add the 1 cup Unsalted Butter (cold and cubed) and cut it in using a pastry cutter or your fingers until the mixture resembles coarse crumbs with pea-sized butter pieces visible.
Gradually add the 0.5 cup Ice Water, 1 tablespoon at a time, mixing just until the dough comes together. Don’t overwork it—you want to see those butter chunks for maximum flakiness. The dough should hold when pressed but not be sticky.
Step 3: Roll and Line the Pie Crust
Divide the dough into two equal portions. On a lightly floured surface, roll one portion into a 12-inch circle. Transfer it to a 9-inch pie dish, pressing gently into the bottom and up the sides. Trim the excess dough, leaving a ½-inch overhang.
Roll out the second portion to the same size for the top crust. Pour the prepared filling into the bottom crust, mounding slightly in the center. Real talk: if your crust tears, just patch it with a little water—it’ll bake up fine and no one will notice.
Step 4: Assemble, Vent, and Bake
Place the top crust over the filling. Trim and crimp the edges together with your fingers or a fork. Cut 4-5 slits in the center to allow steam to escape. Brush the entire top with a beaten 1 whole Large Egg mixed with the 1 tsp Vanilla Extract for a golden finish.
Bake at 375°F for 45-50 minutes until the crust is deep golden brown and the filling is bubbling through the vents. If the edges brown too quickly, cover them with foil. The egg wash gives it that professional, glossy sheen.
Step 5: Cool and Serve
Let the pie cool on a wire rack for at least 2 hours before slicing. This waiting period is crucial—it allows the filling to set properly so you get clean slices instead of a runny mess.
Serve warm or at room temperature. Each slice should have a perfect balance of flaky crust and that vibrant strawberry rhubarb filling with just the right amount of tartness to cut through the sweetness. The cinnamon and vanilla notes will be subtle but noticeable in every bite.
Pro Tips For Making Canned Strawberry Rhubarb Pie
- Chill the Filling: Drain the canned strawberry rhubarb filling and refrigerate it for 20-30 minutes before assembling the pie. I learned this the hard way—it thickens just enough to prevent a soggy bottom crust.
- Use Cold Butter: Cut your unsalted butter into small cubes and keep it ice-cold until you’re ready to work it into the flour. After burning three batches, I finally figured out that warm butter makes for a tough, flat crust.
- Vent the Top: Cut 4-5 small slits in the top crust before baking. Sounds weird, but it works: it lets steam escape so your pie doesn’t burst open in the oven.
- Pre-Bake the Crust: Blind-bake your bottom crust for 8-10 minutes at 375°F before adding the filling. My grandmother swore by this, and she was right: it keeps the crust crisp, not mushy.
Storing and Reheating This Dish
Room Temperature Storage
Once completely cooled, your pie stays fresh at room temperature for 2 days. I cover mine loosely with foil to protect the crust while allowing air circulation. Keep it away from direct sunlight or heat sources to maintain that perfect flaky texture. 💡
Refrigerator Storage
For longer freshness, refrigerate the pie in an airtight container or wrapped tightly in plastic for up to 5 days. The cold helps preserve the filling’s vibrant flavor, though the crust may soften slightly.
Freezing for Later
This pie freezes beautifully for up to 3 months. I wrap individual slices in plastic, then place them in a freezer-safe bag with parchment between layers. This prevents freezer burn and makes it easy to grab a slice whenever the craving hits. ❄️
Oven Reheating
To revive that fresh-baked taste, preheat your oven to 350°F and warm slices for 10-12 minutes. This method restores the crust’s crispness better than any other. I often add a scoop of vanilla ice cream while it’s still warm.
Toaster Oven Hack
For single servings, a toaster oven works wonders. Heat at 325°F for 8-10 minutes. The smaller space concentrates the heat, giving you that just-baked quality without heating up your whole kitchen.
Nutrition Facts
Frequently Asked Questions
Can I use frozen pie crust instead?
Thaw the crust according to package instructions. For best results, brush with egg wash and blind bake for 8 minutes at 375°F before adding filling to prevent sogginess.
How do I prevent a soggy bottom crust?
Sprinkle 1-2 tablespoons of breadcrumbs or crushed cornflakes in the bottom crust before adding filling. This creates a barrier that absorbs excess moisture during baking.
Can I make this into hand pies?
Yes! Cut dough into 5-inch circles, add 2 tablespoons filling to each, fold, and crimp edges. Bake at 375°F for 20-25 minutes until golden.
Why did my filling bubble over?
This usually means the vents were too small or the oven temperature was too low. Ensure you cut 4-5 large slits in the top crust and bake at exactly 375°F.

- 6 Egg Cake Recipe with Oil: Light as Air With Buttery Moisture - October 4, 2026
- 4 Bean Casserole Recipe: One-Pan Heartiness With Smoky Paprika Depth - October 4, 2026
- 3-Ingredient Keto Mug Cake Recipe: Microwave Magic in 2 Minutes - October 4, 2026