
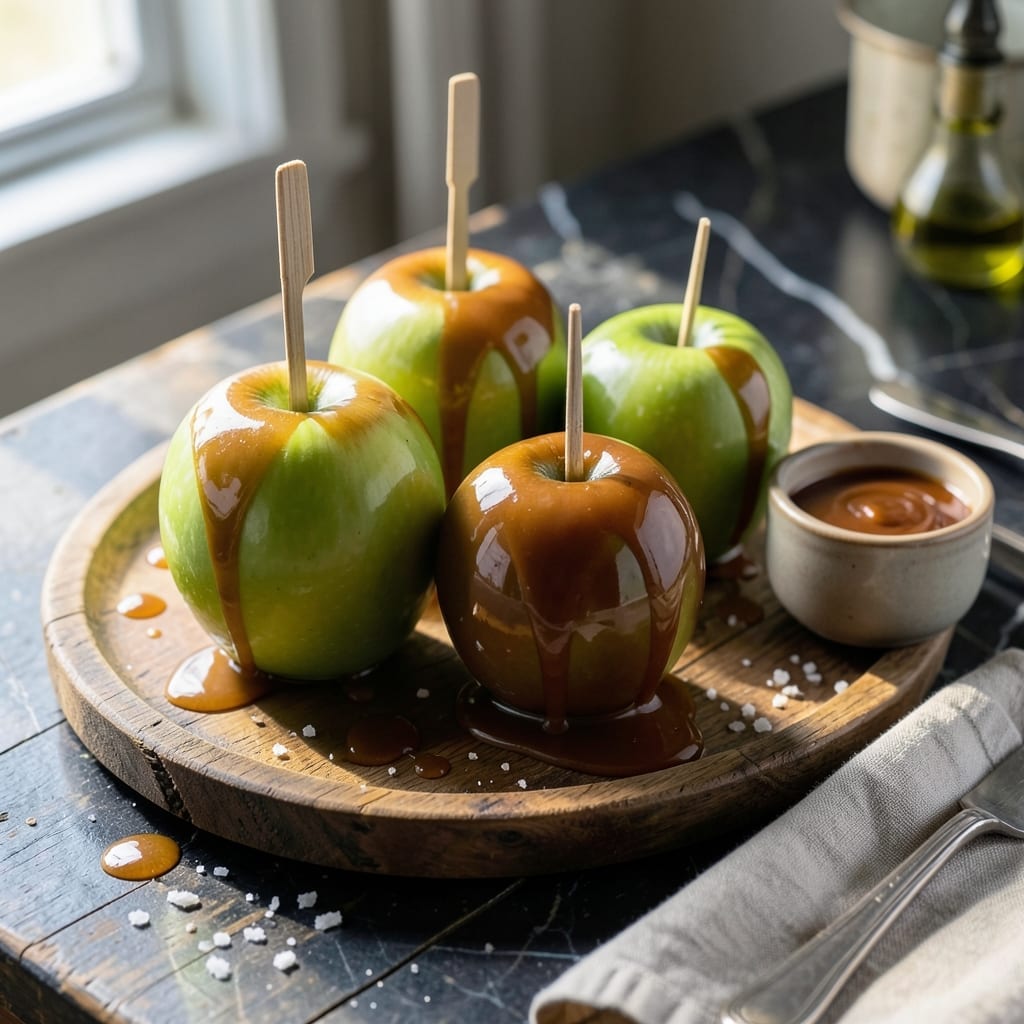
This harvest-inspired treat brings the magic of Dreamlight Valley to your kitchen with minimal effort and maximum reward.
I developed this recipe to capture the cozy autumn vibes of the game, using simple ingredients and a foolproof method that guarantees perfectly coated apples every time.
The caramel achieves the ideal balance of sweetness and richness, while the apples maintain their crisp texture beneath the glossy coating.
This dish transforms a classic fall tradition into something that feels straight out of a storybook.
Ingredients for Caramel Apple Recipe Dreamlight Valley
Simple ingredients create a storybook-worthy autumn treat with minimal effort.
| Ingredient | Amount | Notes |
|---|---|---|
| Granny Smith Apples 🍏 | 4 whole | Medium-sized, washed and dried |
| Granulated Sugar 🍚 | 1 ½ cups | Fine white sugar preferred |
| Light Corn Syrup 🧈 | ½ cup | Prevents crystallization in caramel |
| Heavy Whipping Cream 🥛 | ½ cup | Full-fat for smooth texture |
| Unsalted Butter 🧈 | ½ cup | Cut into small cubes |
| Vanilla Extract 🌿 | 1 tsp | Pure extract for best flavor |
| Salt 🧂 | ½ tsp | Fine sea salt preferred |
| Ground Cinnamon 🌶️ | ½ tsp | Optional for warm spice note |
| Wooden Skewers 🪵 | 4 pieces | For apple handles |
| Parchment Paper 📜 | 1 sheet | For drip-free caramel setting |
| Chopped Pecans 🌰 | ½ cup | Optional topping, lightly toasted |
The apples are the foundation—Granny Smith offers the perfect tart-sweet balance and holds up beautifully to the caramel. Look for firm, unblemished fruit at local orchards or the produce section. The sugar should be standard granulated (not superfine or raw) for proper caramelization. Domino or C&H brands are reliable choices for consistent results.
No light corn syrup? Honey or agave at the same volume works in a pinch (though texture will differ slightly). Heavy cream can be swapped for full-fat coconut milk for a dairy-free version. The butter must be unsalted to control the sodium level. For extra richness, brown the butter first. Skip the cinnamon if you prefer classic caramel flavor.
Store apples in the fridge for up to 2 weeks before using. Caramel apples keep at room temperature for 2 days (longer if refrigerated). Prepare the caramel fresh—it thickens as it cools. For best results, serve within 4 hours of making.
Why You’ll Love This Recipe
- One Pot Magic: I just dump sugar, corn syrup, and cream in a saucepan, let it bubble, then coat the apples—no fancy steps.
- Tart Meets Sweet: The sharp Granny Smiths cut through the rich caramel made with butter and cream like they were made for each other.
- Crowd Pleaser: I’ve served these at game nights and as after-school snacks—everyone from my picky nephew to my sweet-toothed dad asks for more.
- Budget Dessert: A bag of apples and a few pantry staples make a treat that feels fancy but costs less than a bakery run.
Step-by-Step Instructions for Caramel Apples
This method delivers a smooth, glossy caramel coating with the perfect apple-to-topping ratio.
Step 1: Prepare the Apples and Work Surface
Begin by thoroughly washing and drying the 4 whole Granny Smith Apples. Any moisture on the surface will prevent the caramel from adhering properly. Remove the stems and insert the 4 pieces Wooden Skewers firmly into the top of each apple, pushing them about halfway through.
Line a baking sheet with the 1 sheet Parchment Paper to create a non-stick surface for setting the finished apples. This preparation prevents a sticky mess and ensures easy cleanup. The tartness of Granny Smith apples provides the ideal contrast to the sweet caramel coating.
Step 2: Cook the Caramel Base
In a heavy-bottomed saucepan, combine the 1.5 cups Granulated Sugar, 0.5 cup Light Corn Syrup, and 0.5 cup Unsalted Butter (cut into small cubes). Cook over medium heat, stirring constantly with a wooden spoon until the butter melts and the sugar begins to dissolve.
Continue cooking without stirring once the mixture starts to bubble. Swirl the pan occasionally for even heating. The caramel is ready for the next addition when it reaches a deep amber color, about 8-10 minutes. The light corn syrup prevents crystallization, ensuring a smooth final texture.
Step 3: Incorporate Cream and Flavorings
Carefully pour in the 0.5 cup Heavy Whipping Cream—the mixture will bubble vigorously. Stir constantly until fully incorporated and the bubbling subsides, about 2-3 minutes. This step creates the creamy foundation of your caramel.
Remove from heat and immediately stir in the 1 tsp Vanilla Extract, 0.5 tsp Salt, and 0.5 tsp Ground Cinnamon. The vanilla adds depth, while the salt enhances all the flavors. The cinnamon provides a warm, harvest-inspired note that complements the apple perfectly.
Step 4: Dip and Coat the Apples
Let the caramel cool for 2-3 minutes until it thickens slightly but remains pourable. Holding each apple by its skewer, dip it into the caramel at a slight angle, rotating to coat evenly. Let any excess drip off for 10-15 seconds before placing on the prepared parchment.
Work quickly but carefully—the caramel sets as it cools. If it becomes too thick to coat properly, gently reheat it for 10-15 seconds over low heat, stirring constantly. The ideal coating should be thick enough to hold its shape but still have a glossy finish.
Step 5: Add Toppings and Set
While the caramel is still tacky, sprinkle the 0.5 cup Chopped Pecans over each apple, pressing gently to adhere. The pecans add a delightful crunch and visualize the harvest theme. If using, apply them immediately after dipping for maximum adhesion.
Allow the caramel apples to set at room temperature for at least 1 hour, or refrigerate for 30 minutes for faster setting. The caramel should be firm to the touch with no stickiness. Serve at room temperature for the best texture, where the caramel remains slightly gooey beneath its firm exterior.
Pro Tips For Making Caramel Apple Recipe Dreamlight Valley
- Watch the Caramel: I learned this the hard way—once the sugar and corn syrup hit 320°F, it can burn in seconds. Pull it off the heat the moment it turns amber.
- Dry the Apples: After peeling and slicing your Granny Smiths, pat them completely dry. Any moisture will make the caramel seize up instead of clinging smoothly.
- Skip the Stirring: Resist the urge to stir the sugar mixture while it melts. I used to do this and ended up with grainy caramel every time—just swirl the pan occasionally.
- Use Warm Cream: Before adding the heavy whipping cream to the caramel, warm it slightly. Cold cream can cause the hot sugar to seize, and nobody wants lumpy caramel coating their apples.
Make-Ahead Tips for caramel apple recipe dreamlight valley
Prep Ahead Steps
Wash and dry your 4 whole Granny Smith Apples the night before and store them in the fridge. This saves time on prep day and ensures they’re perfectly chilled for dipping. Remove stems and insert wooden skewers up to 2 hours before caramelizing.
Caramel Base Prep
Measure all caramel ingredients (1.5 cups Granulated Sugar, 0.5 cup Light Corn Syrup, etc.) and have them ready to go. I keep everything in small bowls on the counter for a smooth workflow. The butter should be cut into 1-inch cubes for even melting.
Work Surface Ready
Line your baking sheet with parchment paper and set it near your workspace. Have toppings like 0.5 cup Chopped Pecans pre-toasted and in a shallow dish for easy sprinkling. This setup makes the dipping process seamless.
Make Caramel in Advance
The caramel can be made 1 day ahead and gently reheated before dipping. Store it in an airtight container at room temperature. Reheat over low heat for 3-5 minutes, stirring constantly, until it reaches dipping consistency.
Storage Before Serving
Completed caramel apples can sit at room temperature for up to 2 hours before serving. For longer storage, refrigerate for up to 2 days. Let them come to room temperature for 30 minutes before serving for the best texture. 💫
Dreamlight Valley Touch
For that storybook presentation, arrange finished apples on a wooden board with scattered pecans and cinnamon sticks. This creates the harvest vibe straight out of the game. I like to drizzle any leftover caramel artistically on the serving platter.
Nutrition Facts
Frequently Asked Questions
What’s the best apple for caramel dipping?
Granny Smith apples work best due to their firm texture and tart flavor. They hold up well to the hot caramel and balance its sweetness perfectly.
Can I make this without corn syrup?
Yes, you can substitute honey or agave at the same volume. Note that the texture may differ slightly, but the flavor remains delicious.
How long do these keep?
Store at room temperature for up to 2 days or refrigerate for up to 2 weeks. Serve at room temperature for the best texture.
Why did my caramel crystallize?
Crystallization happens if sugar isn’t fully dissolved or the mixture is stirred too much. Use a heavy pan and avoid stirring once it starts bubbling.

- 6 Egg Cake Recipe with Oil: Light as Air With Buttery Moisture - October 4, 2026
- 4 Bean Casserole Recipe: One-Pan Heartiness With Smoky Paprika Depth - October 4, 2026
- 3-Ingredient Keto Mug Cake Recipe: Microwave Magic in 2 Minutes - October 4, 2026