
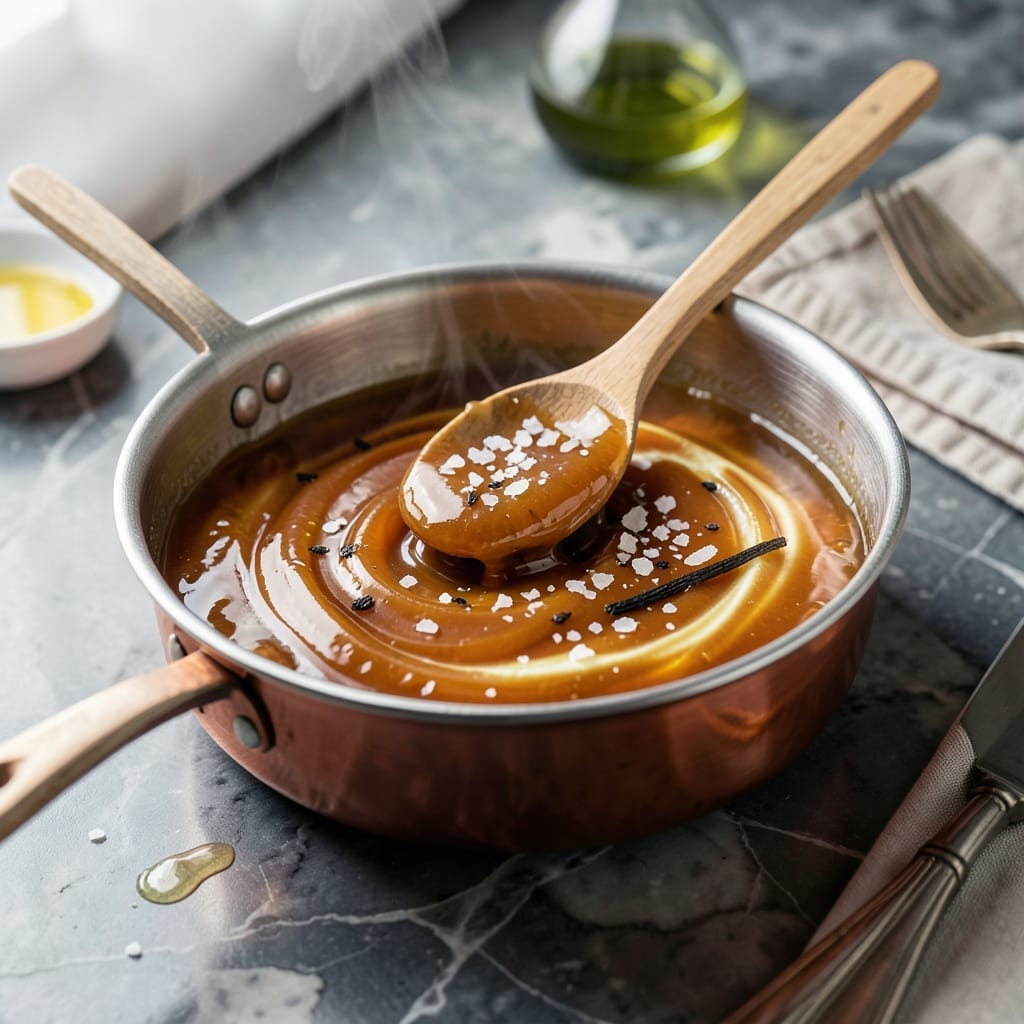
This caramel delivers rich amber sweetness using only sugar, butter, and a plant-based milk alternative. No cream required.
The process is simple yet precise, yielding a smooth, glossy sauce perfect for desserts, coffee, or ice cream toppings.
Ingredients for Caramel Recipe Without Cream
Seven ingredients transform into velvety caramel with rich amber depth.
| Ingredient | Amount | Notes |
|---|---|---|
| Granulated Sugar 🍚 | 1 ½ cups | Fine white sugar preferred |
| Vegan Butter 🧈 | ¾ cup | Unsalted, room temperature |
| Coconut Milk 🥥 | ½ cup | Full-fat, canned variety |
| Vanilla Extract 🌿 | 2 tsp | Pure extract, not imitation |
| Salt 🧂 | ½ tsp | Fine sea salt preferred |
| Light Corn Syrup 🧴 | ¼ cup | Prevents crystallization |
| Water 💧 | 2 tbsp | For initial sugar dissolution |
The sugar is the foundation, so use fine granulated white sugar for even melting—organic or raw sugars can introduce impurities that affect color and texture. For the vegan butter, Miyoko’s or Earth Balance perform best (avoid margarine with high water content). The coconut milk must be full-fat and canned—light versions lack the richness needed to replace heavy cream.
No coconut milk? Full-fat oat milk or cashew cream work in a pinch. Skip the corn syrup? Agave nectar or glucose syrup at a 1:1 ratio prevents graininess. The vanilla should be pure extract—imitation has a synthetic edge that shines through. For salt, fine sea salt dissolves more evenly than kosher, but either works.
Store finished caramel in a glass jar at room temperature for up to 2 weeks. Reheat gently in the microwave (10-second bursts) or a double boiler. The sauce will thicken as it cools—this is normal. Avoid refrigeration as it can cause separation.
Why You’ll Love This Recipe
- One Pot Wonder: I just melt sugar, stir in coconut milk and vegan butter, and boom—smooth caramel without babysitting a pot.
- Rich & Velvety: The coconut milk gives it this deep, buttery richness that’s honestly better than the dairy version.
- Drizzle on Everything: I’ve used it on ice cream, cakes, even stirred into coffee—it’s my new secret weapon for last-minute desserts.
- Keeps for Weeks: Between us, I always make a double batch because it stays perfect in the fridge for up to two weeks.
Step-by-Step Instructions for Caramel Without Cream
This method delivers smooth, glossy caramel using coconut milk for richness instead of heavy cream.
Step 1: Dissolve Sugar and Begin Caramelization
In a medium saucepan with tall sides, combine the 1.5 cups Granulated Sugar, 0.25 cup Light Corn Syrup, and 2 tbsp Water. Stir just enough to moisten the sugar evenly—excessive stirring can cause crystallization.
Place the pan over medium-high heat and bring to a boil without stirring. As the sugar dissolves, you’ll notice the mixture turn from cloudy to clear. Resist the urge to stir; instead, gently swirl the pan if needed to even out hot spots.
Watch for the edges to begin turning amber after 6-8 minutes. This is your visual cue that caramelization has begun. The light corn syrup prevents graininess, so the process should be smooth if you avoid agitation.
Step 2: Monitor Color and Add Vegan Butter
Once the sugar mixture reaches a deep golden amber color (about 320-340°F if using a candy thermometer), immediately remove the pan from heat. The caramel will continue cooking from residual heat, so act quickly to prevent burning.
Carefully add the 0.75 cup Vegan Butter—it will bubble vigorously. Stir with a heatproof spatula until the butter melts completely and the mixture stops foaming. This step tempers the heat and adds a silky texture to your caramel.
Return the pan to low heat and continue cooking for 1-2 minutes, stirring constantly. The caramel should darken slightly to a rich copper hue. If it looks separated, keep stirring—it will emulsify as it heats.
Step 3: Incorporate Coconut Milk and Finish
Slowly pour in the 0.5 cup Coconut Milk while stirring continuously. The mixture will bubble up again due to the temperature difference. Use caution, as the hot caramel can cause splattering.
Once the bubbling subsides, stir in the 0.5 tsp Salt and 2 tsp Vanilla Extract. The salt enhances the caramel’s depth, while the vanilla adds a warm, aromatic note. Continue cooking for 2-3 minutes on low heat until the caramel thickens slightly and coats the back of a spoon.
Remove from heat when the caramel reaches your desired consistency—it will thicken further as it cools. For a pourable sauce, aim for a viscosity similar to warm honey. For a firmer caramel, cook it slightly longer until it’s thick and glossy.
Step 4: Cool and Use
Transfer the caramel to a heatproof bowl or jar. Let it cool to room temperature, stirring occasionally to release heat evenly. As it cools, it will thicken significantly—this is normal. The coconut milk ensures it remains creamy and spreadable even when fully cooled.
Use the caramel while still slightly warm for drizzling over desserts, or let it set completely for a firmer texture ideal for filling candies or layering in bars. Store in an airtight container at room temperature for up to 1 week, or refrigerate for up to 2 weeks.
Pro Tips For Making Caramel Recipe Without Cream
- Don’t Stir the Sugar: I learned this the hard way—once the sugar starts melting, resist the urge to stir or it’ll crystallize. Just swirl the pan gently if needed.
- Use Room-Temp Coconut Milk: Cold coconut milk can cause the caramel to seize. Let it sit out for 10 minutes before adding it to the hot sugar.
- Watch for the Amber: Pull the sugar off the heat the second it hits a deep amber color—it keeps cooking in the pan, and burnt caramel is bittersweet in the worst way.
- Add Butter Slowly: Vegan butter can split if dumped in all at once. Add it a tablespoon at a time, stirring until fully melted before the next.
Pro Cooking Tips for Perfect Results
💡 Heat Control
Mastering the heat is key to a smooth caramel. Use medium-low heat to prevent burning. A heavy-bottomed pan distributes heat evenly, reducing hot spots that can scorch the sugar. Stirring too often can cause crystallization, so resist the urge to overmix.
🌡️ Timing Secrets
Patience is your best tool. Let the sugar melt completely before adding other ingredients. Once it starts to bubble, avoid stirring—swirl the pan gently instead. Aim for a golden-amber color, which takes about 5-7 minutes, depending on your stove.
🎯 Texture Tips
For a silky texture, add a splash of water or lemon juice at the start. This helps dissolve the sugar evenly. If your caramel thickens too much, a quick fix is to warm it slightly with a tablespoon of water, stirring until smooth.
✨ Flavor Boosters
Enhance the depth of your caramel with a pinch of salt or a dash of vanilla extract. For a richer taste, consider adding butter at the end. These small tweaks elevate the flavor without compromising the simplicity of the recipe.
Nutrition Facts

- 6 Egg Cake Recipe with Oil: Light as Air With Buttery Moisture - October 4, 2026
- 4 Bean Casserole Recipe: One-Pan Heartiness With Smoky Paprika Depth - October 4, 2026
- 3-Ingredient Keto Mug Cake Recipe: Microwave Magic in 2 Minutes - October 4, 2026