
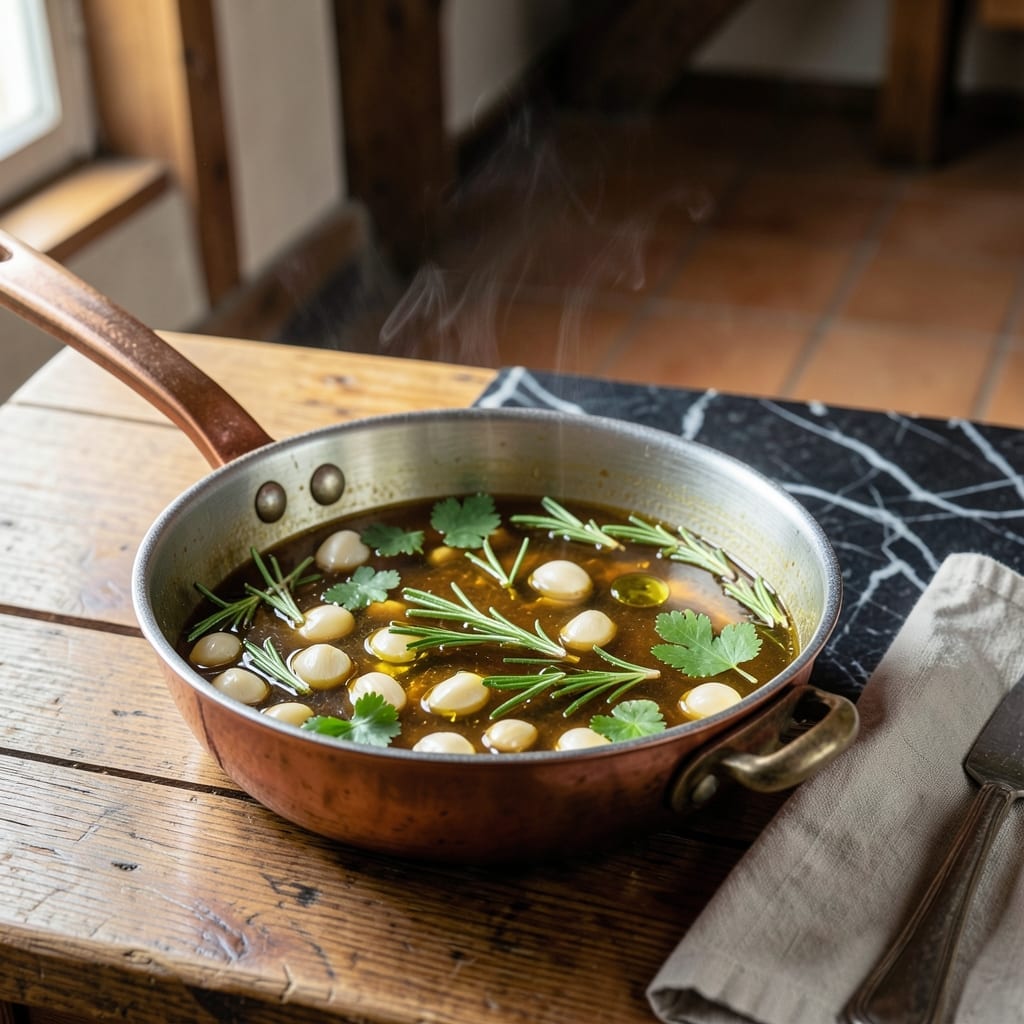
This grill baste captures the bold, herb-infused essence that makes Carrabba’s dishes so memorable. I developed this version after years of trying to replicate that signature zesty flavor at home.
The secret lies in the perfect balance of fresh herbs, garlic, and a touch of acidity. It’s incredibly versatile—use it on chicken, steak, or even vegetables for that restaurant-quality finish.
What you’ll get is a savory, aromatic baste that locks in moisture while adding layers of flavor. It brushes on effortlessly and caramelizes beautifully over high heat.
Make a batch ahead and store it in the fridge for up to a week. Here’s how to bring that Carrabba’s magic to your grill.
Ingredients for Carrabba’s Grill Baste
Nine ingredients. Bold, herb-infused flavor. Just like the restaurant.
| Ingredient | Amount | Notes |
|---|---|---|
| Extra-Virgin Olive Oil 🫒 | 1 cup | High quality, fruity |
| Fresh Rosemary 🌿 | 2 tbsp | Finely chopped |
| Fresh Thyme Leaves 🍃 | 2 tbsp | Stems removed |
| Fresh Parsley 🌿 | ¼ cup | Finely chopped |
| Garlic Cloves 🧄 | 6 cloves | Minced |
| Lemon Juice 🍋 | ¼ cup | Freshly squeezed |
| Red Wine Vinegar 💧 | 2 tbsp | Balances richness |
| Dijon Mustard 🟡 | 1 tbsp | Smooth, sharp flavor |
| Salt 🧂 | 1 tsp | Diamond Crystal kosher |
| Black Pepper 🌶️ | ½ tsp | Freshly ground |
The herbs are non-negotiable here—fresh rosemary and thyme give that signature Carrabba’s aroma. Trader Joe’s or Whole Foods have the best fresh herb selection, but even supermarket bundles work if they’re vibrant and fragrant. The olive oil needs to be good quality (that peppery finish is key), and don’t skimp on the garlic—six cloves sounds like a lot, but it mellows beautifully when cooked.
No fresh herbs? Dried at one-third the amount, but the flavor won’t be as bright. Red wine vinegar can be swapped for apple cider vinegar in a pinch, though it’s slightly sweeter. For the mustard, yellow mustard works but lacks Dijon’s complexity. If you’re out of lemon juice, lime juice adds a nice twist (just use the same amount).
This baste keeps 5-7 days in the fridge—perfect for grilling sessions all week. The flavors deepen over time, so make it a day ahead if you can. Freezing isn’t ideal (herbs lose texture), but it’s fine for up to 1 month if needed.
Why You’ll Love This Recipe
- One Bowl Mix: I just toss the olive oil, herbs, and garlic together—no fancy steps, no mess.
- Herb-Infused Magic: The rosemary and thyme with garlic give that restaurant-quality aroma and taste.
- Weeknight Hero: I use it on chicken, steak, even veggies for a quick dinner upgrade.
- Stretches Further: A batch lasts me all week, and it costs pennies compared to store-bought.
Step-by-Step Instructions for Zesty Herb-Infused Grill Baste
Here’s the method to create this signature flavor with perfect balance every time.
Step 1: Infuse the Olive Oil with Aromatic Herbs
In a small saucepan, combine the 1 cup Extra-Virgin Olive Oil with the 2 tbsp Fresh Rosemary, 2 tbsp Fresh Thyme Leaves, and 0.25 cup Fresh Parsley. Heat over low heat for 5-7 minutes until the oil just begins to shimmer.
This gentle heating extracts the essential oils from the herbs without burning them. You’ll notice the oil turning a deeper green and taking on a fragrant, herbaceous aroma. Don’t let it smoke—that means the heat’s too high. Remove from heat as soon as you see tiny bubbles forming around the herb pieces.
Step 2: Integrate the Acidic and Pungent Elements
Off the heat, stir in the 6 cloves minced Garlic Cloves, 0.25 cup Lemon Juice, and 2 tbsp Red Wine Vinegar. The garlic should sizzle softly when it hits the warm oil—this mellows its sharpness while preserving its depth.
The lemon juice and vinegar will brighten the mixture immediately, creating that signature tangy backbone. I always use freshly squeezed lemon juice here; the bottled stuff lacks the vibrant acidity that makes this baste special. Let this mixture stand for 10 minutes to allow flavors to meld.
Step 3: Emulsify and Season the Baste
Whisk in the 1 tbsp Dijon Mustard vigorously until fully incorporated. The mustard acts as an emulsifier, binding the oil and acidic components together so your baste won’t separate. You’ll see the mixture thicken slightly and take on a creamy appearance.
Now add the 1 tsp Salt and 0.5 tsp Black Pepper. I prefer Diamond Crystal kosher salt here because it dissolves evenly and seasons without overpowering. The freshly ground black pepper adds just enough warmth to complement the herbs.
Step 4: Rest and Develop Full Flavor
Transfer the baste to a clean glass jar and let it cool to room temperature, about 30 minutes. As it cools, the flavors will continue to develop and harmonize. The herbs will settle to the bottom—that’s normal.
Give it a good stir or shake before each use to redistribute all the components. The baste should have a vibrant green color with visible herb flecks throughout. For best results, prepare this at least 2 hours before grilling to allow maximum flavor infusion.
Step 5: Apply to Proteins During Grilling
Use a pastry brush to apply the baste to meats, vegetables, or seafood during the last 5 minutes of grilling. The sugars in the lemon juice and vinegar can burn if exposed to direct heat too long, so timing is crucial.
Baste generously, letting each layer build upon the last. You’ll hear a satisfying sizzle as it hits the hot grill grates. The finished dish should have a glossy, herb-flecked coating with a perfect balance of zesty, herby, and savory notes.
Pro Tips For Making Carrabba’S Grill Baste
- Bloom the Garlic: Cook the minced garlic in olive oil for exactly 30-45 seconds until just fragrant—I learned this the hard way after burning three batches. Pull it off the heat the second it starts to turn golden.
- Bruch the Herbs: Crush the rosemary and thyme with your palms before chopping to release their oils. Sounds weird, but it works: the baste will taste noticeably more vibrant.
- Skip the Dried: Resist the urge to substitute dried herbs here. Fresh parsley, rosemary, and thyme are non-negotiable for that bright, restaurant-quality flavor.
- Rest the Baste: Let the finished baste sit for 10-15 minutes before using—my grandmother swore by this, and she was right: the flavors meld and mellow beautifully.
Creative Variations of This Dish
Spicy Kick Variation
Add 1 tsp red pepper flakes or ½ tsp cayenne pepper to the baste for a subtle heat that complements the herbs beautifully. I love this version on grilled chicken or shrimp. The spice builds gradually without overpowering the fresh herb flavors.
Citrus Forward Twist
Swap the red wine vinegar for orange juice and add 1 tbsp orange zest. This creates a brighter, fruitier profile that pairs wonderfully with seafood or pork. The citrus oils in the zest add an extra aromatic layer.
Garlic Lover’s Version
Double the garlic to 12 cloves for an intense allium punch. Roast the extra cloves first at 400°F for 10 minutes to mellow their sharpness. The result is a deeper, sweeter garlic flavor that caramelizes beautifully on the grill.
Mediterranean Herb Blend
Add 1 tbsp fresh oregano and 1 tsp dried marjoram to the herb mixture. This variation leans into Italian-Greek flavors and works especially well with lamb or eggplant. I like to use Penzeys for my dried herbs. 🌿
Honey Mustard Glaze
Stir in 2 tbsp honey and an extra 1 tbsp Dijon mustard for a sweeter, stickier baste. This creates a beautiful caramelized crust on meats. It’s particularly delicious on pork chops or as a glaze for grilled vegetables.
Smoky Chipotle Infusion
Add 1 tsp chipotle powder or 1 minced chipotle pepper in adobo for a smoky, slightly spicy depth. This works wonderfully with beef or as a unique twist for grilled corn. The smokiness pairs perfectly with the char from the grill. 🔥
Nutrition Facts
Frequently Asked Questions
Can I use dried herbs instead of fresh?
Yes, but use 1/3 the amount since dried herbs are more concentrated. The flavor won’t be as bright, but it’ll still work. Fresh is always best for that authentic restaurant taste.
How long does the baste keep in the fridge?
It stays fresh for 5-7 days in an airtight container. The flavors deepen over time, so making it a day ahead is ideal. Avoid freezing—herbs lose texture.
When should I apply it while grilling?
Baste during the last 5 minutes of cooking to prevent burning. The acids and sugars can char if exposed too long. Use a clean brush for each application.
Can I use this on vegetables?
It works beautifully on grilled veggies like zucchini, asparagus, or bell peppers. Apply just like you would with meats for a flavor boost.

- 6 Egg Cake Recipe with Oil: Light as Air With Buttery Moisture - October 4, 2026
- 4 Bean Casserole Recipe: One-Pan Heartiness With Smoky Paprika Depth - October 4, 2026
- 3-Ingredient Keto Mug Cake Recipe: Microwave Magic in 2 Minutes - October 4, 2026