
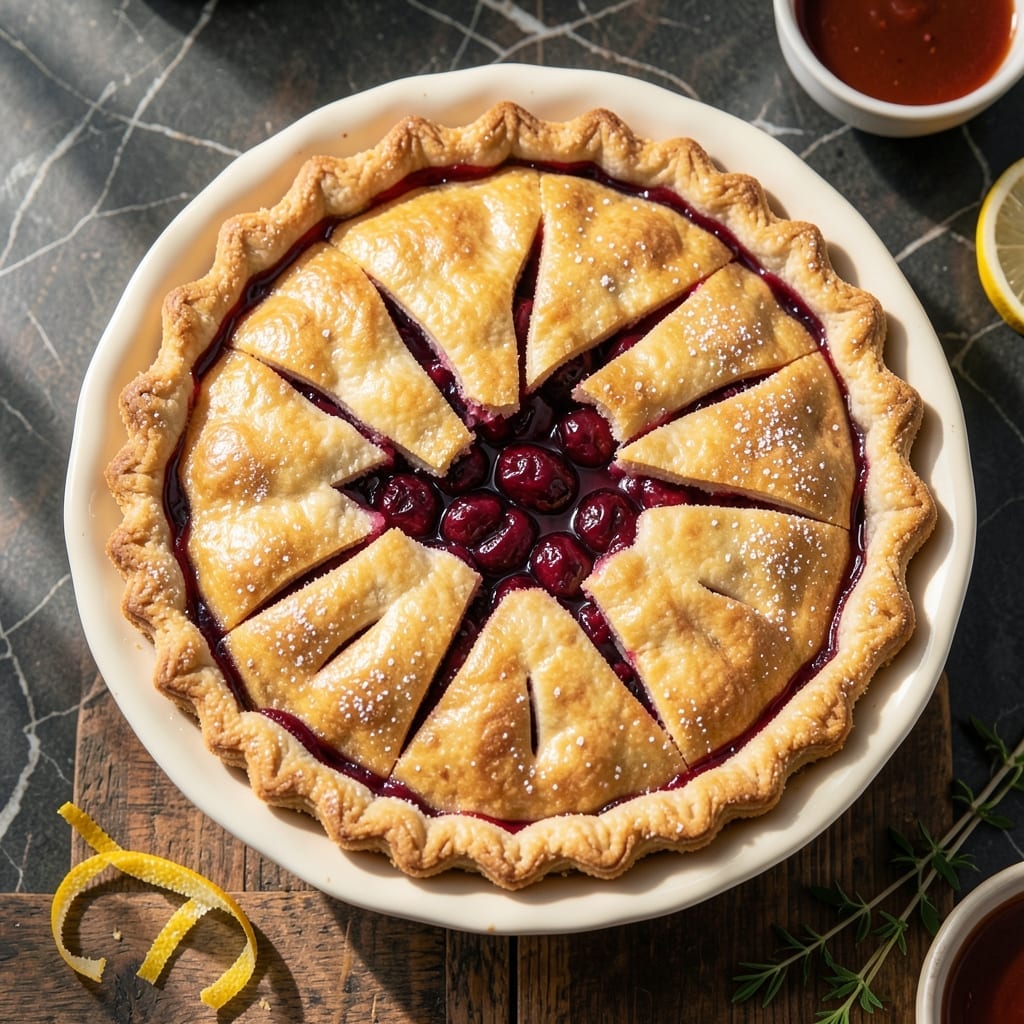
This recipe delivers a flaky crust that perfectly complements the sweet-tart canned cherry filling. The secret lies in keeping the dough cold and handling it minimally for maximum tenderness.
With simple techniques and store-bought filling, you’ll achieve bakery-quality results. The contrast between the buttery crust and rich cherry center makes every bite irresistible.
Ingredients for Cherry Pie Recipe with Canned Filling
Pantry staples and a few cold ingredients create this bakery-style pie with minimal effort.
| Ingredient | Amount | Notes |
|---|---|---|
| All-Purpose Flour 🌾 | 2 ½ cups | Plus extra for dusting surface |
| Granulated Sugar 🍚 | 1 tbsp | For sweetening crust |
| Salt 🧂 | 1 tsp | Fine sea salt preferred |
| Unsalted Butter 🧈 | 1 cup | Cold, cubed into 1/2-inch pieces |
| Ice Water 💧 | ⅓ cup | Plus 1 tbsp as needed |
| Canned Cherry Pie Filling 🍒 | 2 cans | 21 oz each, undrained |
| Lemon Juice 🍋 | 1 tsp | Freshly squeezed preferred |
| Almond Extract 🌰 | ½ tsp | Optional for depth of flavor |
| Large Egg 🥚 | 1 whole | For egg wash finish |
| Turbinado Sugar 🍚 | 1 tbsp | For sprinkling on crust |
The butter must stay cold throughout the process—use European-style if available for its higher fat content and superior flakiness. King Arthur Flour is the gold standard for all-purpose, but any unbleached variety works. For the filling, Comstock or Lucky Leaf brands offer consistent quality in canned cherry pie filling. Avoid generic store brands, as they often contain less fruit and more syrup, which can make the pie runny.
No almond extract? Vanilla extract at double the amount works as a substitute, though the flavor profile will differ slightly. For a richer crust, replace 2 tbsp of the ice water with vodka (the alcohol evaporates during baking but inhibits gluten formation for extra tenderness). If you need to make this ahead, the dough can be refrigerated for 2 days or frozen for 1 month before rolling.
Store leftover pie at room temperature for 2 days or refrigerate for up to 5 days. The crust is best on the first day but remains delicious as the filling softens it slightly. Pie can also be frozen for 3 months—thaw overnight in the refrigerator before serving.
Why You’ll Love This Recipe
- No-Fuss Filling: I love that I can skip pitting and chopping—just pour the canned cherries straight into that buttery, flaky crust.
- Buttery Crust Perfection: The combo of cold butter and ice water makes a crust so tender it practically melts, with just the right sweetness to balance the tart cherries.
- Last-Minute Dessert: I’ve served this at potlucks, picnics, and even for a random Tuesday treat—it’s always a hit.
- Budget-Friendly Treat: Honestly, canned filling keeps costs low, and that basic flour-butter crust stretches my grocery budget without sacrificing flavor.
Step-by-Step Instructions for Cherry Pie With Canned Filling
Master the art of a flaky crust with this streamlined method for perfect results every time.
Step 1: Prepare the Pie Crust Dough
In a large bowl, combine the 2.5 cups All-Purpose Flour, 1 tbsp Granulated Sugar, and 1 tsp Salt. Whisk until evenly distributed. This ensures the dry ingredients are thoroughly mixed before adding the fat.
Cut in the 1 cup Unsalted Butter (cold and cubed) using a pastry cutter or your fingertips, working quickly to avoid warming the butter. The mixture should resemble coarse crumbs with pea-sized butter pieces visible. This creates the flaky layers in your crust.
Gradually add the 0.33 cup Ice Water, 1 tablespoon at a time, mixing gently with a fork until the dough just comes together. It should hold when pressed but not be sticky. Overworking develops gluten, which makes crust tough.
Step 2: Chill and Divide the Dough
Divide the dough into two equal portions, shape each into a disk, and wrap in plastic. Refrigerate for at least 1 hour or up to 2 days. Chilling relaxes the gluten and firms the butter, both essential for flakiness.
While the dough chills, prepare the filling. In a bowl, combine the 2 cans Canned Cherry Pie Filling with 1 tsp Lemon Juice and 0.5 tsp Almond Extract. Stir gently to distribute the flavors without breaking up the cherries.
Step 3: Roll Out and Line the Pie Plate
On a lightly floured surface, roll one dough disk into a 12-inch circle, about ⅛-inch thick. Transfer to a 9-inch pie plate, pressing gently into the bottom and up the sides. Trim the edges, leaving a ½-inch overhang.
Avoid stretching the dough when fitting it into the plate—this can cause shrinking during baking. If the dough tears, patch it with excess from the edges. The overhang will be used later to create the crimped edge.
Step 4: Add Filling and Top Crust
Pour the cherry filling into the crust-lined pie plate, spreading it evenly. Roll out the second dough disk and place it over the filling. Trim the top crust, leaving a ½-inch overhang, then fold the edges under and crimp with your fingers or a fork.
Cut 4-5 slits in the top crust to allow steam to escape. This prevents the filling from bubbling over and ensures even baking. Brush the top crust with a beaten large egg for a golden finish.
Step 5: Bake to Golden Perfection
Preheat the oven to 375°F. Place the pie on a baking sheet to catch any drips and bake for 45-50 minutes. The crust should be deep golden brown, and the filling should bubble visibly through the slits.
Sprinkle the 1 tbsp Turbinado Sugar evenly over the egg wash during the last 10 minutes of baking for added crunch and shine. Let the pie cool for at least 2 hours before slicing to allow the filling to set.
Pro Tips For Making Cherry Pie Recipe With Canned Filling
- Chill the Dough: After mixing your flour, butter, and ice water, let the dough rest in the fridge for at least 30 minutes—I learned this the hard way when my crust shrank in the oven because the butter softened too fast.
- Drain the Filling: Open the can of cherry filling and pour it into a strainer for 5 minutes to remove excess liquid, or your pie will be soupy and the crust soggy.
- Vent the Top: Cut 4-5 small slits in the top crust before baking to let steam escape, or you’ll end up with a messy, burst cherry pie like my first attempt.
- Use Cold Butter: Keep your unsalted butter ice-cold when cutting it into the flour—this is what creates flaky layers, and warm butter just makes a dense, tough crust.
Essential Equipment for This Recipe
Must-Have Tools
To make your cherry pie with canned filling a success, start with a few kitchen staples. A 9-inch pie dish is non-negotiable—glass or ceramic works best for even baking. You’ll also need a rolling pin to smooth out your crust and a pastry cutter or fork to blend the dough. Don’t forget a mixing bowl for combining ingredients!
Nice-to-Have Tools
For extra precision and ease, consider a pie crust shield to prevent over-browning or a bench scraper for clean dough cuts. A kitchen scale ensures accurate measurements, while a pastry brush helps achieve that golden, buttery finish. These tools elevate your pie game without being essential.
Budget Alternatives
No fancy gadgets? No problem! Use a wine bottle as a rolling pin or a butter knife for cutting dough. A ramekin or even a muffin tin can stand in for a pie dish in a pinch. Get creative—great pie is about technique, not just tools!
Nutrition Facts

- 6 Egg Cake Recipe with Oil: Light as Air With Buttery Moisture - October 4, 2026
- 4 Bean Casserole Recipe: One-Pan Heartiness With Smoky Paprika Depth - October 4, 2026
- 3-Ingredient Keto Mug Cake Recipe: Microwave Magic in 2 Minutes - October 4, 2026