
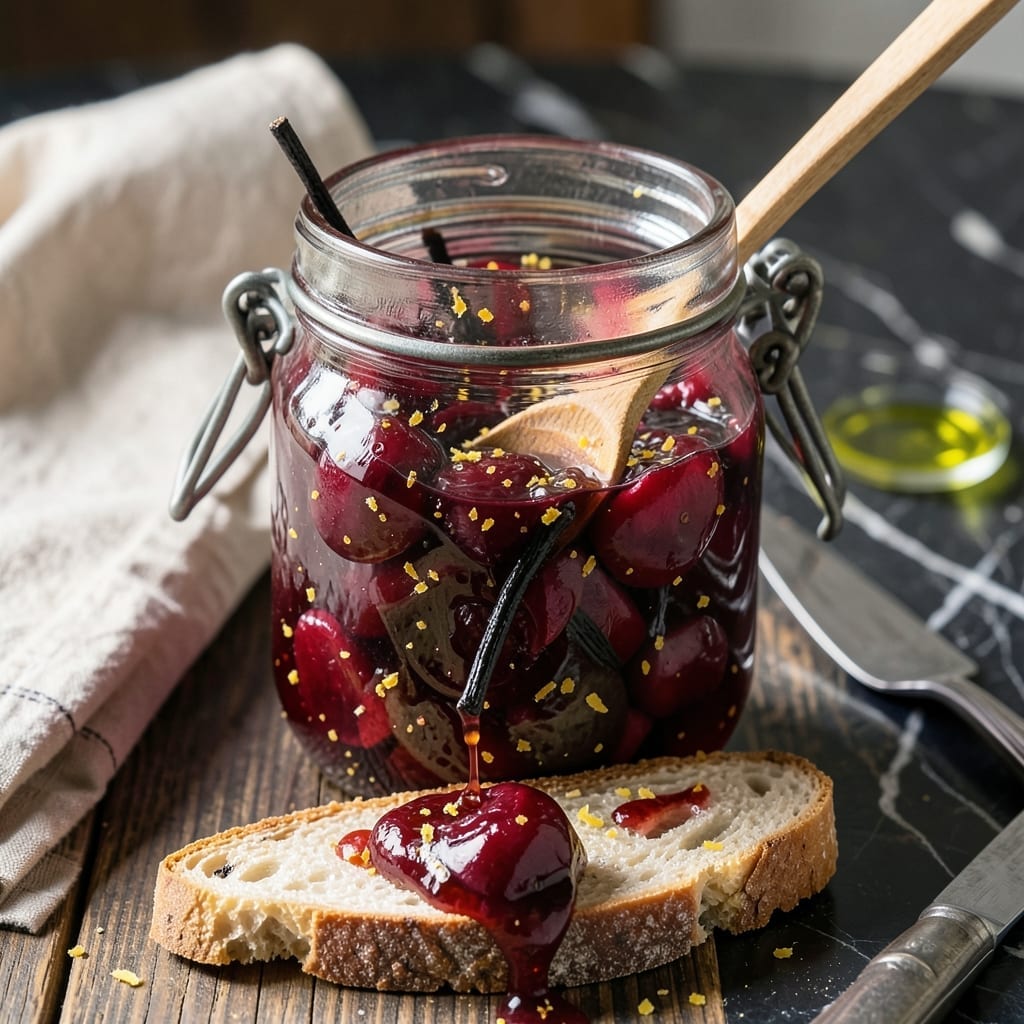
There’s a simple joy in spreading homemade cherry preserves on warm toast, knowing exactly what went into the jar. This small-batch method relies on natural pectin from the fruit itself, creating a thick, glossy spread without additives.
The key is patience—slow cooking allows the cherries to break down and release their own pectin, resulting in preserves that are rich, fruity, and perfectly set. Just three ingredients and a little time yield a condiment far superior to store-bought.
Ingredients for Cherry Preserves Recipe Without Pectin
Small batch of cherries, sugar, and citrus transforms into glossy preserves without additives.
| Ingredient | Amount | Notes |
|---|---|---|
| Fresh Sweet Cherries 🍒 | 4 cups | Pitted, stems removed |
| Granulated Cane Sugar 🍚 | 2 cups | Organic preferred for clean flavor |
| Fresh Lemon Juice 🍋 | ¼ cup | Strained for clarity |
| Lemon Zest 🍋 | 1 tbsp | Finely grated from organic lemons |
| Water 💧 | ¼ cup | Filtered for best results |
| Vanilla Bean 🌿 | ½ whole | Split and scraped, seeds only |
| Pinch of Sea Salt 🧂 | 1 pinch | Balances sweetness |
The cherries are everything here. Sweet varieties like Bing or Rainier work best—avoid overly tart ones. I source mine from local farmers markets in peak season (late June to early August), but Whole Foods carries decent frozen options in a pinch. Look for firm, deep-colored fruit with stems intact. The natural pectin in slightly underripe cherries actually helps with thickening, so don’t stress about absolute perfection.
No vanilla bean? Pure vanilla extract at one teaspoon works perfectly. Short on lemon juice? Lime juice in equal amounts gives a nice twist. The sugar quantity is non-negotiable for proper preservation and texture—reducing it risks a runny product. If you must substitute, raw sugar or turbinado work but may darken the preserves. The water amount can be eyeballed.
Preserves keep 12-18 months in sterilized jars stored in a cool, dark pantry. Once opened, refrigerate and use within 3 months. The flavor deepens over time—wait at least 24 hours before tasting for the full experience.
Why You’ll Love This Recipe
- No-Fuss Cooking: I just pit the cherries, dump everything in a pot, and let the sugar do the work—no special tools or pectin required.
- Bright Cherry Pop: The lemon zest and juice cut through the sweetness, making the cherry flavor taste like summer in a jar.
- Endless Uses: I spoon it over yogurt, swirl it into oatmeal, or gift it in tiny jars—it’s my secret weapon for last-minute hostess gifts.
- Pantry Staple: One batch makes enough to last months, and it’s way cheaper than store-bought preserves with half the sugar.
Step-by-Step Instructions for Cherry Preserves Without Pectin
Master the technique of natural thickening for preserves that set beautifully without artificial additives.
Step 1: Prepare the Cherries and Aromatics
Begin by pitting the 4 cups Fresh Sweet Cherries and removing any stems. I recommend using a cherry pitter for efficiency, but a small knife works as well. Place the pitted cherries in a large, heavy-bottomed pot—this prevents scorching during cooking.
Split the 0.5 whole Vanilla Bean lengthwise and scrape out the seeds. Add the seeds and the pod to the pot along with the cherries. The vanilla adds depth of flavor that complements the natural sweetness of the fruit.
Step 2: Combine Ingredients and Begin Cooking
To the pot, add the 2 cups Granulated Cane Sugar, 0.25 cup Fresh Lemon Juice, 1 tbsp Lemon Zest, and 0.25 cup Water. Stir thoroughly to combine, ensuring the sugar begins to dissolve even before heat is applied. The lemon juice and zest provide essential acidity, which helps the preserves set naturally.
Place the pot over medium heat and bring the mixture to a gentle boil, stirring frequently. As the sugar dissolves completely, you’ll notice the liquid becoming slightly syrupy—this is the first sign that the preserves are beginning to thicken.
Step 3: Simmer to Natural Thickening
Once boiling, reduce the heat to medium-low to maintain a steady but gentle simmer. Add the pinch of Sea Salt—this balances the sweetness and enhances the fruit’s natural flavor. Stir the mixture occasionally to prevent sticking, but avoid constant stirring, which can break down the cherries too much.
Cook for 40-45 minutes, or until the mixture thickens and the liquid reduces by about half. To test for doneness, place a small spoonful on a chilled plate. If it wrinkles slightly when pushed with a finger and holds its shape, the preserves are ready. The cherries should be tender but still hold their form.
Step 4: Cool and Jar the Preserves
Remove the pot from heat and let the preserves cool for 5 minutes. This brief rest allows the mixture to thicken further as it cools. Remove the vanilla bean pod at this stage, as its flavor has fully infused into the preserves.
Ladle the warm preserves into clean, sterilized jars. Seal with lids and let cool completely at room temperature. The preserves will continue to set as they cool, reaching the perfect spreadable consistency. Store in the refrigerator for up to 3 weeks, or process in a water bath for longer shelf stability.
Pro Tips For Making Cherry Preserves Recipe Without Pectin
- Simmer Low and Slow: Keep the heat at a gentle simmer—too high and the sugar will caramelize before the cherries break down. I learned this the hard way after scorching a batch that smelled like burnt candy.
- Pit Every Cherry: Sounds tedious, but skipping this leaves hard pits in your preserves and risks cracking a tooth. A cherry pitter makes quick work of it, or use a chopstick to push them out.
- Test the Set: After 45 minutes, drop a spoonful on a cold plate—if it wrinkles when pushed, it’s ready. I used to guess and ended up with syrupy preserves more than once.
- Zest the Lemon: Add the lemon zest along with the juice for a brighter, more complex flavor. My grandmother swore by this, and she was right: it balances the sweetness perfectly.
Pro Cooking Tips for Great cherry preserves recipe without pectin
💡 Master the Heat
Use medium-low heat for steady simmering to avoid scorching. Too high heat can break down the cherries too quickly, leading to a thin, watery preserve. Stir frequently with a wooden spoon to ensure even cooking and prevent sticking to the bottom of the pot.
✨ Balancing Sweetness and Acid
Add a splash of lemon juice (about 1 tablespoon per pound of cherries) to enhance natural pectin release and brighten flavors. Taste as you go and adjust sugar gradually—cherries vary in sweetness, and you can always add more, but you can’t take it out!
🎯 Test for Doneness
Use the cold plate test: place a spoonful of preserves on a chilled plate, let it sit for a minute, then push it with your finger. If it wrinkles slightly, it’s ready. If it’s still liquid, cook a few more minutes and retest.
🌡️ Use the Right Pot
Opt for a wide, heavy-bottomed pot (like enameled cast iron or stainless steel) to allow for even heat distribution and faster evaporation. Avoid aluminum, as it can react with acidic fruits and affect flavor.
Nutrition Facts

- 6 Egg Cake Recipe with Oil: Light as Air With Buttery Moisture - October 4, 2026
- 4 Bean Casserole Recipe: One-Pan Heartiness With Smoky Paprika Depth - October 4, 2026
- 3-Ingredient Keto Mug Cake Recipe: Microwave Magic in 2 Minutes - October 4, 2026