
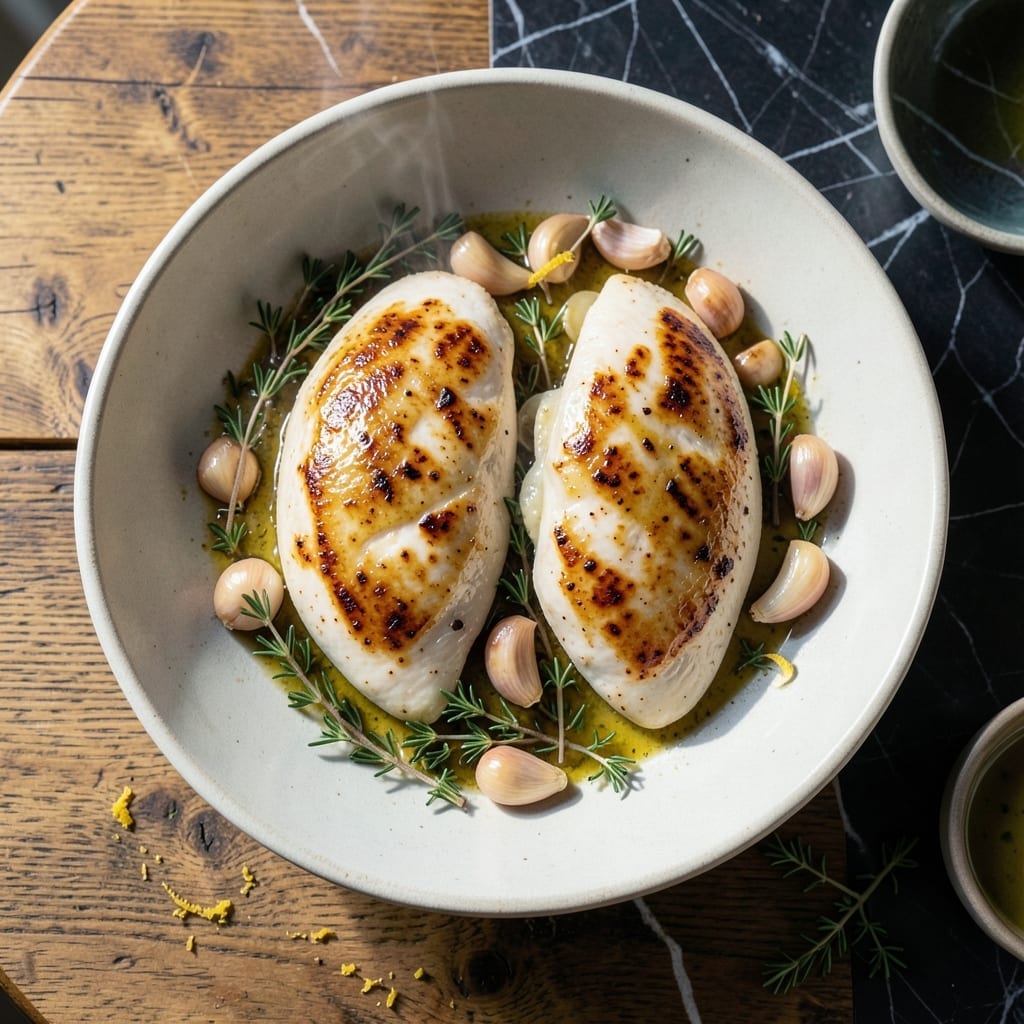
This method guarantees juicy, tender chicken breast every time without fail. The secret lies in a simple brine that locks in moisture before cooking, transforming ordinary chicken into something extraordinary.
I developed this technique after years of struggling with dry, overcooked chicken. A 30-minute brine in salted water works miracles by allowing the meat to absorb liquid, ensuring it stays succulent through cooking.
Cooking at the right temperature and letting the meat rest are equally crucial. These small steps make the difference between mediocre and restaurant-quality results at home.
You’ll serve perfectly cooked chicken that slices cleanly and stays moist in every bite. This is the reliable method your weeknight dinners have been missing.
Ingredients for Chicken Breast Recipe Juicy
A simple brine and quality ingredients transform chicken into something restaurant-worthy every time.
| Ingredient | Amount | Notes |
|---|---|---|
| Boneless Skinless Chicken Breasts 🍗 | 1 ½ lb | Uniform thickness for even cooking |
| Kosher Salt 🧂 | ¼ cup | Diamond Crystal preferred for brining |
| Granulated Sugar 💧 | 2 tbsp | Balances brine salinity |
| Cold Water 💧 | 4 cups | For brine solution |
| Olive Oil 🫒 | 2 tbsp | High smoke point for searing |
| Unsalted Butter 🧈 | 2 tbsp | For basting while cooking |
| Garlic Cloves 🧄 | 4 cloves | Lightly crushed for aroma |
| Fresh Rosemary Sprigs 🌿 | 2 sprigs | For infusing butter |
| Fresh Thyme Sprigs 🍃 | 2 sprigs | Optional for additional flavor |
| Black Peppercorns 🌶️ | 1 tsp | Lightly crushed for seasoning |
| Lemon Juice 🍋 | 1 tbsp | Freshly squeezed for brightness |
| Extra-Virgin Olive Oil 🫒 | 1 tbsp | For finishing |
The brine is non-negotiable here. Diamond Crystal kosher salt dissolves cleanly without additives—avoid table salt at all costs. Chicken breasts vary wildly in size, so pound them to even thickness before brining. I source mine from Whole Foods for consistent quality, but any reputable grocer will do. The sugar isn’t optional; it creates the perfect osmotic balance for maximum moisture retention.
No kosher salt? One-third less table salt by volume, but results won’t be as clean. Fresh herbs are ideal, but dried at half the quantity works in a pinch. The butter can be swapped for ghee if you prefer, but unsalted is crucial—salted will make your brine overly aggressive. For the oil, any neutral high-smoke-point option like avocado oil substitutes beautifully.
Brine chicken for exactly 30 minutes—any longer and it becomes mushy. Cooked chicken keeps 3-4 days refrigerated, or freeze for up to 3 months. Always bring to room temperature before reheating to maintain that coveted juiciness.
Why You’ll Love This Recipe
- 5-Minute Prep: I just mix salt, sugar, and cold water for the brine, then let the chicken soak. Honestly, it doesn’t get simpler than this.
- Melt-in-Your-Mouth Juicy: The sugar in the brine locks in moisture, so every bite is tender and flavorful—no dry chicken here.
- Meal Prep Hero: I make a big batch on Sunday and use it in salads, wraps, or stir-fries all week long.
- Budget Stretch: Four ingredients, one pan, and it feeds my family for days. Between us, it’s my go-to for saving both time and money.
Step-by-Step Instructions for Chicken Breast Recipe Juicy
This method ensures maximum moisture retention through precise brining and controlled cooking techniques.
Step 1: Prepare the Brine Solution
In a large bowl, combine the 0.25 cup Kosher Salt, 2 tbsp Granulated Sugar, and 4 cups Cold Water. Stir vigorously until both the salt and sugar fully dissolve—the solution should appear clear, not cloudy.
I use Diamond Crystal kosher salt for its clean flavor and consistent dissolution. The sugar balances the brine’s salinity, preventing the chicken from tasting overly salty while still enhancing its natural juiciness. Ensure the water remains cold throughout to maintain food safety.
Step 2: Brine the Chicken Breasts
Submerge the 1.5 lb Boneless Skinless Chicken Breasts completely in the brine solution. If they float, place a small plate or weight on top to keep them fully immersed. Refrigerate for at least 1 hour, though I prefer 2-4 hours for optimal flavor penetration and moisture retention.
The brine works by breaking down muscle proteins, allowing the chicken to retain more moisture during cooking. For uniform thickness, I recommend pounding thicker parts of the breasts to ensure even brining and cooking. Don’t exceed 4 hours of brining time, as the texture may become mealy.
Step 3: Sear with Aromatic Infusion
Remove the chicken from the brine and pat thoroughly dry with paper towels. Heat the 2 tbsp Olive Oil in a large skillet over medium-high heat until it shimmers. Add the chicken and sear for 5-6 minutes per side until golden brown and the internal temperature reaches 155°F.
During the last 2 minutes of cooking, add the 2 tbsp Unsalted Butter, 4 cloves Garlic Cloves (lightly crushed), 2 sprigs Fresh Rosemary Sprigs, 2 sprigs Fresh Thyme Sprigs, and 1 tsp Black Peppercorns (lightly crushed) to the pan. Tilt the skillet and baste the chicken with the infused butter continuously for maximum flavor penetration.
Step 4: Rest and Finish
Transfer the chicken to a cutting board and let it rest for 5-10 minutes. This crucial step allows the juices to redistribute throughout the meat. Tent loosely with foil to maintain warmth without steaming the skin.
Before serving, drizzle with the 1 tbsp Lemon Juice and 1 tbsp Extra-Virgin Olive Oil. The acidity from the lemon juice brightens the rich flavors, while the extra-virgin olive oil adds a final layer of complexity. Slice against the grain for the most tender texture and serve immediately while still warm.
Pro Tips For Making Chicken Breast Recipe Juicy
- Brine First: Soak the chicken in a mix of 1/4 cup kosher salt, 2 tablespoons sugar, and 4 cups cold water for 30 minutes—this is the only thing that keeps it from drying out when cooking.
- Pound Even Thickness: Use a rolling pin or heavy pan to pound the breasts to an even ¾-inch thickness so they cook through without overdoing the thinner parts.
- Don’t Overcook: Pull the chicken off the heat at 155°F internal temp and let it rest to 160°F—any higher and it turns to sawdust, no matter how much you brined it.
- Hot Pan, Quick Sear: Heat 2 tablespoons olive oil in a pan until shimmering, then cook the chicken 4-5 minutes per side—this creates a crust that locks in the juices.
Storing and Reheating This Dish
Refrigerator Storage
Let your cooked chicken cool for no more than 2 hours before transferring to airtight containers. I use glass containers with snap-tight lids to prevent leakage. Store at 40°F or below for up to 3-4 days. The flavors actually deepen slightly as it rests. ❄️
Freezer Storage
For longer storage, wrap each breast individually in plastic wrap, then place in a gallon-sized freezer bag. Squeeze out excess air to prevent freezer burn. This method keeps the chicken juicy for up to 3 months without texture loss.
Stovetop Reheating
My preferred method: warm in a skillet over low heat with a splash of chicken broth or water. Cover with a lid and heat for 5-7 minutes, turning once. This restores moisture beautifully while preventing drying out. 🔥
Microwave Quick Fix
Place chicken on a microwave-safe plate, cover with a damp paper towel, and heat on 50% power for 1-2 minutes. Check temperature and continue in 30-second bursts until reaching 165°F.
Oven Method
Preheat oven to 300°F. Wrap chicken in aluminum foil with a pat of butter and heat for 10-15 minutes. This gentle method works great for larger batches.
Pro Tip
Always let refrigerated chicken sit at room temperature for 15 minutes before reheating. This ensures even warming throughout without overcooking the edges. The brine helps maintain that juiciness we worked so hard to achieve.
Nutrition Facts
Frequently Asked Questions
Why does brining make chicken juicier?
Brining works through osmosis, allowing the chicken to absorb moisture before cooking. The salt in the brine also breaks down muscle proteins, helping them retain liquid during the cooking process. This means less moisture loss and more tender results.
How do I know when the chicken is done?
Use a meat thermometer to check the internal temperature—it should read 165°F in the thickest part. The juices should also run clear, not pink. Overcooking is the biggest enemy of juiciness, so pull it off the heat just as it reaches temperature.
Can I skip the resting step?
Never skip resting! Letting the chicken rest for 5-10 minutes allows the juices to redistribute throughout the meat. Cutting too soon causes all those precious juices to spill out, leaving you with dry chicken. Patience pays off here.
What if my chicken breasts are different sizes?
Pound them to an even thickness with a rolling pin or meat mallet. This ensures even cooking and prevents smaller pieces from drying out while waiting for larger ones to finish. Aim for ½-inch to ¾-inch thickness for best results.

- 6 Egg Cake Recipe with Oil: Light as Air With Buttery Moisture - October 4, 2026
- 4 Bean Casserole Recipe: One-Pan Heartiness With Smoky Paprika Depth - October 4, 2026
- 3-Ingredient Keto Mug Cake Recipe: Microwave Magic in 2 Minutes - October 4, 2026