
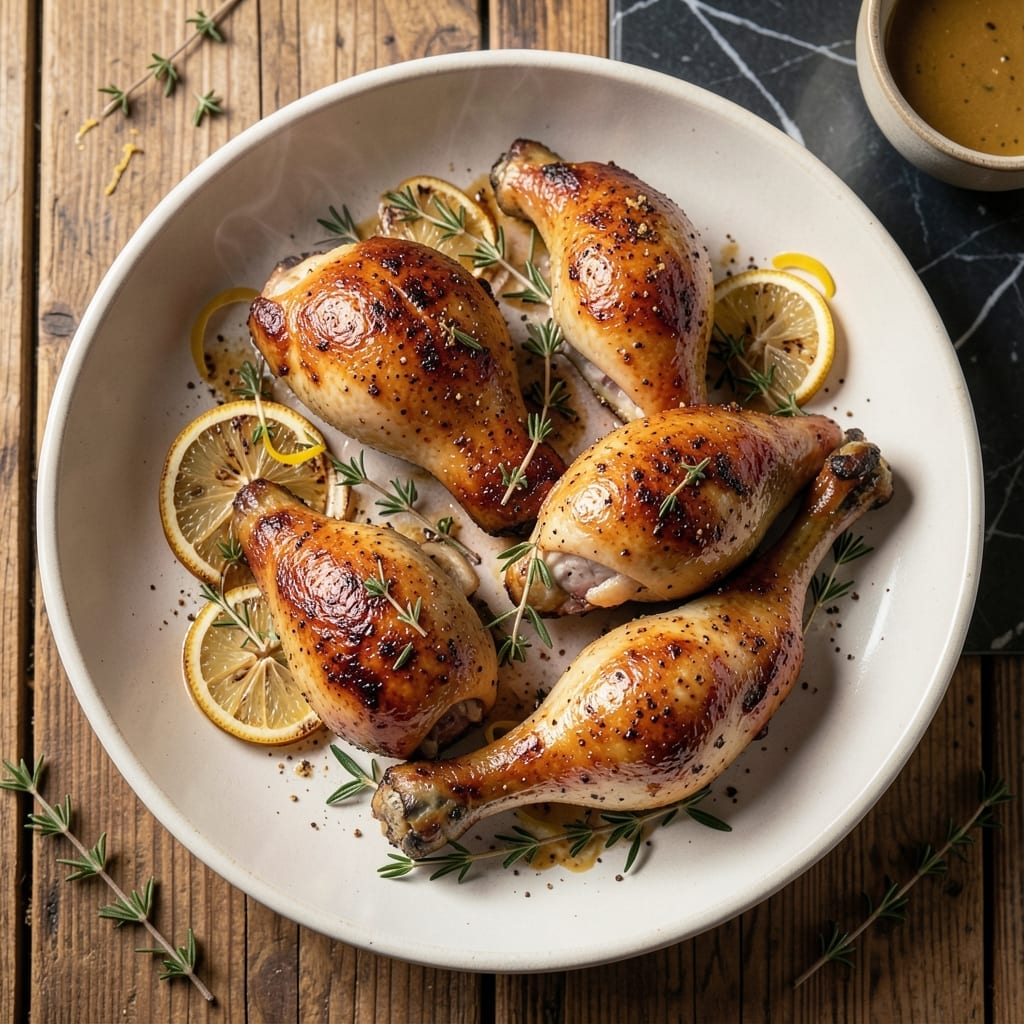
Achieving fall-off-the-bone chicken with crispy skin in the oven is simpler than you think. This method delivers consistent results through precise temperature control and timing.
The key is high heat for the first phase to render fat and crisp the skin, followed by a lower temperature to ensure the meat becomes exceptionally tender. A dry brine beforehand enhances flavor and moisture retention.
You’ll end up with drumsticks featuring golden, shatteringly crispy skin giving way to juicy, flavorful meat. The technique works every time without fail.
Pair with roasted vegetables or a fresh salad for a complete meal. Here’s how to make it.
Ingredients for Chicken Drumstick Recipe Oven
Skin-on drumsticks and a handful of pantry spices create this foolproof oven-baked dish.
| Ingredient | Amount | Notes |
|---|---|---|
| Chicken Drumsticks 🍗 | 2 ½ lb | Skin-on, bone-in preferred |
| Kosher Salt 🧂 | 1 ½ tbsp | Diamond Crystal brand preferred |
| Black Pepper 🌶️ | 1 tsp | Freshly ground for best flavor |
| Garlic Powder 🧄 | 1 tsp | Not garlic salt |
| Onion Powder 🧅 | 1 tsp | Fresh ground preferred |
| Smoked Paprika 🌶️ | 1 tsp | For depth of flavor |
| Dried Thyme 🍃 | ½ tsp | Rubbed between fingers to release aroma |
| Baking Powder 🧂 | 1 tsp | Enhances crispiness of skin |
| Olive Oil 🫒 | 2 tbsp | Extra-virgin for richness |
| Lemon Juice 🍋 | 1 tbsp | Freshly squeezed for brightness |
| Fresh Rosemary 🌿 | 1 tbsp | Chopped, for garnish |
| Fresh Parsley 🌿 | ¼ cup | Chopped, for garnish |
The chicken quality is paramount. Skin-on, bone-in drumsticks yield the crispiest skin and juiciest meat—avoid pre-brined or enhanced products. Costco and Whole Foods carry excellent options, but most supermarkets stock suitable drumsticks. Look for pieces that are similar in size for even cooking. The dry brine (salt applied ahead of time) is non-negotiable for maximum flavor and moisture retention.
No smoked paprika? Regular paprika plus a pinch of cayenne approximates the smokiness. Fresh garlic can replace garlic powder (use 3 cloves, minced). If you lack dried thyme, fresh thyme at triple the amount works beautifully. The baking powder might seem unusual, but it’s the professional trick for extra-crispy skin—do not omit. Olive oil can be swapped for avocado oil if preferred.
The dry-brined drumsticks can rest uncovered in the fridge for up to 24 hours before cooking. Leftovers keep for 4 days refrigerated or freeze for 3 months. Reheat in the oven to maintain crispy skin—microwaving will soften it.
Why You’ll Love This Recipe
- One Pan Wonder: I toss the drumsticks with salt, pepper, garlic and onion powder, then let the oven do all the work.
- Ridiculously Good: That crispy skin with the juicy meat inside? The garlic and onion powder make it irresistible.
- Weeknight Hero: It’s my go-to for busy evenings—minimal effort, maximum flavor, and the kids actually eat it.
- Budget Stretcher: A pack of drumsticks feeds my family for less than takeout, and leftovers taste even better the next day.
Step-by-Step Instructions for Chicken Drumsticks Oven
Master the technique for crispy-skinned, fall-off-the-bone chicken with this oven method.
Step 1: Season the Chicken for Maximum Flavor
Pat the 2.5 lb chicken drumsticks completely dry with paper towels—this is critical for crispy skin. In a small bowl, combine the 1.5 tbsp kosher salt, 1 tsp black pepper, 1 tsp garlic powder, 1 tsp onion powder, 1 tsp smoked paprika, 0.5 tsp dried thyme, and 1 tsp baking powder.
Rub this seasoning mixture all over the drumsticks, pressing it into the skin. The baking powder reacts with the chicken’s natural juices to create micro-bubbles, which results in extra-crispy skin. Place the seasoned drumsticks on a wire rack set over a baking sheet.
Step 2: Add Moisture and Aromatics
Drizzle the 2 tbsp olive oil and 1 tbsp lemon juice over the drumsticks, turning to coat evenly. The olive oil helps the seasoning adhere while the lemon juice adds brightness and begins tenderizing the meat.
Let the chicken sit at room temperature for 20-30 minutes while your oven preheats. This ensures even cooking and allows the seasoning to penetrate the meat. The skin should look slightly tacky from the oil and lemon juice mixture.
Step 3: Roast at High Heat for Crispy Skin
Preheat your oven to 425°F. Once hot, roast the drumsticks for 25 minutes, then flip them over using tongs. Roast for another 20-25 minutes or until the internal temperature reaches 195°F.
The high heat renders the fat under the skin, creating that coveted crispiness. Look for the skin to turn a deep golden brown and the meat to pull away slightly from the bones. This higher internal temperature ensures the collagen breaks down completely for that fall-off-the-bone tenderness.
Step 4: Rest and Garnish Before Serving
Remove the drumsticks from the oven and let them rest on the wire rack for 10 minutes. This allows the juices to redistribute throughout the meat. Tent loosely with foil if needed to keep warm, but avoid sealing completely to preserve the crispy skin.
Just before serving, sprinkle with the 1 tbsp fresh rosemary and 0.25 cup fresh parsley for a pop of color and fresh herbal notes. The aromatic oils from the herbs will complement the smoky depth from the paprika.
Pro Tips For Making Chicken Drumstick Recipe Oven
- Pat Them Dry: Grab a paper towel and dry each drumstick thoroughly before seasoning—I learned this the hard way after my first batch came out steamed instead of crispy.
- Crank the Oven: Set it to 425°F for the first 20 minutes, then drop to 375°F to finish. This gives you that golden crust without drying out the meat.
- Season Twice: Hit the drumsticks with salt and spices before baking, then give them another light dusting halfway through. Garlic and onion powder cling better to the skin this way.
- Rest Before Serving: Pull them out 5 minutes early and let them rest under foil. Sounds weird, but it keeps the juices from running all over the plate when you cut in.
Make-Ahead Tips for This chicken drumstick recipe oven
Dry Brine Ahead
Season your 2.5 lb chicken drumsticks with the full spice rub up to 24 hours before cooking. This dry brine deepens flavor and ensures maximum moisture retention. Store uncovered in the fridge on a wire rack to allow air circulation. 💡
Prep the Pan
Set up your baking sheet with a wire rack the night before. Line with parchment paper for easy cleanup. I like using a half-sheet pan with a cooling rack—it fits 8-10 drumsticks perfectly without crowding.
Room Temperature Start
Remove the seasoned chicken from the fridge 30-45 minutes before roasting. This ensures even cooking and helps the skin crisp uniformly. I always set a timer so I don’t forget this crucial step.
Oven Prep
Preheat your oven to 425°F during the last 20 minutes of the chicken’s rest time. A properly preheated oven is essential for that initial high-heat blast that renders fat and starts the crisping process.
Reheating Leftovers
Store cooked drumsticks in an airtight container for up to 4 days. Reheat in a 400°F oven for 10-15 minutes on a wire rack to restore crispiness. Microwaving will soften the skin, so avoid it if possible.
Freeze for Later
Freeze cooled drumsticks in a single layer first, then transfer to a freezer bag for up to 3 months. Thaw overnight in the fridge before reheating. This method prevents the pieces from sticking together. ❄️
Nutrition Facts
Frequently Asked Questions
Why use baking powder on the chicken?
Baking powder creates tiny bubbles under the skin, making it extra crispy. It reacts with the chicken’s natural juices during cooking. This is a professional trick for perfect texture every time.
Can I use chicken thighs instead?
Yes! Bone-in, skin-on thighs work well with the same method. Adjust cooking time to 35-40 minutes total at 425°F. Thighs may need a few extra minutes to reach 195°F internally.
How do I know when they’re done?
Use a meat thermometer to check for 195°F internally. The skin should be deep golden brown and crispy. Meat will pull slightly away from the bones when fully cooked.
What if my skin isn’t crispy?
Pat the drumsticks completely dry before seasoning. Ensure oven is fully preheated to 425°F. Crowding the pan can steam the skin—use a wire rack for air circulation.

- 6 Egg Cake Recipe with Oil: Light as Air With Buttery Moisture - October 4, 2026
- 4 Bean Casserole Recipe: One-Pan Heartiness With Smoky Paprika Depth - October 4, 2026
- 3-Ingredient Keto Mug Cake Recipe: Microwave Magic in 2 Minutes - October 4, 2026