
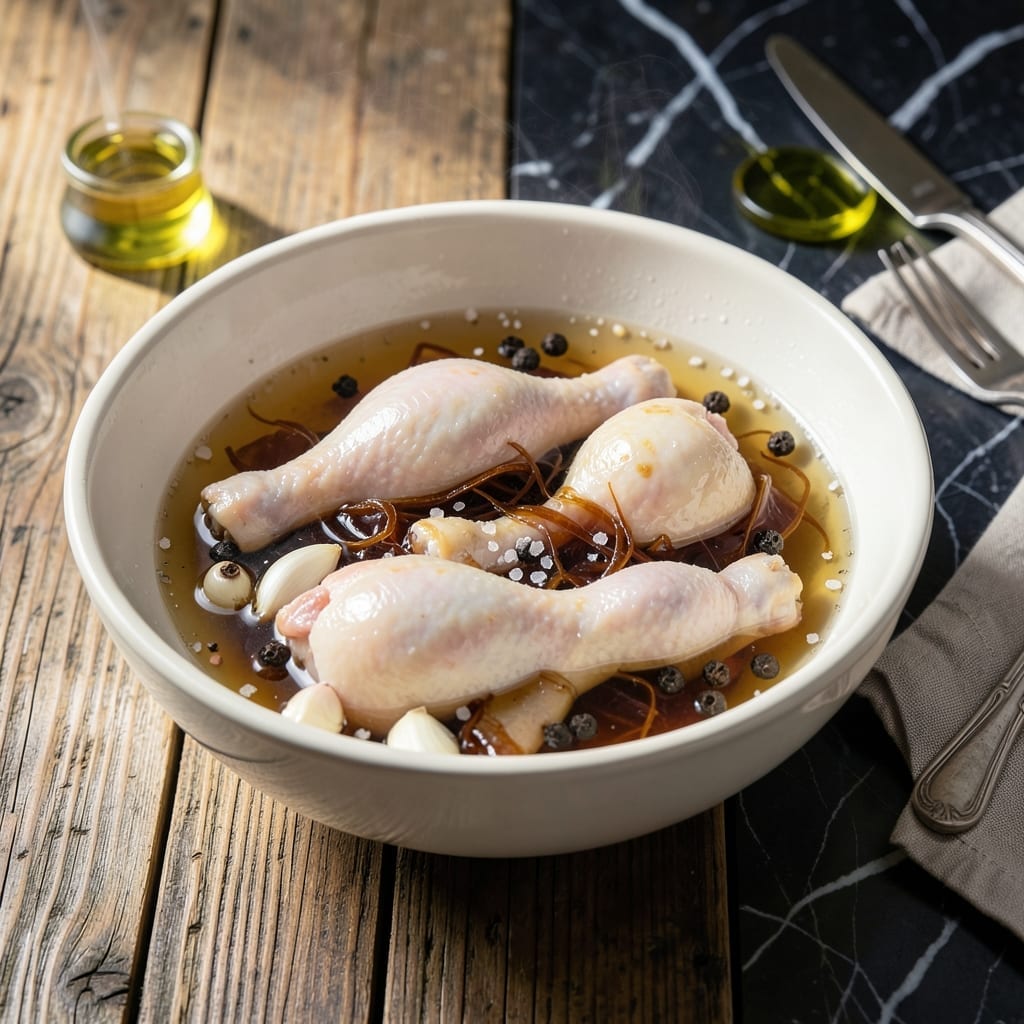
This simple brine solution guarantees juicy, flavorful chicken legs every time. No more dry, bland meat—just consistent results with minimal effort.
The combination of salt and water works its magic in just 4 hours, infusing moisture and seasoning deep into the meat. I use a precise ratio that enhances natural flavors without overpowering them.
With basic pantry staples and a short soak, you’ll transform ordinary chicken into something exceptional. The difference is noticeable from the first bite.
Perfect for grilling, baking, or frying, this brine ensures your chicken stays succulent throughout cooking. Here’s how to make it.
Ingredients for Chicken Leg Brine
Nine ingredients transform chicken legs into juicy, flavor-packed masterpieces with minimal effort.
| Ingredient | Amount | Notes |
|---|---|---|
| Water 💧 | 4 cups | Cold, for dissolving salt |
| Kosher Salt 🧂 | ½ cup | Diamond Crystal preferred |
| Granulated Sugar 🍚 | ¼ cup | Balances saltiness perfectly |
| Brown Sugar 🟤 | ¼ cup | Light or dark works |
| Garlic Cloves 🧄 | 6 cloves | Smashed to release flavor |
| Black Peppercorns 🌶️ | 1 tbsp | Whole, lightly crushed |
| Bay Leaves 🍃 | 4 whole | Dried, for depth |
| Fresh Rosemary Sprigs 🌿 | 3 whole | Optional aromatic boost |
| Lemon Slices 🍋 | 2 slices | Thin, for brightness |
The salt is doing the heavy lifting here—Diamond Crystal kosher salt is my go-to because it dissolves cleanly and has no additives. For the water, use cold (not ice water, but straight from the tap is fine). Most grocery stores carry Diamond Crystal, but Morton works too—just reduce the amount by about 25% since it’s denser. The sugar isn’t just for sweetness; it helps the brine penetrate the meat faster.
Out of kosher salt? Table salt at half the amount (but it’s not ideal—can taste metallic). No fresh garlic? Garlic powder at 1 tsp works in a pinch, but fresh is better for this. Skip the rosemary if you don’t have it (the bay and peppercorns carry the flavor), but if you’ve got fresh thyme, toss in a few sprigs—it’s a great addition that pairs perfectly with chicken.
Brine keeps in the fridge for 24 hours (any longer and it gets too salty). Don’t reuse it—discard after one batch. The chicken can soak in the fridge for 4-12 hours (4 is the minimum for noticeable juiciness, 12 is the sweet spot for maximum flavor).
Why You’ll Love This Recipe
- 5-Minute Mix: Honestly, I just dump the salt, sugars, and garlic in water—no chopping, no fuss.
- Deep Garlic Punch: The slow soak turns plain chicken legs into juicy, garlicky bites that taste like they marinated for hours.
- Grill or Oven: I’ve brined these for weeknight dinners and summer BBQs—works every time.
- Pennywise Protein: A bag of chicken legs and pantry staples stretch into multiple meals without breaking the bank.
Step-by-Step Instructions for Chicken Leg Brine
Here’s the method. Straightforward, tested, works every time.
Step 1: Dissolve Salt and Sugars in Water
In a large pot, combine the 4 cups Water with the 0.5 cup Kosher Salt, 0.25 cup Granulated Sugar, and 0.25 cup Brown Sugar. Stir over medium heat just until the salt and sugars fully dissolve—you should see no visible grains left.
This balance of salt and sugars ensures maximum moisture retention while adding subtle sweetness. I use Diamond Crystal kosher salt for its clean, consistent flavor. Remove from heat once everything dissolves to prevent unnecessary evaporation.
Step 2: Toast and Bloom the Aromatics
Lightly crush the 1 tbsp Black Peppercorns with the flat side of a knife—just enough to crack them open. Add these to the warm brine along with the 4 whole Bay Leaves, 6 cloves Garlic Cloves (smashed), 3 whole Fresh Rosemary Sprigs, and 2 slices Lemon Slices.
Let the mixture steep for 10 minutes off heat. The residual warmth will extract the essential oils from the rosemary and bay leaves, while the garlic and lemon infuse the brine with bright, aromatic depth. You’ll smell the transformation as the kitchen fills with herbaceous notes.
Step 3: Cool Completely Before Using
Allow the brine to cool to room temperature before adding chicken legs. This step is non-negotiable—adding meat to hot brine will partially cook the exterior, resulting in tough, dry spots. I speed up the process by placing the pot in an ice bath or cold water sink.
You’ll know it’s ready when the liquid feels cool to the touch, typically after 30-45 minutes. The aromatics will continue infusing as it cools, intensifying the flavor impact on your chicken. Stir occasionally to distribute the flavors evenly.
Step 4: Brine the Chicken Legs
Submerge the chicken legs completely in the cooled brine. Use a plate or zip-top bag to keep them under the surface—any exposed portions won’t benefit from the brine’s magic. Refrigerate for 4-12 hours; I’ve found 8 hours delivers the perfect balance of flavor penetration and texture improvement.
During this time, the brine works its osmosis magic, seasoning the meat from the inside out while breaking down proteins for exceptional tenderness. The sugars also promote beautiful browning when you eventually cook the legs.
Pro Tips For Making Chicken Leg Brine
- Brine Overnight: I learned this the hard way—4 hours just isn’t enough. Give the chicken legs a full 12-hour soak in the salt-sugar-garlic mix for flavor that actually penetrates the meat.
- Crush the Garlic: Sounds weird, but it works: smash those garlic cloves before adding them to the brine. It releases way more flavor into the liquid than whole cloves ever could.
- Use Cold Water: After ruining a batch with warm brine, I now always start with ice-cold water. It keeps the chicken safe while brining and prevents any weird texture changes.
- Rinse After Brining: Skip this step and your chicken will taste like a salt lick. A quick rinse under cold water removes excess salt without washing away the flavor—yes, even if you’re impatient like me.
Make-Ahead Tips for Leftovers
Prep the Brine Early
I always make this brine the night before cooking. It takes 10 minutes to dissolve the salt and sugars in water, then another 30-45 minutes to cool completely. This head start means you can brining first thing in the morning.
Overnight Brining
Submerge your chicken legs in the cooled brine and refrigerate for 8-12 hours. I use a large zip-top bag placed in a bowl to prevent leaks. The longer soak maximizes flavor penetration and ensures every bite stays juicy. 💧
Same-Day Option
Short on time? A 4-hour brine still makes a noticeable difference. I set a timer and keep the chicken in the fridge. Even this quick soak improves moisture retention compared to unbrined legs.
Brine Storage
This brine keeps beautifully in the fridge for up to 24 hours before use. I store mine in a sealed container with all the aromatics still in the liquid. The flavors continue to develop during this time.
Pre-Brine Prep
Before brining, I pat the chicken legs dry with paper towels. This helps the brine penetrate more evenly. Also, ensure your container is large enough to hold both the liquid and meat comfortably.
Post-Brine Rest
After removing chicken from the brine, let it rest on a rack for 15 minutes before cooking. This allows excess moisture to drain, ensuring better browning. I always discard the used brine immediately. ❄️
Nutrition Facts
Frequently Asked Questions
Can I reuse the brine for another batch?
No, always discard used brine. It contains raw chicken juices and bacteria that can contaminate new meat. Make a fresh batch each time for safety.
What if I don’t have kosher salt?
Use table salt at half the amount, but it may taste slightly metallic. Morton kosher salt works too—reduce by 25% as it’s denser.
How long can chicken stay in the brine?
Soak for 4-12 hours maximum. Beyond 12 hours, the meat can become too salty and mushy. 8 hours is ideal for best results.
Do I need to rinse the chicken after brining?
No rinsing needed—just pat dry with paper towels. Rinsing washes away flavor and increases risk of cross-contamination in your kitchen.

- 6 Egg Cake Recipe with Oil: Light as Air With Buttery Moisture - October 4, 2026
- 4 Bean Casserole Recipe: One-Pan Heartiness With Smoky Paprika Depth - October 4, 2026
- 3-Ingredient Keto Mug Cake Recipe: Microwave Magic in 2 Minutes - October 4, 2026