
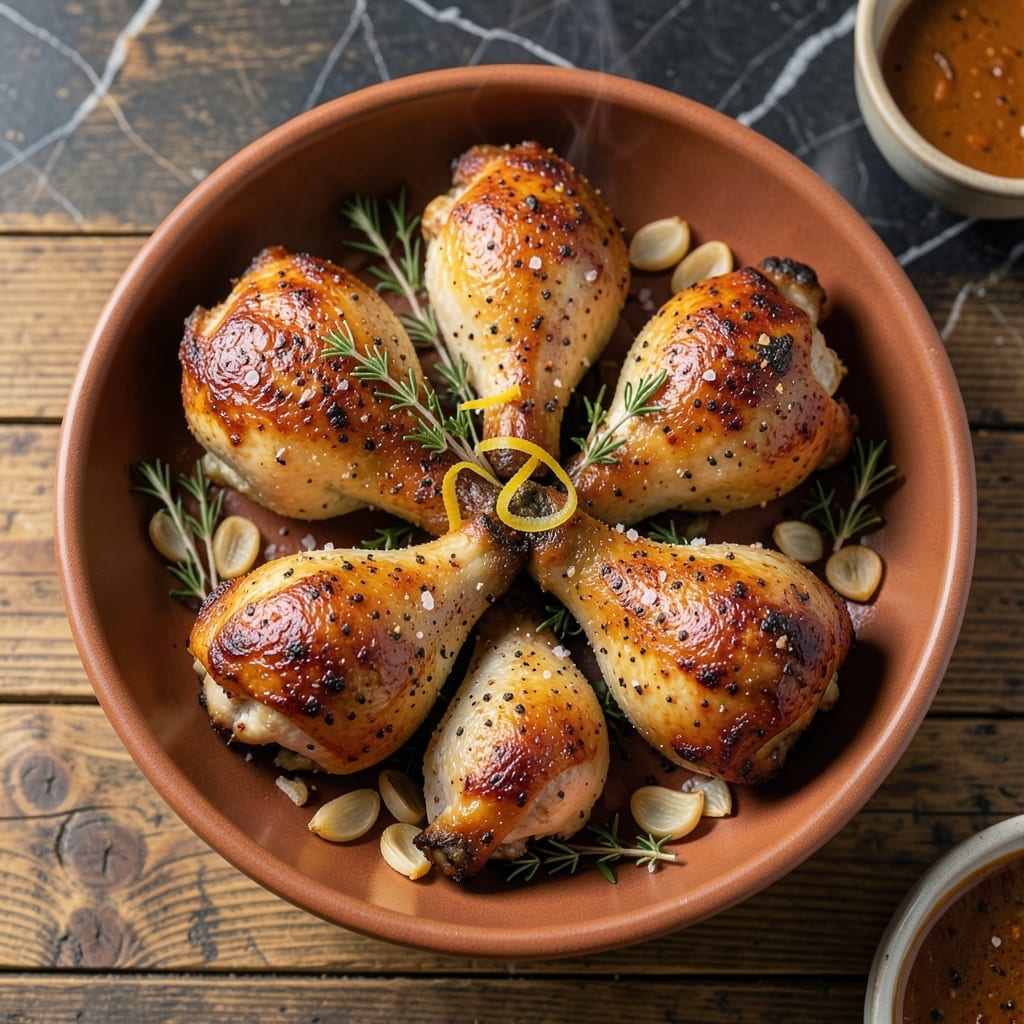
This baked chicken leg recipe delivers crispy skin and juicy meat with minimal effort. The secret lies in a simple dry brine and high-heat finish that guarantees perfect texture every time.
I’ve tested countless methods, and this one-pan approach consistently produces the best results. The skin renders to a golden, shatteringly crispy finish while the meat stays tender and full of flavor.
What you’ll get is fall-off-the-bone chicken with skin so crispy it cracks at the slightest touch. The seasoning is straightforward but deeply flavorful, letting the natural taste of the chicken shine.
Serve with roasted vegetables or a simple salad for a complete meal. Here’s how to make it.
Ingredients for Chicken Leg Recipe Baked
Simple ingredients, extraordinary crispy and juicy results in one pan.
| Ingredient | Amount | Notes |
|---|---|---|
| Chicken Legs 🍗 | 8 pieces | Bone-in, skin-on, drumsticks and thighs |
| Kosher Salt 🧂 | 2 tbsp | Diamond Crystal preferred for dry brine |
| Black Pepper 🌶️ | 2 tsp | Freshly ground for best flavor |
| Garlic Powder 🧄 | 2 tsp | Not garlic salt |
| Onion Powder 🧅 | 2 tsp | Adds depth to seasoning |
| Paprika 🌶️ | 2 tsp | Sweet or smoked variety |
| Dried Thyme 🍃 | 1 tsp | Crushed between fingers |
| Dried Rosemary 🍃 | 1 tsp | Crushed between fingers |
| Olive Oil 🫒 | 2 tbsp | Extra-virgin for richness |
| Baking Powder 🧂 | 1 tsp | For extra-crispy skin |
| Lemon 🍋 | 1 whole | Zested and juiced |
The chicken legs are the star—bone-in, skin-on is non-negotiable for that shatteringly crisp finish. Costco or Sam’s Club have great bulk options, but any supermarket will do. Look for legs with smooth, unbroken skin (fewer tears = crispier results). I always grab a few extra for leftovers—they reheat surprisingly well.
No thyme or rosemary? Dried oregano or marjoram work in a pinch. Short on paprika? Cayenne for heat or skip it entirely—the salt and pepper are doing most of the work. The baking powder might seem odd, but it’s the secret to extra-crispy skin (trust me on this one). No fresh lemon? Bottled juice works, but zest it fresh if you can.
Dry-brined chicken keeps in the fridge for 2 days before cooking. Leftovers? 4-5 days in the fridge, or freeze for 3 months. The skin stays crisp if you reheat in the oven—microwave kills the texture.
Why You’ll Love This Recipe
- I’ll be real: it’s my go-to for Sunday suppers or when the kids bring friends over.
- One Pan Wonder: I toss the legs with salt, pepper, and those powders, then let the oven do the rest—hardly any cleanup.
- Crispy & Savory: The skin gets this golden crunch while the spices sink in, making every bite ridiculously good.
- Feeds a Crowd: I’ll be real: it’s my go-to for Sunday suppers or when the kids bring friends over.
Step-by-Step Instructions for Baked Chicken Legs
One pan, minimal effort, maximum flavor—this method delivers on the crispy-juicy promise.
Step 1: Dry Brine and Season the Chicken Legs
Pat the 8 pieces chicken legs completely dry with paper towels. This step is non-negotiable—moisture prevents crispy skin. Place them in a large bowl and sprinkle evenly with the 2 tbsp kosher salt, 2 tsp black pepper, 2 tsp garlic powder, 2 tsp onion powder, 2 tsp paprika, 1 tsp dried thyme, and 1 tsp dried rosemary.
Rub the seasoning into every crevice, ensuring full coverage. Add the 1 tsp baking powder last—this is the secret to ultra-crispy skin. Let the chicken sit uncovered in the refrigerator for 1 hour or up to 12 hours for the dry brine to work its magic.
Step 2: Prep the Baking Sheet and Zest the Lemon
Position a rack in the center of your oven and preheat to 425°F. Line a large, rimmed baking sheet with parchment paper. The high heat is crucial for that golden, crackly skin we’re after.
Zest the 1 whole lemon directly over the chicken legs, then cut it in half and juice it over the top. The acidity brightens the rich flavors and helps tenderize the meat. Drizzle the 2 tbsp olive oil evenly over the chicken and toss to coat every piece thoroughly.
Step 3: Bake Until Golden and Crispy
Arrange the chicken legs skin-side up on the prepared baking sheet, spacing them out so they’re not touching. This allows hot air to circulate, ensuring even browning. Slide the pan into the preheated oven.
Bake for 40-45 minutes, flipping the legs halfway through, until the skin is deep golden brown and crispy, and the internal temperature reaches 175°F at the thickest part of the thigh. The juices should run clear when pierced with a knife.
Step 4: Rest and Serve
Transfer the baked chicken legs to a serving platter and let them rest for 5-10 minutes. This step locks in the juices—cutting into them too soon will send all that flavor straight to the cutting board.
The skin should be so crispy it crackles when you bite into it, while the meat inside stays tender and moist. Serve with your favorite sides, and maybe an extra squeeze of lemon for good measure. The contrast between the crunchy exterior and juicy interior is what makes this dish unforgettable.
Pro Tips For Making Chicken Leg Recipe Baked
- Dry the Skin: Pat the chicken legs thoroughly dry with paper towels before seasoning—I learned this the hard way after ending up with steamed instead of crispy skin.
- Crisp at 425°F: Bake at a high temperature (425°F) for 40-45 minutes, flipping halfway, to get that golden, crackly skin without drying out the meat.
- Season Twice: Sprinkle half the salt and spices under the skin and the rest on top—this makes sure every bite is flavorful, not just the surface.
- Rest Before Serving: Let the chicken rest 5-10 minutes after baking so the juices redistribute—skip this and you’ll lose half the moisture to the cutting board.
Best Sauces and Condiments for This chicken leg recipe baked
Classic BBQ Glaze
My go-to is a 2:1 ratio of BBQ sauce to honey brushed on during the last 10 minutes of baking. I love Sweet Baby Ray’s for its balance of sweet and tangy. The heat caramelizes the sugars, creating a sticky, glossy finish that clings perfectly to the crispy skin. 🔥
Garlic-Herb Aioli
Whisk ½ cup mayonnaise with 2 minced garlic cloves, 1 tbsp lemon juice, and 1 tsp Dijon mustard. Fold in 2 tbsp chopped fresh parsley. This creamy dip adds a cool contrast to the rich chicken, and the acidity cuts through the fat beautifully.
Spicy Buffalo Sauce
Toss baked legs in ¼ cup melted butter mixed with ½ cup Frank’s RedHot sauce. The buttery heat complements the juicy meat, and it’s ready in seconds. For extra crunch, sprinkle with crumbled blue cheese or serve with celery sticks.
Lemon-Pepper Drizzle
Combine 3 tbsp melted butter, zest of 1 lemon, 1 tbsp lemon juice, and 1 tsp black pepper. Drizzle over the chicken just before serving. The brightness enhances the natural flavors without overpowering them.
Honey-Mustard Glaze
Mix 3 tbsp whole-grain mustard with 2 tbsp honey and 1 tbsp apple cider vinegar. Brush on during the final 5 minutes of baking. The tangy sweetness pairs wonderfully with the savory seasoning on the chicken.
Nutrition Facts
Frequently Asked Questions
What temperature should the oven be set to?
Preheat your oven to 425°F for the perfect balance of crispy skin and juicy meat. This high heat ensures the skin renders properly while cooking the meat through evenly.
How do I know when they’re fully cooked?
Use a meat thermometer to check the thickest part of the thigh—it should read 175°F. The juices will run clear, and the skin will be deep golden brown and crispy.
Can I use boneless chicken instead?
Not recommended. Bone-in, skin-on legs are essential for juicy meat and crispy skin. Boneless pieces dry out faster and won’t achieve the same texture.
How long should I let them rest before serving?
Allow the legs to rest for 5-10 minutes after baking. This keeps the juices locked in so every bite stays tender and flavorful.

- 6 Egg Cake Recipe with Oil: Light as Air With Buttery Moisture - October 4, 2026
- 4 Bean Casserole Recipe: One-Pan Heartiness With Smoky Paprika Depth - October 4, 2026
- 3-Ingredient Keto Mug Cake Recipe: Microwave Magic in 2 Minutes - October 4, 2026