
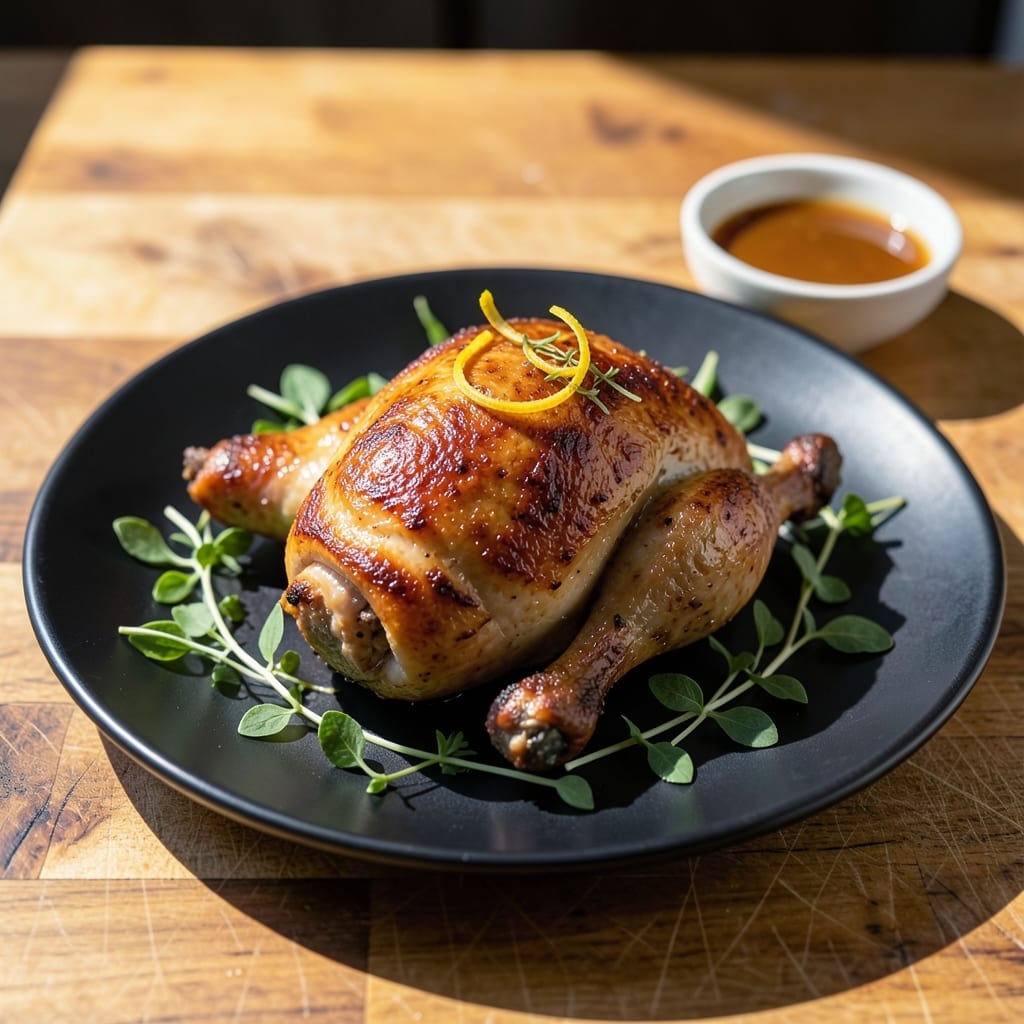
Achieving crispy chicken skin and tender meat requires precision, not luck.
This method delivers perfectly golden, shatteringly crispy skin every time while keeping the meat juicy and flavorful. No shortcuts, just proven technique.
Ingredients for Chicken Recipe Chicken
Precision ingredients for crispy skin and juicy meat every single time.
| Ingredient | Amount | Notes |
|---|---|---|
| Chicken Thighs 🍗 | 4 lb | Bone-in, skin-on, patted dry |
| Kosher Salt 🧂 | 2 tbsp | Diamond Crystal preferred for even seasoning |
| Freshly Ground Black Pepper 🌶️ | 1 tsp | Coarse grind for texture |
| Garlic Powder 🧄 | 1 tbsp | Not garlic salt |
| Onion Powder 🧅 | 1 tbsp | Freshly ground if possible |
| Smoked Paprika 🌶️ | 1 tsp | For depth of flavor |
| Dried Thyme 🍃 | 1 tsp | Rubbed between fingers to release oils |
| Dried Rosemary 🌿 | 1 tsp | Crushed for better distribution |
| Baking Powder 🧂 | 1 tsp | For extra crispiness |
| Olive Oil 🫒 | 2 tbsp | High smoke point variety |
| Unsalted Butter 🧈 | 4 tbsp | Melted for basting |
| Fresh Lemon 🍋 | 1 whole | Zest and juice for brightness |
The chicken is non-negotiable here. Bone-in, skin-on thighs deliver the crispiest skin and most forgiving meat. Whole Foods or Costco have excellent quality—look for plump pieces with smooth, unbroken skin. Avoid pre-brined chicken; you want full control over the seasoning. Pat them thoroughly dry before seasoning—this is the secret to that shattering crispness.
No bone-in thighs? Drumsticks work in a pinch (adjust cooking time). Out of garlic powder? Fresh minced garlic at double the amount, but powder adheres better to the skin. Smoked paprika missing? Substitute with regular paprika plus a pinch of cayenne. The baking powder might seem odd, but it’s the professional trick for extra-crispy results.
Seasoned chicken can rest uncovered in the fridge for up to 24 hours—this actually improves the texture. Cooked chicken keeps 3-4 days refrigerated, but the skin loses crispness. Reheat in a 400°F oven to revive, or repurpose into tacos or salads.
Why You’ll Love This Recipe
- One Pan Magic: I toss the thighs with salt, pepper, and those powders, then roam free while the oven does the work.
- Honestly Addictive: That combo of garlic and onion powder gives the skin a crispy, savory punch I crave all week.
- Feeds the Crew: It’s my go-to for Sunday dinner or doubling the batch for lunches that actually get eaten.
- Pocketbook Friendly: Chicken thighs stay cheap, and a few pantry staples turn them into something I’m proud to serve.
Step-by-Step Instructions for Chicken with Crispy Skin
Here is the method. Tested, reliable, and designed for perfect results every time.
Step 1: Season and Prepare the Chicken Thighs
Pat the 4 lb Chicken Thighs completely dry with paper towels. In a small bowl, combine 2 tbsp Kosher Salt, 1 tsp Freshly Ground Black Pepper, 1 tbsp Garlic Powder, 1 tbsp Onion Powder, 1 tsp Smoked Paprika, 1 tsp Dried Thyme, 1 tsp Dried Rosemary, and 1 tsp Baking Powder. Rub this mixture evenly over all sides of the chicken, pressing gently to adhere.
The baking powder reacts with the skin to create micro-bubbles, which renders the fat and produces an ultra-crispy texture. Let the seasoned chicken rest uncovered in the refrigerator for 1 hour to allow the salt to penetrate and the skin to dry thoroughly.
Step 2: Preheat and Prepare the Cooking Surface
Position a rack in the upper third of your oven and preheat to 425°F. Place a large, oven-safe skillet or rimmed baking sheet in the oven to heat for 10 minutes. The hot surface ensures the chicken skin starts crisping immediately upon contact.
While the oven preheats, zest the 1 whole Fresh Lemon, then cut it into wedges for serving. The zest will be sprinkled over the finished dish for a bright, citrusy note that cuts through the richness of the chicken.
Step 3: Sear and Roast the Chicken Thighs
Carefully remove the hot skillet from the oven and add 2 tbsp Olive Oil, swirling to coat the surface. Arrange the chicken thighs skin-side down in a single layer, ensuring they do not touch. Return the skillet to the oven and roast for 20-25 minutes.
After 20 minutes, check the skin—it should be deep golden brown and crispy. If it needs more color, broil for 2-3 minutes but watch closely to avoid burning. Flip the thighs and roast for an additional 10-12 minutes until the internal temperature reaches 165°F.
Step 4: Baste with Butter and Finish
Remove the skillet from the oven and transfer the chicken to a plate. Pour off excess fat from the skillet, leaving about 2 tbsp behind. Place the skillet over medium heat on the stovetop, add the 4 tbsp Unsalted Butter, and melt it, swirling to combine with the rendered fat.
Return the chicken to the skillet, skin-side up, and baste with the butter mixture for 1-2 minutes. Spoon the butter over the chicken repeatedly to ensure every piece is coated. This final step enhances the crispiness and adds a rich, savory depth to the skin.
Step 5: Rest and Serve
Transfer the chicken to a serving platter and let it rest for 5-10 minutes. Sprinkle the reserved lemon zest over the top and serve with the lemon wedges on the side. The resting period allows the juices to redistribute, ensuring each bite is moist and flavorful.
Serve immediately while the skin is still crisp. The contrast between the shatteringly crisp skin and the tender, succulent meat underneath delivers the promised result.
Pro Tips For Making Chicken Recipe Chicken
- Pat Thighs Dry: I learned this the hard way—wet chicken steams instead of searing, so blot those thighs with a paper towel before seasoning. Sounds tedious, but it actually changes the outcome.
- Season Twice: Hit the thighs with salt, pepper, garlic and onion powder before cooking, then again right after flipping. The double dose makes a real difference with these bold spices.
- Skip the Crowding: Resist the urge to cram all the thighs in one pan—they’ll boil in their own juices instead of browning. Give them space, or cook in batches.
- Rest Before Serving: My grandmother swore by this, and she was right: let the thighs rest 5 minutes after cooking so the juices redistribute. Cutting too soon sends all that flavor to the cutting board.
Essential Equipment for Great chicken recipe chicken
Must-Have Tools
To achieve that perfect crispy skin and succulent meat 🍖, a few essential tools are non-negotiable. Start with a heavy-duty roasting pan—brands like All-Clad or Le Creuset distribute heat evenly for consistent cooking. A meat thermometer (like the Thermoworks ThermoPop) ensures your chicken reaches the ideal 165°F without overcooking.
Don’t skip a sharp chef’s knife (e.g., Wüsthof or Victorinox) for clean cuts and a cutting board to prep ingredients safely. These basics set the foundation for a flawless dish every time.
Nice-to-Have
For extra convenience, consider a kitchen twine to truss the chicken, promoting even cooking. A basting brush helps coat the skin with juices or marinades for added flavor. If you love crispy skin, a cast-iron skillet (like Lodge) can sear the chicken before roasting for an extra crunch.
A fat separator is also handy for making gravy from the drippings, elevating your meal with minimal effort.
Budget Alternatives
No fancy gear? No problem! Use a baking sheet with a wire rack as a roasting pan substitute. A fork or skewer can pierce the skin for crispiness, and a digital kitchen scale (like OXO Good Grips) ensures precise seasoning.
For trussing, aluminum foil works in a pinch. These swaps keep your chicken recipe delicious without breaking the bank. 💡
Nutrition Facts

- 6 Egg Cake Recipe with Oil: Light as Air With Buttery Moisture - October 4, 2026
- 4 Bean Casserole Recipe: One-Pan Heartiness With Smoky Paprika Depth - October 4, 2026
- 3-Ingredient Keto Mug Cake Recipe: Microwave Magic in 2 Minutes - October 4, 2026