
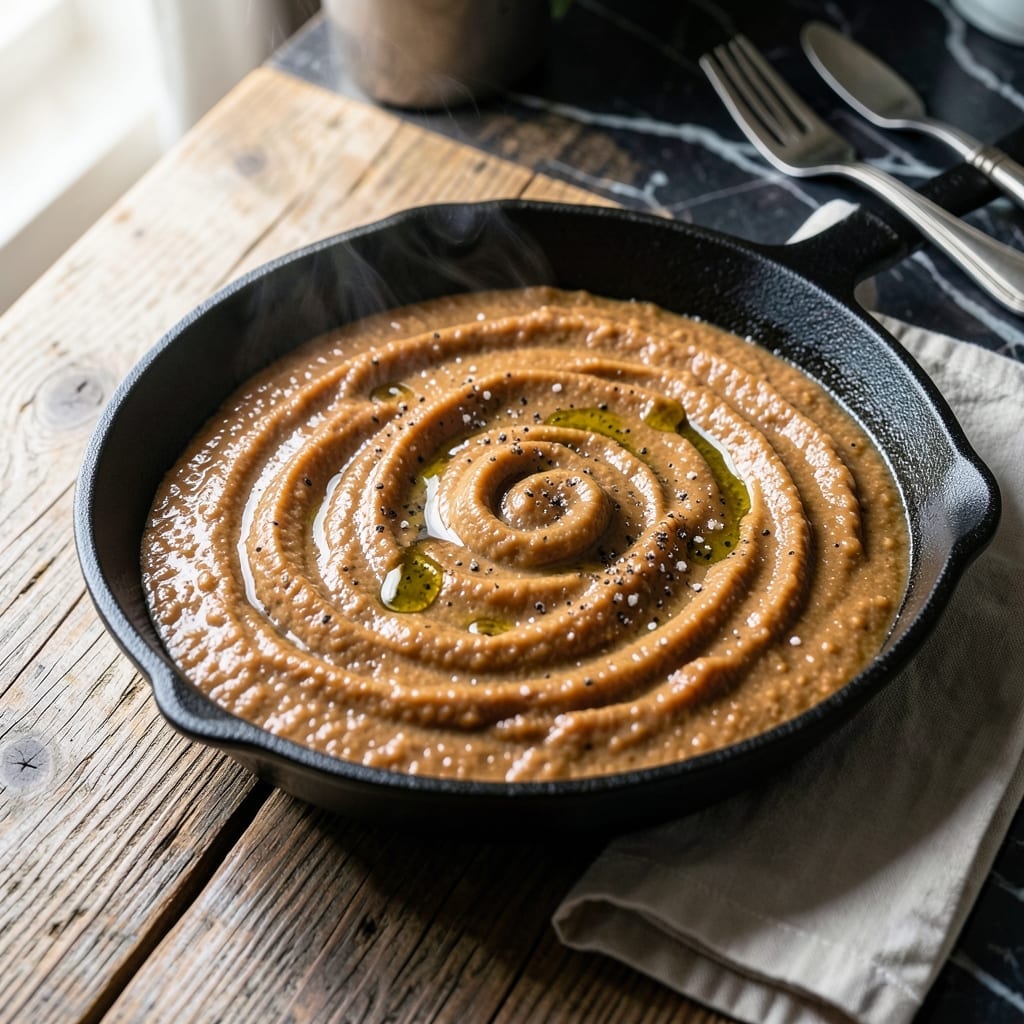
This classic roux forms the rich, velvety foundation for countless Creole and Cajun dishes.
Equal parts fat and flour cooked slowly until golden creates a smooth, flavorful base. I’ve perfected this technique over years of making gumbo and étouffée at home.
The key is patience—rushing the process risks burning. The mixture should reach a peanut butter color for the best depth of flavor.
Use this as the starting point for soups, stews, and sauces that taste like they simmered all day.
Ingredients for Chicken Roux
Nine ingredients create this rich, golden roux base for Creole and Cajun cooking.
| Ingredient | Amount | Notes |
|---|---|---|
| All-Purpose Flour 🌾 | ½ cup | The foundation of the roux |
| Vegetable Oil 🫒 | ½ cup | Neutral flavor, high smoke point |
| Unsalted Butter 🧈 | ¼ cup | Adds richness to the base |
| Chicken Fat 🍗 | 2 tbsp | Rendered from chicken, traditional choice |
| Salt 🧂 | ½ tsp | Enhances flavor balance |
| Black Pepper 🌶️ | ¼ tsp | Freshly ground preferred |
| Cayenne Pepper 🔥 | 0.125 tsp | Adds subtle heat (optional) |
| Garlic Powder 🧄 | ½ tsp | Deepens savory notes |
| Onion Powder 🧅 | ½ tsp | Boosts aromatic complexity |
The fat is everything here. Chicken fat gives authentic flavor, but vegetable oil works if that’s what you have. For best results, use a high smoke point oil like peanut or canola. Costco’s organic vegetable oil is a solid choice for bulk cooking. If using butter, clarify it first to prevent burning—Plugrá is a reliable brand.
No chicken fat? Bacon grease adds a smoky depth, while pure vegetable oil keeps it neutral. Swap half the flour for cornstarch if you need a gluten-free option (texture changes slightly). The spices can be adjusted—skip the cayenne for a milder base. If you’re out of garlic powder, fresh minced garlic works too (add it later in cooking).
Store the roux in an airtight container in the fridge for up to 1 week. For longer storage, freeze in ice cube trays for 3 months. Reheat gently to avoid separation. Always cook fresh if possible—roux loses potency over time.
Why You’ll Love This Recipe
- One-Pot Wonder: I love that this chicken roux comes together in a single pan—just flour, oil, butter, and chicken fat, no fuss.
- Rich and Deep: That nutty, toasty flavor from the chicken fat renders into the roux makes every dish it touches taste incredible.
- Endless Uses: I use this as a base for gravy, gumbo, or even to thicken soups—it’s my kitchen multitool.
- Budget Stretch: Honestly, a little goes a long way, and it keeps in the fridge for weeks, saving me money and time.
Step-by-Step Instructions for Chicken Roux
Master this fundamental technique to create a rich, velvety base for Creole and Cajun dishes.
Step 1: Combine the Fats for Optimal Flavor
In a heavy-bottomed skillet or Dutch oven, combine the 0.5 cup vegetable oil, 0.25 cup unsalted butter, and 2 tbsp chicken fat over medium heat. The blend of fats creates depth of flavor that defines an authentic roux.
Allow the fats to melt together completely, stirring occasionally. You’ll notice the butter foam subside first, followed by the chicken fat rendering fully. This step takes about 3-4 minutes and ensures even heat distribution before adding the flour.
Step 2: Incorporate the Flour Gradually
Once the fats are fully combined and shimmering, gradually whisk in the 0.5 cup all-purpose flour. I add it in 2-3 additions, whisking vigorously after each to prevent lumps from forming.
The mixture will transform from a loose liquid to a thick paste. Keep whisking constantly for 2-3 minutes to eliminate any dry spots. At this stage, you’re building the foundation that will develop into a smooth, rich roux with no grainy texture.
Step 3: Cook to the Perfect Color
Reduce heat to medium-low and continue cooking, stirring constantly with a wooden spoon. This is where patience pays off—rushing with high heat will burn the roux.
Watch for the color to deepen gradually from pale yellow to a rich peanut butter hue, which takes 15-20 minutes. The aroma will shift from raw flour to a deeply nutty, toasty scent. If it smells burnt at any point, you’ve gone too far and should start over.
Step 4: Season and Finish the Roux
When the roux reaches your desired color, immediately remove it from the heat. Stir in the 0.5 tsp salt, 0.5 tsp garlic powder, 0.5 tsp onion powder, 0.25 tsp black pepper, and 0.125 tsp cayenne pepper.
The spices will bloom in the hot roux, releasing their fragrance. Let it sit for 1 minute off the heat to allow the flavors to meld. For gumbo, you’ll typically use this immediately. For other dishes, you can cool and store it for up to 1 week in the refrigerator.
This classic preparation creates a versatile base that delivers authentic Creole flavor to stews, sauces, and gravies. The key is constant attention and patience—never walk away from a roux in progress.
Pro Tips For Making Chicken Roux
- Use Chicken Fat: Swap half the oil for rendered chicken fat—it adds a depth of flavor that vegetable oil alone can’t match. I learned this the hard way after making bland roux for years.
- Keep It Moving: Stir constantly over medium heat to prevent hot spots from burning the flour. After burning two batches, I finally figured out that walking away for even a minute is a gamble.
- Skip the Butter Overload: Butter burns faster than oil, so use no more than 2 tablespoons mixed with oil. Sounds weird, but it works: the combo gives richness without the smoke.
- Toast the Flour: Cook the flour until it turns a light peanut butter color—about 10-15 minutes—before adding liquid. My grandmother swore by this, and she was right: under-toasting leaves a raw taste.
Common Mistakes When Making This Recipe
Rushing the Cooking
High heat seems faster, but it burns the flour and creates a bitter taste. Keep your burner at medium-low and stir constantly. I learned this the hard way with my first batch—it went from pale to burnt in 5 minutes.
Uneven Mixing
Adding all the flour at once leads to clumps that won’t dissolve. Whisk in the all-purpose flour gradually, about ¼ cup at a time, ensuring each addition is fully incorporated before adding more. A flat whisk works best for this. 💡
Wrong Pan Choice
Thin pans cause hot spots that burn the roux. Use a heavy-bottomed pot or Dutch oven—I swear by my Le Creuset. The even heat distribution prevents those dreaded dark specks that signal a ruined batch.
Walking Away
This requires your full attention. Even 30 seconds of unstirred cooking can cause burning. Set a timer for 15-minute intervals to remind yourself to check the color. Trust me, multitasking here ends in disaster.
Incorrect Color Judgment
Peanut butter color is ideal for most dishes. Stop cooking when it reaches this shade—about 15-20 minutes. Darker than milk chocolate means it’s overcooked. I use a white plate to test the color accurately.
Skipping the Rest
Let the finished roux sit off heat for 1 minute after seasoning. This allows the spices to bloom fully. Adding liquid immediately can cause splattering or uneven thickening. Patience at this final stage makes all the difference. 🔥
Nutrition Facts
Frequently Asked Questions
What’s the ideal color for a finished roux?
Aim for a rich peanut butter shade after 15-20 minutes of cooking. This indicates perfect development of nutty, toasty flavors without bitterness.
Can I make this without chicken fat?
Use all vegetable oil or substitute bacon grease for smoky depth. The flavor will differ slightly but still works beautifully in recipes.
How do I fix a burnt roux?
Unfortunately, there’s no saving it. Burnt roux tastes bitter and can ruin your dish. Start over with fresh ingredients and lower heat.
Can I double the batch?
Yes, but use a larger, heavy-bottomed pot to maintain even cooking. Doubling increases cooking time slightly—expect 20-25 minutes to reach the right color.

- 6 Egg Cake Recipe with Oil: Light as Air With Buttery Moisture - October 4, 2026
- 4 Bean Casserole Recipe: One-Pan Heartiness With Smoky Paprika Depth - October 4, 2026
- 3-Ingredient Keto Mug Cake Recipe: Microwave Magic in 2 Minutes - October 4, 2026