
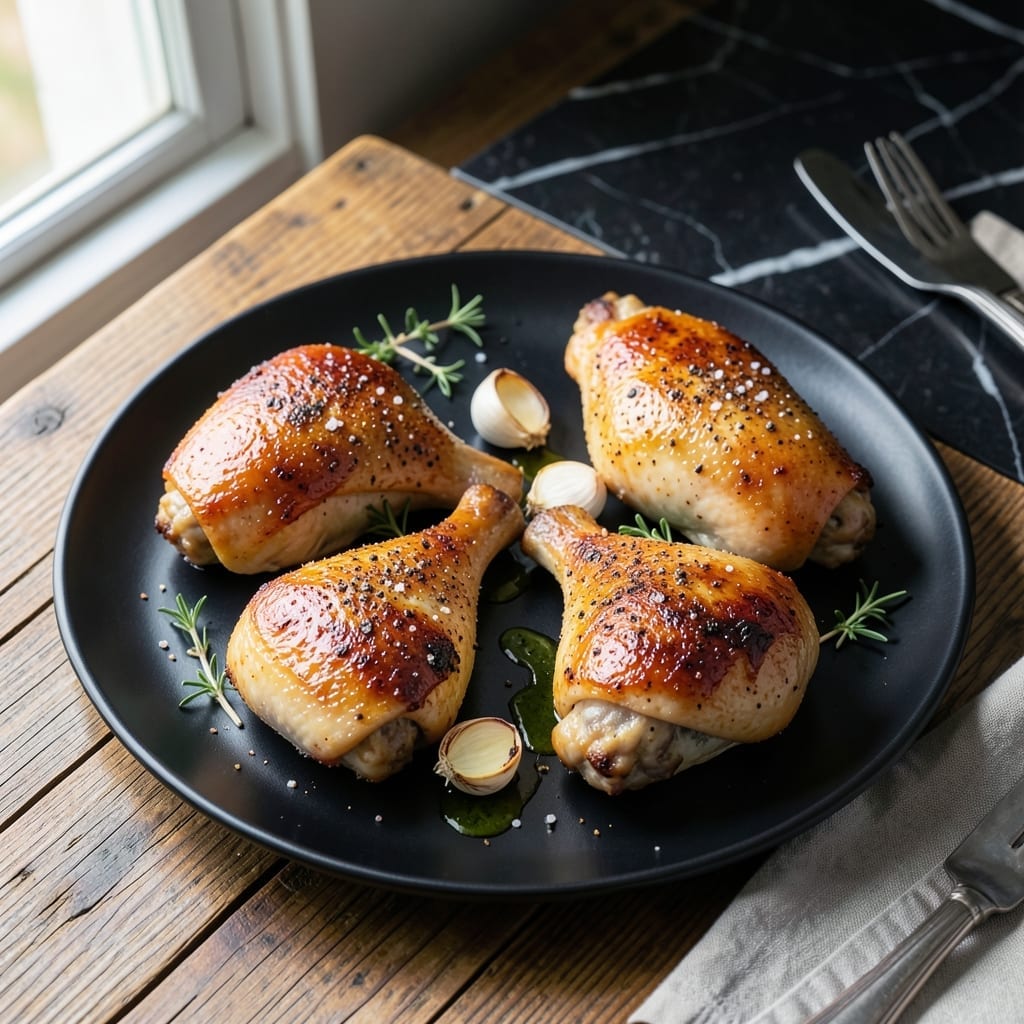
I’ve perfected the method for achieving crispy skin and juicy meat with every batch of bone-in chicken thighs. This recipe relies on a hot oven and a simple dry brine to guarantee consistent results.
The key is starting with skin-on, bone-in thighs and patting them completely dry before seasoning. A brief rest in the refrigerator allows the salt to penetrate deeply, ensuring flavor throughout the meat.
Roasting at high heat renders the fat, creating an irresistibly crispy skin while keeping the inside tender. The process is straightforward but requires attention to detail for the best outcome.
Serve with your favorite sides for a meal that feels special without the effort. This technique works every time.
Ingredients for Chicken Thigh Recipe Bone In
Pantry staples and bone-in chicken thighs create irresistibly crispy skin with every bite.
| Ingredient | Amount | Notes |
|---|---|---|
| Bone-In, Skin-On Chicken Thighs 🍗 | 2 lb | Pat completely dry before seasoning |
| Kosher Salt 🧂 | 1 ½ tbsp | Diamond Crystal preferred for dry brine |
| Freshly Ground Black Pepper 🌶️ | 1 tsp | Coarse grind recommended |
| Garlic Powder 🧄 | 1 tsp | Not garlic salt |
| Onion Powder 🧅 | 1 tsp | Balances the seasoning blend |
| Smoked Paprika 🌶️ | 1 tsp | Adds depth and color |
| Dried Thyme 🍃 | ½ tsp | Rubbed between fingers to release oils |
| Dried Rosemary 🌿 | ½ tsp | Crushed lightly before using |
| Avocado Oil 🫒 | 1 tbsp | High smoke point for roasting |
| Fresh Lemon 🍋 | 1 whole | Zested and juiced for brightness |
| Fresh Parsley 🌿 | ¼ cup | Chopped, for garnish |
The chicken quality is non-negotiable. Skin-on, bone-in thighs with good fat marbling render the crispiest skin—avoid pre-trimmed cuts. Costco or Whole Foods typically stock the best for roasting. Pat them meticulously dry; residual moisture prevents browning. Diamond Crystal kosher salt is ideal for dry brining due to its coarse texture and clean flavor. Always check the sell-by date for freshness.
No smoked paprika? Regular paprika plus a pinch of cayenne mimics the smokiness. Fresh herbs can replace dried at a 3:1 ratio—just add them after roasting to preserve color. The avocado oil can be swapped for grapeseed or refined coconut oil (both have high smoke points). If you lack garlic powder, fresh minced garlic works but may burn—add it halfway through cooking.
Dry-brined chicken keeps in the fridge for 1-2 days before cooking. Leftovers stay fresh for 4 days refrigerated or freeze for 3 months. Reheat in the oven to maintain skin crispness. Always bring chicken to room temperature before roasting for even cooking.
Why You’ll Love This Recipe
- One Pan Wonder: I toss the thighs with salt, pepper, and those powders, then let the oven do the rest—one sheet pan, zero fuss.
- Crispy, Juicy Magic: The skin renders out to a perfect crunch while the meat stays fall-off-the-bone tender, all thanks to that garlic-onion rub.
- Feeds My Crew Twice: I make a big batch and we’re eating well for two nights—leftovers taste even better cold straight from the fridge.
- Budget Hero: Bone-in thighs cost half what breasts do, and honestly, they pack way more flavor into every bite.
Step-by-Step Instructions for Chicken Thighs Bone-In
This method delivers perfectly crispy skin and juicy meat with a simple, foolproof approach.
Step 1: Dry Brine and Season the Chicken Thighs
Pat the 2 lb Bone-In, Skin-On Chicken Thighs completely dry with paper towels. This step is critical—moisture prevents crispy skin. Place them skin-side up on a wire rack set over a baking sheet.
In a small bowl, combine the 1.5 tbsp Kosher Salt, 1 tsp Freshly Ground Black Pepper, 1 tsp Garlic Powder, 1 tsp Onion Powder, 1 tsp Smoked Paprika, 0.5 tsp Dried Thyme, and 0.5 tsp Dried Rosemary. Rub this mixture evenly over all surfaces of the chicken, pressing it into the skin. Refrigerate uncovered for 1 hour or up to 24 hours to dry brine.
Step 2: Preheat and Prepare for Roasting
Remove the chicken from the refrigerator and let it sit at room temperature for 30 minutes. Preheat your oven to 425°F to ensure it’s fully hot before the chicken goes in. This high heat is key for achieving golden, crispy skin.
While the oven preheats, zest the 1 whole Fresh Lemon and set the zest aside for garnish. The bright citrus will balance the rich, savory flavors of the roasted chicken. Leave the juiced lemon halves for another use.
Step 3: Sear and Roast to Perfection
Heat the 1 tbsp Avocado Oil in a large, oven-safe skillet over medium-high heat until shimmering. Place the chicken thighs skin-side down in the skillet, being careful not to crowd the pan. Sear undisturbed for 6-8 minutes until the skin is deep golden brown and crisp.
Flip the chicken and transfer the skillet to the preheated oven. Roast for 20-25 minutes until the internal temperature reaches 175°F and the juices run clear. The skin should be crisp and crackling, and the meat should pull away slightly from the bone.
Step 4: Rest and Garnish for Serving
Transfer the chicken to a serving platter and let it rest for 5-10 minutes. This allows the juices to redistribute, ensuring moist, tender meat. Sprinkle the reserved lemon zest over the chicken for a pop of freshness.
Garnish with the 0.25 cup Fresh Parsley, roughly chopped, for color and a hint of herbal brightness. Serve immediately with your choice of sides, ensuring each portion includes a crispy, crackling piece of skin.
Pro Tips For Making Chicken Thigh Recipe Bone In
- Pat Thighs Dry: Use paper towels to thoroughly dry the skin—this guarantees a crispy finish instead of a soggy one. I learned this the hard way after wondering why my thighs steamed instead of sizzled.
- Season Generously: Don’t be shy with the kosher salt; the skin needs a heavy hand to develop that golden, flavorful crust. I use about 1 teaspoon per thigh, plus extra garlic and onion powder for good measure.
- Start Skin-Side Down: Place the thighs skin-side down in a hot pan first, and resist the urge to move them for at least 5 minutes. This builds a non-stick crust that won’t tear when you flip.
- Rest Before Serving: Let the thighs rest 5-10 minutes after cooking—it keeps the juices inside the meat instead of all over your cutting board. Sounds simple, but skipping this leaves you with dry chicken.
Pro Cooking Tips for chicken thigh recipe bone in
Perfect Skin Crisp
Pat the thighs completely dry with paper towels—this is non-negotiable for crispy skin. I press firmly to remove every drop of moisture. Then, let the seasoned chicken rest uncovered in the fridge for 1 hour to 24 hours to dry brine. 💡
High Heat is Key
Preheat your oven to 425°F and use an oven-safe skillet like Lodge cast iron. The high heat renders fat quickly, creating that irresistible crunch. I always preheat the skillet in the oven for 10 minutes before adding the chicken.
Sear Without Crowding
Sear the thighs skin-side down in 1 tbsp avocado oil over medium-high heat. Don’t move them for 6-8 minutes—this builds a deep golden crust. Crowding the pan steams the skin, so cook in batches if needed.
Internal Temperature
Roast until the internal temp hits 175°F—this is higher than standard poultry temp for extra crispness. Use a ThermoWorks instant-read thermometer for accuracy. The meat will pull slightly from the bone when done.
Rest for Juiciness
Let the chicken rest 5-10 minutes before serving. This allows juices to redistribute, keeping the meat moist. I tent loosely with foil to retain heat without steaming the skin.
Oven-Safe Skillet
Avoid nonstick pans for stovetop-to-oven cooking. I prefer stainless steel or cast iron for even heat distribution. The same skillet goes from searing to roasting seamlessly.
Nutrition Facts
Frequently Asked Questions
Why pat the chicken dry first?
Moisture on the skin prevents crispiness. Press firmly with paper towels to remove every drop for the best texture. This step is critical for that golden, crackling result.
Can I use boneless thighs instead?
Yes, but bone-in stays juicier. Boneless cooks faster (15-20 minutes), so adjust time and temperature accordingly. The bone also adds flavor to the meat.
What if my skin isn’t crispy?
Try higher heat or longer drying time. Ensure the oven reaches 425°F and the chicken isn’t crowded in the pan. Pat it dry again before searing.
How do I know when it’s done?
Use a meat thermometer—the internal temp should reach 175°F. The skin will be deep golden, and juices should run clear when pierced.

- 6 Egg Cake Recipe with Oil: Light as Air With Buttery Moisture - October 4, 2026
- 4 Bean Casserole Recipe: One-Pan Heartiness With Smoky Paprika Depth - October 4, 2026
- 3-Ingredient Keto Mug Cake Recipe: Microwave Magic in 2 Minutes - October 4, 2026