
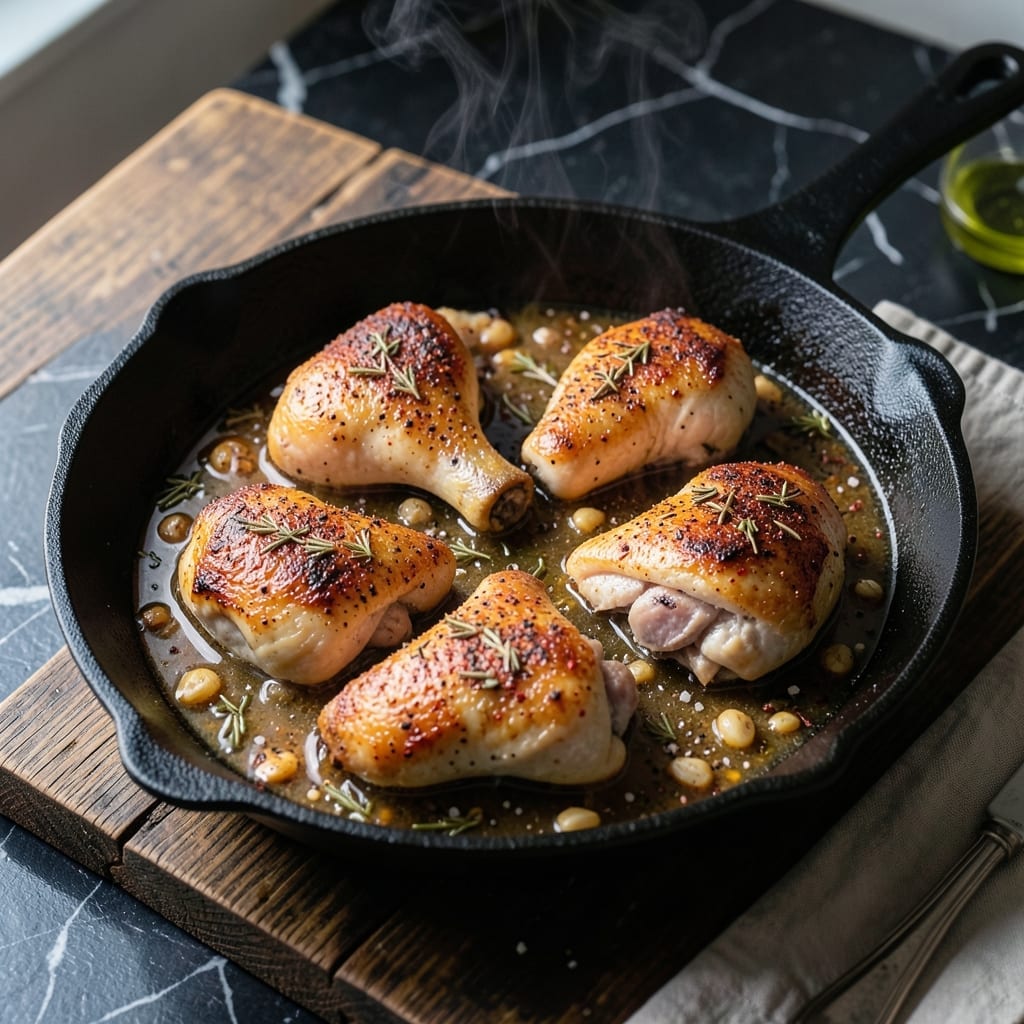
Cast iron transforms chicken thighs into something extraordinary—crispy skin that shatters at the touch, with juicy meat beneath. This method delivers professional results using one pan and simple ingredients.
The secret is high heat to render fat and create that signature golden crust, then finishing with a rich pan sauce built from the fond. Every bite offers perfect contrast between the crispy exterior and tender interior.
You’ll achieve restaurant-quality texture without complicated techniques. The cast iron retains heat evenly, ensuring consistent browning and deep flavor development throughout the cooking process.
Serve with the pan sauce spooned over the top for maximum impact. This dish proves that exceptional meals don’t require fancy equipment—just the right approach.
Ingredients for Chicken Thigh Recipe Cast Iron
Cast iron plus chicken thighs equals restaurant-quality results with minimal effort required.
| Ingredient | Amount | Notes |
|---|---|---|
| Bone-In Chicken Thighs 🍗 | 2 lb | Skin-on, patted dry thoroughly |
| Kosher Salt 🧂 | 1 ½ tsp | Diamond Crystal preferred for texture |
| Freshly Ground Black Pepper 🌶️ | 1 tsp | Coarse grind for crust |
| Garlic Powder 🧄 | 1 tsp | Not garlic salt substitute |
| Smoked Paprika 🌶️ | 1 tsp | For depth of flavor |
| Dried Thyme 🌿 | ½ tsp | Crushed between fingers |
| Extra-Virgin Olive Oil 🫒 | 2 tbsp | High smoke point variety |
| Unsalted Butter 🧈 | 2 tbsp | For pan sauce base |
| Shallots 🧅 | 2 whole | Finely minced for sauce |
| Fresh Garlic Cloves 🧄 | 3 cloves | Minced for sauce |
| Chicken Stock 💧 | ¾ cup | Low-sodium preferred |
| Dijon Mustard 🟡 | 1 tbsp | Whole grain acceptable |
| Fresh Lemon Juice 🍋 | 1 tbsp | Zest reserved for garnish |
| Fresh Parsley 🌿 | ¼ cup | Chopped for garnish |
The chicken thighs are non-negotiable for this method. Bone-in, skin-on ensures the fat renders properly to create that signature crispy crust. Look for thighs with uniform sizing—about 4-5 ounces each—at Whole Foods or local butchers for best quality. Pat them meticulously dry before seasoning; moisture is the enemy of crispiness. The skin should be taut and unblemished.
No bone-in thighs? Boneless, skin-on works in a pinch but won’t hold up as well to the high heat. Substitute chicken drumsticks for similar results—adjust cooking time accordingly. For the sauce, white wine at half the volume can replace chicken stock for acidity. Fresh rosemary can stand in for thyme at a 1:1 ratio. Avoid pre-minced garlic; it lacks the necessary punch.
The cooked chicken keeps 4 days refrigerated in an airtight container. For longer storage, freeze up to 3 months—though the skin loses some crispness upon reheating. Always bring chicken to room temperature before cooking for even doneness. The pan sauce can be made ahead and reheated gently before serving.
Why You’ll Love This Recipe
- One Pan Wonder: I toss the thighs with salt, pepper, garlic powder, and smoked paprika, then let the cast iron do the rest.
- Crispy & Smoky: That skin gets impossibly crispy while the smoked paprika gives it a deep, almost bacon-like flavor.
- Weeknight MVP: I throw it together after work and have dinner ready before the kids start asking “when’s food?”
- Feeds for Days: Leftovers taste even better the next day—if they last that long. And bone-in thighs are always easy on the wallet.
Step-by-Step Instructions for Chicken Thighs in Cast Iron
Master the technique for achieving perfectly crispy skin and a rich pan sauce every time.
Step 1: Season and Prepare the Chicken Thighs
Begin by thoroughly patting the 2 lb Bone-In Chicken Thighs dry with paper towels—this is essential for crispy skin. Season all over with the 1.5 tsp Kosher Salt, 1 tsp Freshly Ground Black Pepper, 1 tsp Garlic Powder, 1 tsp Smoked Paprika, and 0.5 tsp Dried Thyme. I crush the dried thyme between my fingers to release its aroma.
Let the seasoned thighs sit at room temperature for 20-30 minutes while you preheat your cast iron skillet. This ensures even cooking and allows the salt to penetrate the meat. The skin should appear slightly tacky from the seasoning, which helps it crisp up beautifully.
Step 2: Sear the Thighs to Crispy Perfection
Heat the 2 tbsp Extra-Virgin Olive Oil in a large cast iron skillet over medium-high heat until it shimmers. Place the thighs skin-side down in the skillet, being careful not to crowd the pan. Press down gently with a spatula for the first 30 seconds to ensure full contact with the hot surface.
Cook undisturbed for 8-10 minutes until the skin is deep golden brown and crispy. You’ll know it’s ready to flip when the edges appear golden and the skin releases easily from the pan. Flip and cook for another 6-8 minutes until the internal temperature reaches 165°F.
Step 3: Build the Rich Pan Sauce
Remove the chicken to a plate and tent with foil. Reduce heat to medium and add the 2 tbsp Unsalted Butter to the skillet. Once melted, add the minced 2 whole Shallots and cook for 2-3 minutes until softened and translucent.
Add the minced 3 cloves Fresh Garlic Cloves and cook for 30 seconds until fragrant. Pour in the 0.75 cup Chicken Stock, scraping up any browned bits from the bottom. Stir in the 1 tbsp Dijon Mustard and 1 tbsp Fresh Lemon Juice, then simmer for 3-4 minutes until the sauce thickens slightly.
Step 4: Finish and Serve
Return the chicken to the skillet, skin-side up, and spoon the sauce over the top. Simmer for another 1-2 minutes to allow the flavors to meld. The sauce should coat the back of a spoon and have a glossy, rich appearance.
Garnish with the 0.25 cup Fresh Parsley and serve immediately. Each thigh should have crispy, caramelized skin with juicy, flavorful meat underneath. The pan sauce adds a tangy, savory depth that complements the smoky, spiced chicken perfectly.
Pro Tips For Making Chicken Thigh Recipe Cast Iron
- Sear Skin-Side Down First: Start with the skin-side down in a screaming hot cast iron pan for 5-6 minutes—this renders the fat and guarantees that crispy crust you’re after. I learned this the hard way after flipping too early and ending up with pale, soggy skin.
- Dry the Thighs Well: Pat the thighs bone-dry with paper towels before seasoning. Sounds tedious, but it actually changes the outcome by helping the skin brown instead of steam.
- Skip the Crowding: Resist the urge to fit all the thighs in at once—give them at least an inch of space so they sear, not steam. After burning three batches, I finally figured out this was the culprit.
- Rest Before Serving: Let the thighs rest 5-10 minutes after cooking to keep the juices inside where they belong. My grandmother swore by this, and she was right—cutting too soon sends all that flavor straight to the cutting board.
Essential Equipment for chicken thigh recipe cast iron
Cast Iron Skillet
A heavy 12-inch cast iron skillet is non-negotiable for this recipe. I use my trusty Lodge—it retains heat beautifully and develops a natural non-stick surface over time. The even heat distribution ensures perfect browning and prevents hot spots that can burn the chicken. 🔥
Tongs and Spatula
Invest in 12-inch locking tongs for easy flipping without piercing the skin. A fish spatula works wonders for pressing the thighs into the pan initially. These tools give you precise control without damaging the crispy exterior you worked so hard to achieve.
Instant-Read Thermometer
Don’t guess—use a ThermoWorks ThermaPen for accurate internal temperature readings. I check multiple spots in each thigh to ensure 165°F throughout. This prevents overcooking while guaranteeing food safety, especially important with bone-in pieces.
Paper Towels
You’ll need plenty of heavy-duty paper towels for patting the thighs dry before seasoning. Moisture is the enemy of crispy skin, so be thorough. I also keep some nearby for handling the hot skillet and cleaning up any splatters during cooking.
Splatter Screen
A stainless steel splatter screen saves your stovetop from grease splatters when searing. The chicken releases fat as it cooks, and a screen keeps your kitchen cleaner. It’s a small investment that prevents a big mess during high-heat cooking.
Wooden Spoon
Use a wooden spoon for scraping up the fond when building your pan sauce. It won’t scratch your cast iron like metal utensils might. The spoon helps incorporate all those flavorful browned bits into your sauce, creating depth of flavor. 💡
Nutrition Facts
Frequently Asked Questions
What temperature should the oil be before adding chicken?
Heat the 2 tbsp olive oil until it shimmers over medium-high heat. This ensures proper searing and crispy skin. A quick flick of water should sizzle vigorously when it hits the pan.
How do I prevent the skin from sticking to the pan?
Pat the thighs completely dry and don’t move them for 8-10 minutes after placing skin-side down. The skin will release naturally when properly browned and crispy.
Can I use boneless thighs instead?
Yes, but they cook faster and won’t hold up as well to high heat. Reduce cooking time by 2-3 minutes per side. Bone-in provides better flavor and moisture retention.
How do I know when the chicken is done?
Use an instant-read thermometer to check for 165°F in the thickest part. The juices should run clear, and the meat should pull away slightly from the bone.

- 6 Egg Cake Recipe with Oil: Light as Air With Buttery Moisture - October 4, 2026
- 4 Bean Casserole Recipe: One-Pan Heartiness With Smoky Paprika Depth - October 4, 2026
- 3-Ingredient Keto Mug Cake Recipe: Microwave Magic in 2 Minutes - October 4, 2026