
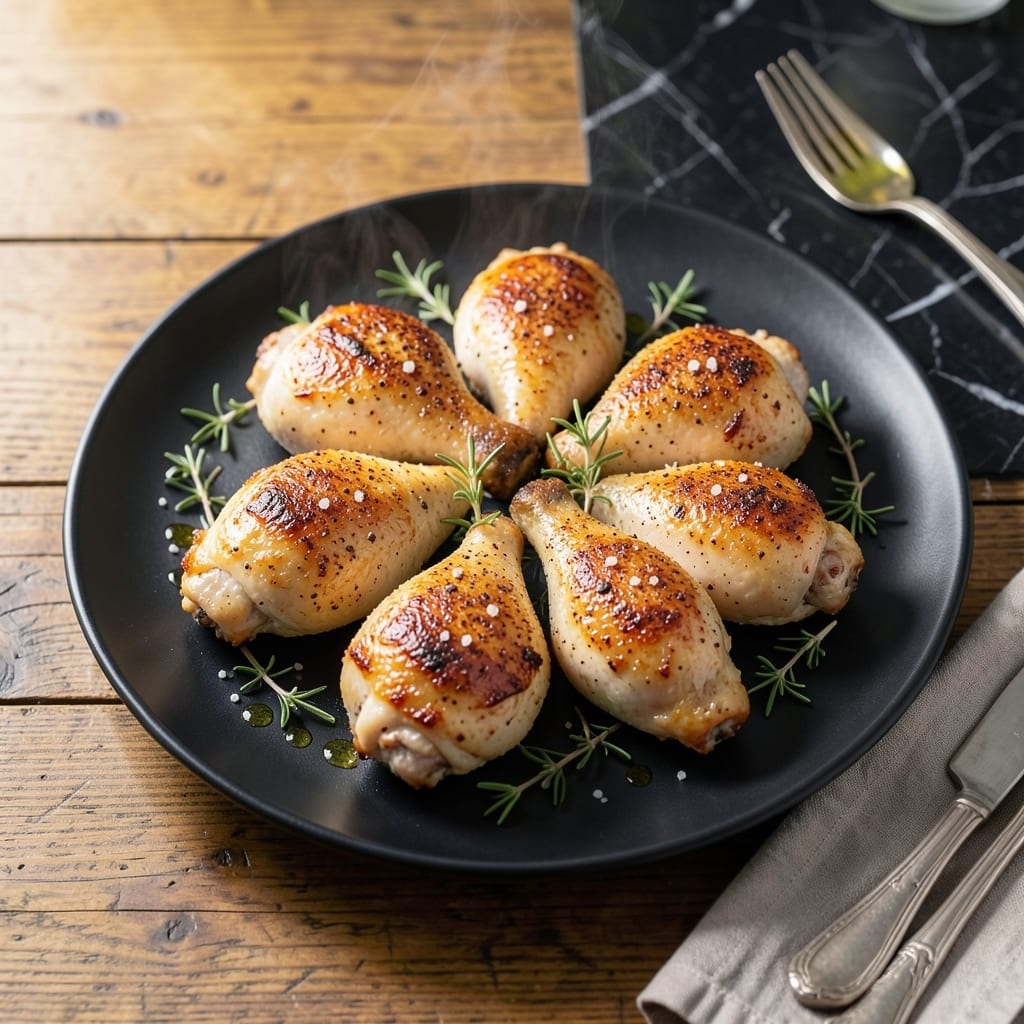
Achieving crispy chicken skin while keeping the meat juicy is a game of precision and patience. This method delivers both without fail.
The secret lies in drying the skin thoroughly, seasoning generously, and using the right cooking temperature. High heat renders fat for maximum crunch.
By the end, you’ll have golden, shatteringly crispy skin over tender, juicy meat that stays succulent. No dry flesh, no soggy skin—just perfect balance.
Pair with roasted vegetables or a fresh salad for a complete meal. Here’s how to nail it every time.
Ingredients for Chicken Thigh Recipe Crispy Skin
Bone-in, skin-on thighs and a handful of pantry staples yield golden, shatteringly crisp results.
| Ingredient | Amount | Notes |
|---|---|---|
| Chicken Thighs 🍗 | 2 lb | Bone-in, skin-on, patted dry |
| Kosher Salt 🧂 | 1 ½ tbsp | Diamond Crystal preferred for even seasoning |
| Freshly Ground Black Pepper 🌶️ | 1 tsp | Coarse grind for texture |
| Garlic Powder 🧄 | 1 tsp | Not garlic salt, for depth |
| Onion Powder 🧅 | 1 tsp | Balances savory profile |
| Smoked Paprika 🌶️ | ½ tsp | Adds subtle smokiness |
| Avocado Oil 🫒 | 2 tbsp | High smoke point for frying |
| Unsalted Butter 🧈 | 2 tbsp | Browned for basting |
| Fresh Thyme Sprigs 🌿 | 4 pieces | Optional for aromatic finish |
| Fresh Rosemary Sprigs 🌿 | 2 pieces | Optional for aromatic finish |
| Lemon 🍋 | 1 whole | Juiced for brightness |
The chicken is non-negotiable: bone-in, skin-on thighs deliver the juiciest meat and crispiest skin. ButcherBox or Whole Foods offer high-quality options with consistent sizing. Pat the skin thoroughly dry—this is critical for achieving that golden crunch. Look for thighs with even fat distribution under the skin for optimal rendering.
No kosher salt? Sea salt at half the volume works, but avoid iodized table salt—it’s too fine. Swap smoked paprika for regular paprika plus a pinch of cayenne if you prefer heat over smoke. Fresh garlic and onion can replace the powders (1 clove minced = 1 tsp powder), but powders adhere better to the skin. The avocado oil can be grapeseed or vegetable oil—just ensure a high smoke point.
Prep the chicken the night before: salt it and leave it uncovered in the fridge. This dries the skin for maximum crispiness. Cooked thighs keep 4 days refrigerated or 3 months frozen. Reheat in a dry skillet to revive the skin’s crunch.
Why You’ll Love This Recipe
- Five Ingredient Magic: I love how this comes together with just chicken thighs, salt, pepper, and those two powders—nothing fancy, no shopping stress.
- That Crispy Bite: The skin gets so crackly it shatters, while the meat stays juicy from the garlic and onion powder doing their thing.
- Weeknight Hero: I throw this in the oven after work and we’re eating 40 minutes later, no side dish planning required.
- Budget Stretcher: A family of four eats well for under ten bucks, and leftovers taste even better the next day.
Step-by-Step Instructions for Chicken Thighs with Crispy Skin
Master the technique for perfectly crispy skin and succulent meat with this proven method.
Step 1: Season the Chicken Thighs Thoroughly
Pat the 2 lb Chicken Thighs completely dry with paper towels. Any moisture on the skin will prevent crisping. Season both sides aggressively with the 1.5 tbsp Kosher Salt, 1 tsp Freshly Ground Black Pepper, 1 tsp Garlic Powder, 1 tsp Onion Powder, and 0.5 tsp Smoked Paprika.
Rub the seasoning into the skin and meat so it adheres well. I use my hands for this—it ensures even coverage. Let the seasoned thighs sit uncovered on a wire rack for 1 hour at room temperature. This drying step is crucial for achieving that golden crunch.
Step 2: Preheat and Prepare the Skillet
Place a large, heavy skillet (cast iron works best) over medium-high heat. Add the 2 tbsp Avocado Oil and heat until it shimmers but doesn’t smoke. The high smoke point of avocado oil makes it ideal for this high-heat searing.
While the oil heats, arrange the chicken thighs skin-side down in the pan, ensuring they’re not crowded. Crowding lowers the pan temperature and steams the chicken instead of searing it. You should hear a satisfying sizzle the moment they hit the pan.
Step 3: Sear for Maximum Crispiness
Cook the thighs undisturbed for 8-10 minutes until the skin is deep golden brown and crisp. Resist the urge to move them—this allows the skin to render its fat and develop a uniform crust.
Flip the thighs and add the 2 tbsp Unsalted Butter, 4 pieces Fresh Thyme Sprigs, and 2 pieces Fresh Rosemary Sprigs to the pan. Tilt the skillet and baste the chicken with the foaming butter for 2-3 minutes, spooning it over the meat continuously.
Step 4: Finish and Rest for Juiciness
Reduce heat to medium and cook for another 5-7 minutes until the thighs reach an internal temperature of 165°F. The juices should run clear when pierced with a knife.
Transfer the chicken to a plate, tent loosely with foil, and let it rest for 5-10 minutes. Squeeze the 1 whole Lemon over the thighs just before serving to add a bright, zesty finish that cuts through the richness of the crispy skin.
Serve immediately while the skin is still shatteringly crisp. The contrast between the crunchy exterior and the tender, juicy meat beneath is what makes this dish exceptional.
Pro Tips For Making Chicken Thigh Recipe Crispy Skin
- Pat Dry Thoroughly: Use paper towels to remove every bit of moisture from the skin—wet skin steams instead of crisps, and I learned this the hard way after too many soggy batches.
- Start Skin-Side Down: Place the thighs skin-side down in a cold pan, then turn the heat to medium-high; this renders fat gradually and guarantees even browning without burning the seasoning.
- Skip the Crowding: Leave at least an inch between thighs in the pan, or the temperature drops and you’ll end up with pale, limp skin instead of that crackling crust.
- Rest Before Serving: Let the thighs rest 5 minutes on a rack after cooking—this keeps the skin crisp while the juices settle, and yes, even if you’re starving, it’s worth the wait.
Best Sauces and Condiments for This Dish
Classic Pan Sauces
After removing the chicken, pour out excess fat but leave the browned bits. Add ½ cup chicken broth and 2 tbsp lemon juice, scraping the fond. Simmer for 3-4 minutes until reduced by half. Finish with a 1 tbsp butter swirl for gloss. 🔥
Herb-Infused Options
For a fresh take, deglaze with ¼ cup white wine and ¼ cup broth. Add 2 crushed garlic cloves and 1 tbsp fresh thyme leaves. Reduce by half, then stir in 1 tsp Dijon mustard for depth.
Creamy Variations
Whisk ½ cup heavy cream into the pan drippings after deglazing with ¼ cup broth. Simmer until thickened, about 5 minutes. Season with salt and white pepper to taste. Perfect for spooning over the crispy thighs.
Spicy Kick
Add 1 tbsp sriracha and 1 tbsp honey to the pan drippings with ¼ cup broth. Simmer until syrupy, about 4 minutes. The heat balances the rich, crispy skin beautifully.
Simple Condiments
A dollop of whole-grain mustard cuts through the fat, while pickled red onions add tangy crunch. I also love a drizzle of hot honey for sweet heat. These take the dish to the next level with zero effort.
Nutrition Facts
Frequently Asked Questions
Why does my chicken skin turn out soggy?
Moisture is the enemy of crispiness. Always pat the skin completely dry before seasoning. Also, avoid crowding the pan—this steams the chicken instead of searing it.
Can I use boneless thighs for this method?
Bone-in thighs work best because the bone helps conduct heat for even cooking. Boneless can dry out faster but will still develop crispy skin if dried properly and cooked carefully.
How do I keep the skin crispy when serving?
Serve immediately after cooking. If you must hold it, place on a wire rack (not a plate) in a 200°F oven for up to 15 minutes to maintain crunch.
Can I bake this instead of pan-frying?
Yes! Place on a wire rack over a baking sheet at 425°F for 35-40 minutes. The elevated rack allows air circulation for crispier skin.

- 6 Egg Cake Recipe with Oil: Light as Air With Buttery Moisture - October 4, 2026
- 4 Bean Casserole Recipe: One-Pan Heartiness With Smoky Paprika Depth - October 4, 2026
- 3-Ingredient Keto Mug Cake Recipe: Microwave Magic in 2 Minutes - October 4, 2026