
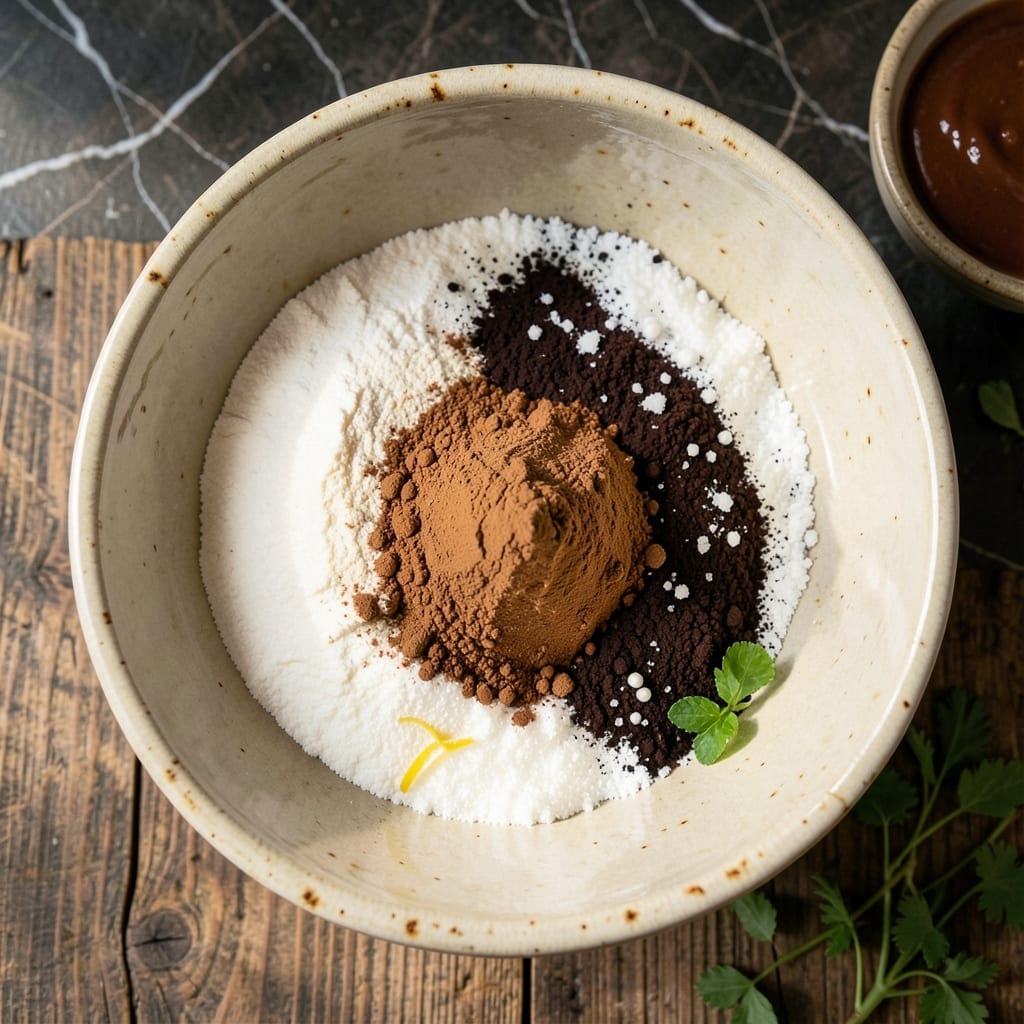
There’s nothing quite like a homemade chocolate cake to turn an ordinary day into something special. This from-scratch version delivers rich cocoa flavor in every moist, tender bite, proving that the best desserts start with simple, quality ingredients.
What makes this recipe stand out is its balance of depth and simplicity. With a few pantry staples and a bit of patience, you’ll create decadent layers that rival any bakery’s best. The process is straightforward, but the results are anything but ordinary.
You’ll end up with a cake that’s deeply chocolatey, wonderfully moist, and topped with a velvety frosting that ties it all together. It’s the kind of dessert that earns compliments and second helpings without fail.
Perfect for celebrations or just because, this cake is a testament to the magic of baking from scratch.
Ingredients for Chocolate Cake Recipe from Scratch
Just a few pantry staples transform into something extraordinary with this treat.
| Ingredient | Amount | Notes |
|---|---|---|
| All-Purpose Flour 🌾 | 2 cups | Sifted for best texture |
| Granulated Sugar 🍚 | 2 cups | Fine white sugar preferred |
| Unsweetened Cocoa Powder 🍫 | ¾ cup | Dutch-processed for richer flavor |
| Baking Powder 🧂 | 2 tsp | Fresh for maximum rise |
| Baking Soda 🧂 | 1 ½ tsp | Balances acidity in cocoa |
| Salt 🧂 | 1 tsp | Fine sea salt preferred |
| Large Eggs 🥚 | 2 whole | Room temperature for best volume |
| Whole Milk 🥛 | 1 cup | Full-fat for richness |
| Vegetable Oil 🫒 | ½ cup | Neutral flavor like canola |
| Vanilla Extract 🌿 | 2 tsp | Pure extract for best flavor |
| Hot Water 💧 | 1 cup | Just boiled enhances cocoa |
| Unsalted Butter 🧈 | 1 cup | Softened for frosting |
| Powdered Sugar 🍚 | 3 ½ cups | Sifted for smooth frosting |
| Heavy Cream 🥛 | ¼ cup | Optional for richer frosting |
The cocoa powder is everything here. Hershey’s Special Dark or Ghirardelli Dutch-processed gives that deep, complex flavor you’re after. Skip the natural cocoa—it won’t deliver that rich darkness. I grab mine from Whole Foods or the baking aisle at Target. And yes, sift your dry ingredients (don’t skip this part). It’s worth the extra minute for that perfect crumb.
No buttermilk? Whole milk plus 1 tbsp vinegar works perfectly. Out of vanilla? Almond extract at half the amount adds a nice twist. Oil can be swapped for melted butter (same amount), but the texture changes slightly. For the frosting, powdered sugar is non-negotiable—granulated won’t work. Need it dairy-free? Earth Balance butter and almond milk make a great substitute.
Cake layers stay moist wrapped tightly at room temp for 2 days. Frosted cake? Refrigerate for up to 5 days. Freeze unfrosted layers for 3 months—just thaw before frosting. Always bring ingredients to room temp before starting (except the hot water, obviously).
Why You’ll Love This Recipe
- One Bowl Magic: I love that I can mix everything right in the same bowl—no extra dishes, just flour, sugar, cocoa, and the leaveners coming together effortlessly.
- Rich Cocoa Hit: The unsweetened cocoa powder gives it that deep, bittersweet chocolate flavor I crave, no artificial taste.
- Birthday or Tuesday: Honestly, it’s my go-to for celebrations and random weeknights when we need a treat.
- Budget Friendly: Between us, this costs pennies compared to bakery cakes, and I usually have all the ingredients already.
Step-by-Step Instructions for Chocolate Cake From Scratch
This foolproof method delivers moist, rich layers with deep cocoa flavor every time you bake it.
Step 1: Combine Dry Ingredients for Perfect Structure
In a large mixing bowl, whisk together the 2 cups All-Purpose Flour, 2 cups Granulated Sugar, 0.75 cup Unsweetened Cocoa Powder, 2 tsp Baking Powder, 1.5 tsp Baking Soda, and 1 tsp Salt. Sift if your cocoa powder is lumpy—this ensures a smooth, professional-quality batter.
This combination creates the foundation for your cake’s tender yet sturdy crumb. The baking soda reacts with the cocoa’s natural acidity, while the baking powder provides additional lift. I always whisk for a full 30 seconds to distribute the leavening agents evenly—this prevents pockets of uneven rise in the finished cake.
Step 2: Incorporate Wet Ingredients for Moisture and Flavor
In a separate bowl, beat the 2 whole Large Eggs lightly, then add the 1 cup Whole Milk, 0.5 cup Vegetable Oil, and 2 tsp Vanilla Extract. Mix until just combined—over-beating can incorporate too much air, leading to a dense texture.
Pour the wet mixture into the dry ingredients and stir until about 70% combined. The batter will look slightly streaky at this point—that’s perfect. Now slowly add the 1 cup Hot Water while stirring continuously. The hot water blooms the cocoa, intensifying its flavor and creating that signature deep chocolate color.
Step 3: Bake Layers to Ideal Doneness
Divide the thin batter evenly between two greased and lined 9-inch round cake pans. Bake in a preheated 350°F oven for 30-35 minutes, or until a toothpick inserted in the center comes out clean or with just a few moist crumbs.
The cakes are done when they spring back lightly when pressed and the edges have pulled slightly from the pan. Don’t overbake—this is the secret to keeping the layers moist. I start checking at 28 minutes because ovens can vary, and these cakes go from perfect to dry quickly.
Step 4: Prepare the Rich Chocolate Frosting
Beat the 1 cup Unsalted Butter until creamy, then gradually add the 3.5 cups Powdered Sugar, mixing on low speed to avoid a cloud of sugar dust. Once incorporated, add the 0.25 cup Heavy Cream and beat on high for 2-3 minutes until light and fluffy.
This frosting should be smooth, glossy, and spreadable but thick enough to hold its shape. If it’s too stiff, add a teaspoon more heavy cream. The key is patience—beating it longer than you think necessary creates that luxurious, melt-in-your-mouth texture that makes this cake extraordinary.
Step 5: Assemble and Finish with Professional Touch
Level the cooled cake layers with a serrated knife if they’ve domed during baking. Place the first layer on a serving plate and spread a generous 1 cup of frosting evenly over the top. Add the second layer and cover the entire cake with a thin crumb coat of frosting.
Chill the cake for 15 minutes to set the crumb coat, then apply the remaining frosting. For a polished finish, use a bench scraper or offset spatula to create smooth sides. The contrast between the dark, moist cake and the rich, creamy frosting is what makes this from-scratch creation truly decadent.
Pro Tips For Making Chocolate Cake Recipe From Scratch
- Preheat the Oven: I learned this the hard way—always preheat your oven for at least 15 minutes to guarantee even baking. A cold start can leave you with a dense, sunken middle.
- Sift Your Dry Ingredients: After ending up with lumpy batter one too many times, I now sift the flour, cocoa powder, baking powder, and baking soda together. It takes 30 seconds and actually changes the outcome.
- Don’t Overmix: Resist the urge to beat the batter once the dry ingredients are in—mix just until combined. Overmixing develops gluten, and your cake will turn out tough.
- Use Room Temp Ingredients: Sounds fussy, but it works: eggs and any dairy should sit out for 30 minutes before mixing. Cold ingredients can cause the batter to curdle or bake unevenly.
Common Mistakes When Making This Recipe
Overmixing the Batter
Once you add the wet ingredients to dry, stir just until combined. Overmixing develops gluten in the 2 cups All-Purpose Flour, resulting in a tough, dense cake. I stop when I see only a few streaks of flour remaining. 💡
Using Cold Ingredients
Room temperature Large Eggs and Whole Milk emulsify better, creating a smoother batter. Cold ingredients can cause the batter to curdle. I take mine out 30 minutes before starting.
Skipping the Hot Water
The 1 cup Hot Water isn’t just for thinning the batter. It blooms the 0.75 cup Unsweetened Cocoa Powder, intensifying its flavor. Without it, your cake will taste flat and dull.
Overbaking the Layers
Check your 9-inch round cake pans at 28 minutes. Overbaking dries out the cake. I look for a clean toothpick with just a few moist crumbs. The layers continue cooking slightly from residual heat.
Rushing the Frosting
Beat the 1 cup Unsalted Butter and 3.5 cups Powdered Sugar for a full 2-3 minutes. This incorporates air, making it light and fluffy. Skipping this step results in dense, grainy frosting.
Not Leveling the Layers
Domed layers make a lopsided cake. I use a serrated knife to trim the tops after cooling. This ensures even frosting distribution and a professional appearance.
Nutrition Facts
Frequently Asked Questions
Can I use natural cocoa powder instead of Dutch-process?
Natural cocoa works but gives a lighter color and tangier taste. For the deepest flavor, stick with Dutch-process. The recipe’s 1 cup Hot Water helps bloom either type effectively.
Why does the batter seem so thin?
The 1 cup Hot Water creates a thin batter, which is normal. It ensures a moist crumb and helps distribute the 0.75 cup Unsweetened Cocoa Powder evenly throughout the cake.
How do I know when the layers are done?
Check at 28 minutes in a 350°F oven. A toothpick should come out clean or with a few moist crumbs. The edges will pull slightly from the pan.
Can I make this ahead of time?
Bake layers up to 2 days ahead; wrap tightly at room temperature. Frosted cake keeps refrigerated for 5 days. For longer storage, freeze unfrosted layers for 3 months.

- 6 Egg Cake Recipe with Oil: Light as Air With Buttery Moisture - October 4, 2026
- 4 Bean Casserole Recipe: One-Pan Heartiness With Smoky Paprika Depth - October 4, 2026
- 3-Ingredient Keto Mug Cake Recipe: Microwave Magic in 2 Minutes - October 4, 2026