
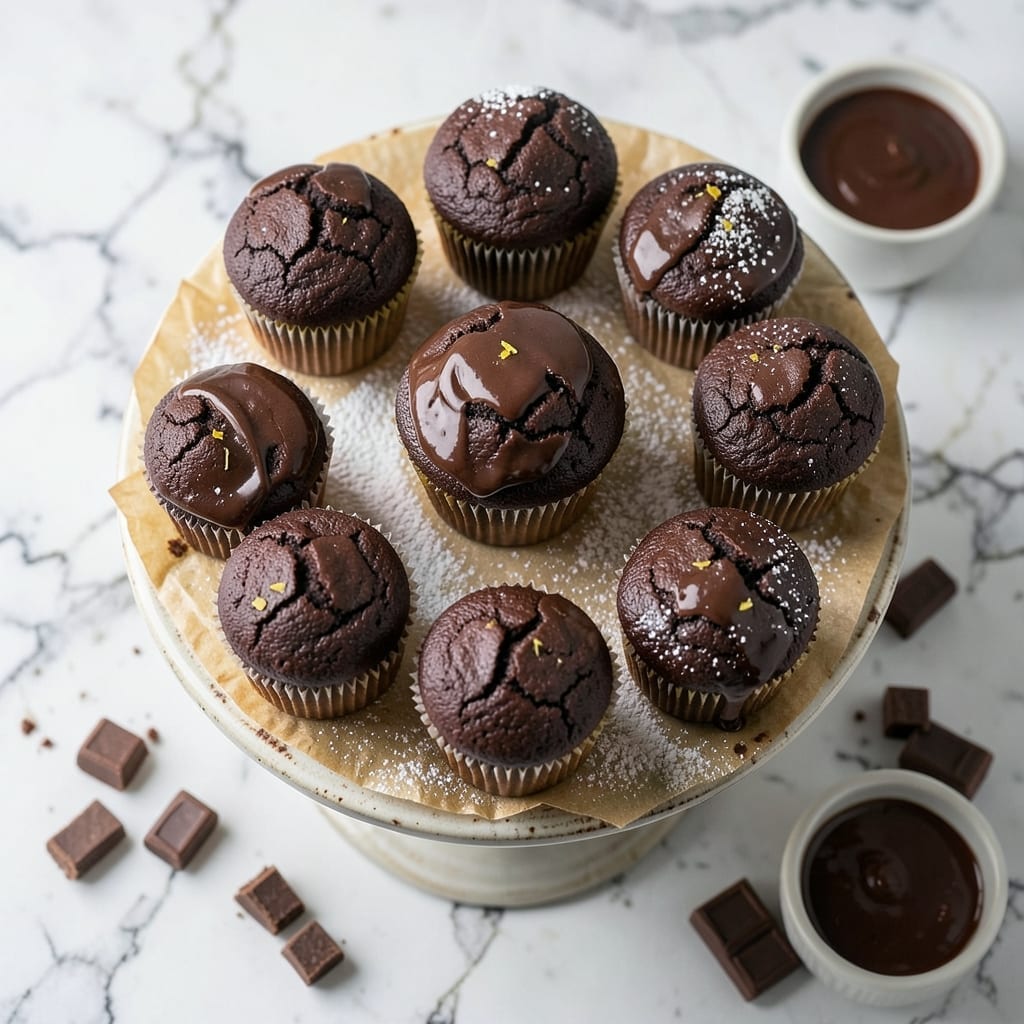
This recipe delivers rich chocolate flavor without relying on cocoa powder, using melted chocolate as the star ingredient. The result is cupcakes with deep, velvety chocolate taste in every bite.
I developed this method after realizing many bakers don’t always have cocoa powder on hand. Melted chocolate creates a moist texture and intense flavor that’s just as satisfying.
With simple ingredients and straightforward steps, you’ll achieve bakery-quality cupcakes at home. The melting process ensures even distribution of chocolate throughout the batter.
The final product is tender, rich, and perfect for any occasion. Let’s get started with this foolproof approach.
Ingredients for Chocolate Cupcake Recipe Without Cocoa Powder
Simple pantry staples transform into bakery-quality cupcakes with deep chocolate flavor from melted bars.
| Ingredient | Amount | Notes |
|---|---|---|
| All-Purpose Flour 🌾 | 1 ½ cups | Sifted for even texture |
| Granulated Sugar 🍚 | 1 ½ cups | Fine white sugar preferred |
| Baking Powder 🧂 | 1 ½ tsp | Ensures proper rise |
| Baking Soda 🧂 | ½ tsp | Balances acidity in batter |
| Salt 🧂 | ½ tsp | Fine sea salt recommended |
| Unsalted Butter 🧈 | ½ cup | Room temperature, softened |
| Large Eggs 🥚 | 2 whole | Room temperature for even mixing |
| Vanilla Extract 💧 | 2 tsp | Pure vanilla for best flavor |
| Whole Milk 🥛 | ¾ cup | Full-fat for richness |
| Semi-Sweet Chocolate Bars 🍫 | 8 oz | High-quality, finely chopped |
| Hot Water 💧 | ½ cup | For melting chocolate |
| Vegetable Oil 🫒 | ¼ cup | Neutral flavor, like canola |
The chocolate is everything here. Use high-quality semi-sweet bars (Ghirardelli or Guittard) for the deepest flavor—avoid chocolate chips, which have stabilizers that prevent smooth melting. Finely chop the bars to melt evenly in the hot water. The butter should be unsalted to control the sodium levels in the batter. Room temperature is key for proper emulsification with the sugar.
No semi-sweet bars? Bittersweet chocolate at 60-70% cacao works beautifully (just reduce sugar by 2 tablespoons). Need to skip dairy? Vegan butter and oat milk substitute seamlessly. Out of all-purpose flour? Cake flour plus 2 tablespoons cornstarch per cup makes a decent swap. The vegetable oil can be melted coconut oil for a subtle flavor change.
Store cupcakes in an airtight container at room temperature for up to 3 days. For longer storage, freeze unfrosted cupcakes for up to 3 months. Thaw overnight in the fridge before decorating. The melted chocolate method ensures these stay moist and rich even after freezing.
Why You’ll Love This Recipe
- No Fuss Mix: I just dump the dry ingredients—flour, sugar, baking powder, soda, and salt—straight into one bowl. Honestly, it’s the lazy baker’s dream come true.
- Rich Without Cocoa: The melted chocolate (yes, real chocolate bars) gives it that deep, fudgy taste without needing cocoa powder.
- Party or Lunchbox: These work for birthday parties or my kid’s school snack—just switch the frosting.
- Pantry Staples: I always have these basics on hand, so I can bake a batch whenever a craving hits. No special shopping trips.
Step-by-Step Instructions for Chocolate Cupcakes Without Cocoa Powder
Here’s the method. Straightforward, tested, works every time.
Step 1: Melt the Chocolate and Prepare Wet Ingredients
Finely chop the 8 oz Semi-Sweet Chocolate Bars and place them in a heatproof bowl. Pour 0.5 cup Hot Water over the chocolate and let it sit for 2 minutes to soften. Then whisk until completely smooth and glossy.
In a separate large bowl, cream together the 0.5 cup Unsalted Butter and 1.5 cups Granulated Sugar until light and fluffy, about 3-4 minutes. Add the 2 whole Large Eggs one at a time, mixing well after each addition.
Stir in the 2 tsp Vanilla Extract and the melted chocolate mixture. Finally, mix in the 0.25 cup Vegetable Oil until fully incorporated. The batter should be smooth and slightly thick at this stage.
Step 2: Combine Dry Ingredients
In a medium bowl, whisk together the 1.5 cups All-Purpose Flour, 1.5 tsp Baking Powder, 0.5 tsp Baking Soda, and 0.5 tsp Salt. This ensures even distribution of leavening agents for consistent rise.
I sift the flour first to break up any lumps and create a lighter texture. The combination of baking powder and baking soda provides both immediate and delayed rise, resulting in a perfectly domed cupcake.
Step 3: Alternate Adding Dry Ingredients and Milk
With the mixer on low speed, add about one-third of the dry ingredients to the wet mixture. Mix just until combined. Pour in half of the 0.75 cup Whole Milk and mix until incorporated.
Repeat this process, ending with the last portion of dry ingredients. Be careful not to overmix—the batter should be smooth but not tough. Overmixing develops gluten, which can make the cupcakes dense rather than tender.
The final batter will be thick but pourable, with a rich chocolate color and no visible flour streaks.
Step 4: Bake to Perfection
Preheat your oven to 350°F and line a 12-cup muffin tin with paper liners. Divide the batter evenly among the cups, filling each about two-thirds full.
Bake for 18-22 minutes, or until a toothpick inserted into the center comes out clean or with just a few moist crumbs. The cupcakes should spring back when lightly touched and have a slightly domed top.
Don’t open the oven door during the first 15 minutes of baking, as this can cause the cupcakes to sink. Rotate the pan halfway through baking for even browning if your oven has hot spots.
Step 5: Cool and Serve
Remove the cupcakes from the oven and let them cool in the pan for 5 minutes. This allows them to set slightly before transferring to a wire rack to cool completely.
The cupcakes will firm up as they cool. Once completely cool, they’re ready to be frosted or enjoyed as is. The melted chocolate base gives these cupcakes a rich, fudgy texture that’s distinctly different from cocoa-based versions.
For best results, let them cool completely before adding any frosting. This prevents the frosting from melting and sliding off the cupcakes.
Pro Tips For Making Chocolate Cupcake Recipe Without Cocoa Powder
- Melt the Chocolate First: Use melted chocolate (not cocoa) as your base—this is how you get deep flavor without cocoa powder. I learned this the hard way after a batch tasted flat with just flour and sugar.
- Don’t Overmix Batter: Stir just until the flour disappears. After burning three batches, I finally figured out that overmixing makes cupcakes dense, not light and tender.
- Use Room Temp Eggs: Sounds weird, but it works: room temperature eggs blend better into the batter and help create a smoother, more even texture.
- Check at 18 Minutes: Start testing doneness at 18 minutes—these cupcakes bake faster than you think. I used to wait for 22 and ended up with dry crumbs.
Storing and Reheating This Recipe
Room Temperature Storage
Let your cupcakes cool completely before storing in an airtight container at room temperature. They’ll stay fresh for up to 3 days. I use a glass container with a snap-tight lid to maintain moisture. 💡
Refrigerator Storage
If your kitchen is warm or you need to store them longer, refrigerate in an airtight container for up to 5 days. Place a paper towel on top of the cupcakes to absorb excess moisture. Bring to room temperature before serving.
Freezing Unfrosted
Freeze unfrosted cupcakes individually wrapped in plastic wrap, then placed in a freezer bag for up to 3 months. I label each bag with the date to track freshness. Thaw overnight in the refrigerator before decorating. ❄️
Freezing Frosted
For frosted cupcakes, freeze them first on a baking sheet for 1 hour to set the frosting. Then wrap individually and store for up to 1 month. This prevents the frosting from sticking to the wrap.
Reheating Methods
To revive slightly dry cupcakes, warm them in the microwave for 10-15 seconds. For a larger batch, place in a 300°F oven for 5-8 minutes wrapped in foil to retain moisture.
Nutrition Facts
Frequently Asked Questions
Can I use milk chocolate instead of semi-sweet?
Yes, but reduce the sugar by 1/4 cup since milk chocolate is sweeter. The flavor will be milder and creamier, but the texture remains rich.
Why does the recipe use both baking powder and baking soda?
The combo ensures a perfect rise. Baking soda reacts with acidic ingredients, while baking powder provides extra lift for a light, fluffy crumb.
How can I tell when they’re done baking?
Insert a toothpick into the center—it should come out clean or with a few moist crumbs. The tops will spring back when lightly pressed at 18-22 minutes.
What’s the best way to cool them quickly?
Transfer cupcakes to a wire rack after 5 minutes in the pan. Space them out so air circulates, preventing soggy bottoms.

- 6 Egg Cake Recipe with Oil: Light as Air With Buttery Moisture - October 4, 2026
- 4 Bean Casserole Recipe: One-Pan Heartiness With Smoky Paprika Depth - October 4, 2026
- 3-Ingredient Keto Mug Cake Recipe: Microwave Magic in 2 Minutes - October 4, 2026