
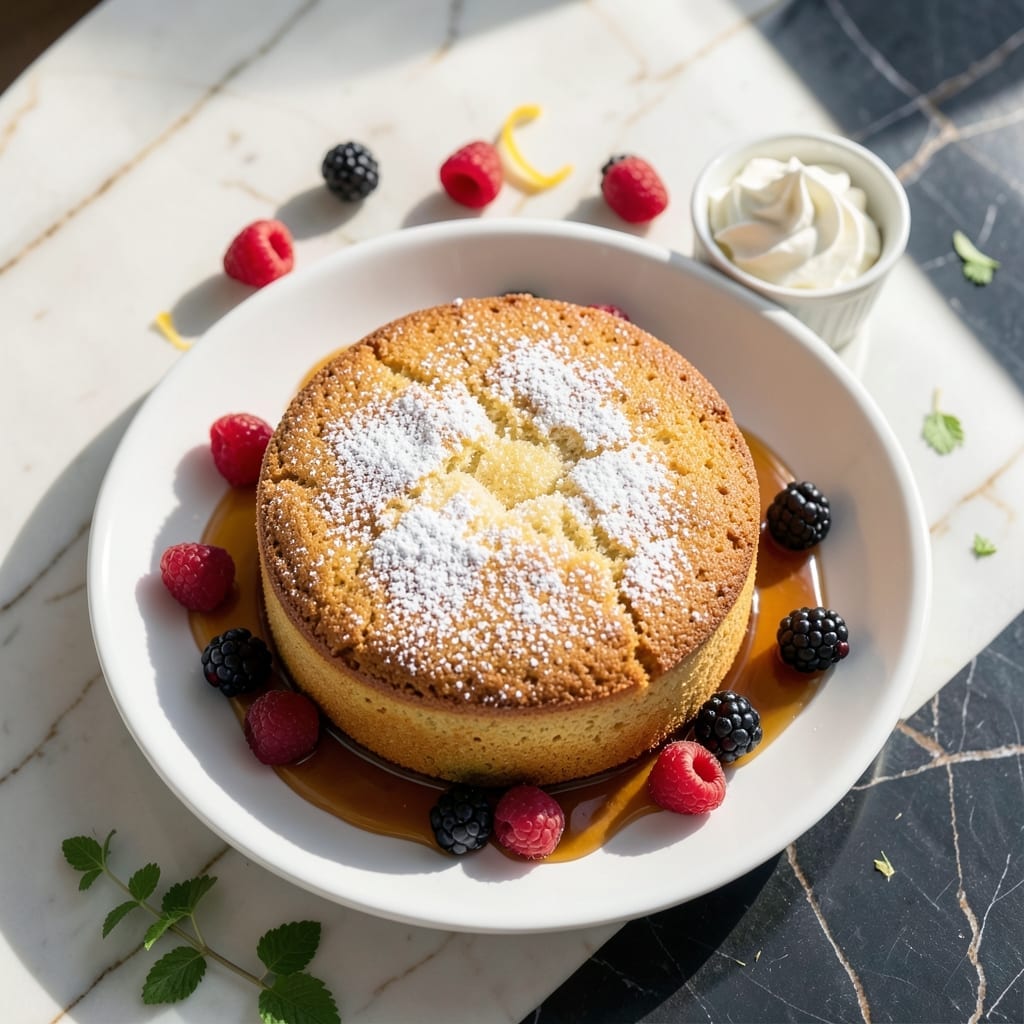
This classic sponge cake delivers the light, airy texture that defines traditional baking at its best. The secret lies in precise technique and simple ingredients working in perfect harmony.
I’ve refined this method through years of testing to ensure consistent results every time. The key is properly whipping the eggs and sugar to create maximum volume before gently folding in the dry ingredients.
What emerges from the oven is a golden cake with a tender crumb that practically melts in your mouth. The delicate structure makes it ideal for layering or serving plain with fresh berries.
Perfect for birthdays, afternoon tea, or any occasion that calls for elegant simplicity. Here’s how to achieve that signature cloud-like texture.
Ingredients for Classic Sponge Cake
Ten simple ingredients for that signature cloud-like texture everyone raves about.
| Ingredient | Amount | Notes |
|---|---|---|
| Cake Flour 🌾 | 2 cups | Sifted for lightness |
| Granulated Sugar 🍚 | 1 ½ cups | Superfine for best results |
| Large Eggs 🥚 | 6 whole | Room temperature essential |
| Unsalted Butter 🧈 | ½ cup | Melted and cooled |
| Vanilla Extract 🌿 | 2 tsp | Pure for best flavor |
| Baking Powder 🧂 | 1 ½ tsp | Ensures proper rise |
| Salt 🧂 | ¼ tsp | Fine grain preferred |
| Whole Milk 🥛 | ¼ cup | Room temperature preferred |
| Cream of Tartar 🧂 | ½ tsp | Stabilizes egg whites |
| Lemon Zest 🍋 | 1 tbsp | Finely grated for brightness |
The eggs are everything here. Room temperature whips up fluffier—pull them out an hour before baking. Cake flour (like Swans Down or Softasilk) gives that tender crumb regular flour can’t match. Don’t skip the cream of tartar—it’s the difference between good and show-stopping height. I always grab mine from King Arthur’s online if my local store’s out.
No cake flour? All-purpose plus 2 tbsp cornstarch per cup gets you close. Out of cream of tartar? White vinegar at half the amount in a pinch (but the tartar’s better). The vanilla? Nielsen-Massey if you’re splurging, store brand if you’re not. Whole milk’s ideal, but 2% works too—just don’t use skim, the fat matters.
This bakes best the day it’s made. Leftovers? Wrap tightly—stays fresh for 3 days at room temp. Freeze slices for up to 2 months (thaw at room temp for that just-baked taste). Perfect for layering with jam or serving with fresh berries.
Why You’ll Love This Recipe
- One Bowl Wonder: I just dump everything in, mix, and it’s done—no extra bowls, no fuss.
- Buttery Vanilla Bliss: The real butter and vanilla make it taste like my grandma’s old-school bakery sponge.
- Dress It Up: I’ve served it plain with tea, layered with jam, or topped with fresh berries—always a hit.
- Stays Fresh: Honestly, it tastes just as good on day three as the first slice.
Step-by-Step Instructions for Classic Sponge Cake
This traditional method guarantees that ethereal texture you’re after—light, tender, and sky-high.
Step 1: Separate and Whip the Eggs to Ribbon Stage
Separate all 6 whole Large Eggs, placing the whites in a clean, grease-free bowl and the yolks in another. Add the 1.5 cups Granulated Sugar to the yolks and beat on high speed for 5-7 minutes until pale, thick, and ribbon-like. The mixture should fall in slow ribbons when the beaters are lifted.
This step incorporates air, which is crucial for that classic airy crumb. Don’t rush—under-whipped yolks mean a dense cake. Meanwhile, add the 0.5 tsp Cream of Tartar to the egg whites and beat on medium-high speed until stiff peaks form. The cream of tartar stabilizes the whites, ensuring they hold their structure.
Step 2: Fold in Dry Ingredients with Precision
Sift the 2 cups Cake Flour, 1.5 tsp Baking Powder, and 0.25 tsp Salt together twice. This aerates the flour and prevents lumps. Gently fold the dry ingredients into the yolk mixture in three additions, alternating with the 0.25 cup Whole Milk, starting and ending with the flour.
Use a spatula and cut through the center of the batter, then fold from the bottom up. Rotate the bowl as you work to maintain even distribution. Stop folding as soon as the flour disappears—overmixing deflates the air you’ve worked so hard to incorporate.
Step 3: Incorporate the Egg Whites and Flavorings
Add the 2 tsp Vanilla Extract and 1 tbsp Lemon Zest to the batter, folding just until combined. The lemon zest adds a bright, citrusy note that balances the sweetness. Now, add the whipped egg whites in two batches, folding gently but thoroughly to avoid deflating them.
Here’s the thing—this is where most sponge cakes fail. Be patient. It’s better to take an extra minute to fold carefully than to rush and end up with a flat cake. The batter should look smooth and uniform, with no streaks of egg white remaining.
Step 4: Bake in a Prepared Pan for Even Rise
Pour the batter into an ungreased 10-inch tube pan (the nonstick surface allows the cake to climb). Smooth the top with a spatula, then bake in a preheated 325°F oven for 50-60 minutes. Do not open the oven door during the first 40 minutes—the sudden temperature drop can cause the cake to collapse.
You’ll know it’s done when the top springs back when lightly touched and a skewer inserted near the center comes out clean. The cake should pull away from the sides of the pan slightly, revealing that classic golden-brown crust.
Step 5: Cool Upside Down for Structural Perfection
Immediately invert the pan onto a cooling rack or over a bottle to suspend it upside down. This prevents the cake from sinking as it cools. Let it cool completely for 1-2 hours before running a thin knife around the edges to loosen it.
Once released, your cake should be tall, even, and incredibly tender. Serve it plain, dusted with powdered sugar, or layered with fresh berries and whipped cream. This method delivers on the promise of a true classic—delicate, airy, and utterly irresistible.
Pro Tips For Making Classic Sponge Cake
- Room Temp Eggs: Take your eggs out 30 minutes before starting—I learned this the hard way after my first few sponges came out dense. Cold eggs just don’t whip up enough air.
- Fold Gently: When combining the dry ingredients with the egg mixture, use a spatula and fold just until no streaks remain. Overmixing kills the air bubbles you worked so hard to create.
- Preheat Properly: Make sure your oven is fully preheated to 350°F before the pan goes in. Sounds obvious, but I’ve ruined batches by rushing this step.
- Butter and Flour: Grease your pan with unsalted butter, then dust with a light coat of cake flour—skip the cooking spray. The cake releases cleaner and the crust stays tender.
Health Benefits of These Flavors
Low-Calorie Indulgence
A slice of this creation contains about 250-300 calories, making it a lighter dessert option compared to denser cakes. The airy texture means you get volume without excessive calories, satisfying sweet cravings guilt-free. I love serving smaller slices with fresh fruit to keep portions in check. 💪
Protein Boost
With 6 large eggs in the recipe, you’re getting a decent protein punch—about 6-8 grams per serving. This helps balance blood sugar spikes and keeps you feeling full longer. The eggs also contribute essential amino acids for muscle maintenance.
Low Fat Content
Using only ½ cup unsalted butter for the entire cake keeps saturated fat in check at around 8-10 grams per slice. Most of the volume comes from air incorporated during whipping, not from fat. This makes it a smarter choice for special occasions.
Vitamin Enrichment
The eggs provide vitamin D and B12, while the lemon zest adds a boost of vitamin C. These nutrients support immune function and energy metabolism. A slice contributes meaningfully to your daily vitamin needs.
Gluten Considerations
Made with cake flour, this has less gluten than bread but isn’t gluten-free. For sensitive individuals, try substituting 1:1 gluten-free flour blend. The texture will differ slightly, but the method remains the same. Always check labels on your baking powder and vanilla extract.
Nutrition Facts
Frequently Asked Questions
Why do my eggs need to be room temperature?
Room temperature eggs whip up fluffier and hold more air. Cold eggs can cause the batter to curdle.
Can I use all-purpose flour instead of cake flour?
Yes, substitute 2 cups all-purpose flour minus 4 tablespoons plus 4 tablespoons cornstarch. Sift well for best texture.
How can I prevent my cake from sinking?
Cool it upside down immediately. Opening the oven too soon or under-whipping the eggs can also cause collapse.
What’s the best way to store leftovers?
Wrap tightly in plastic at room temperature for 3 days. For longer storage, freeze slices for up to 2 months.

- 6 Egg Cake Recipe with Oil: Light as Air With Buttery Moisture - October 4, 2026
- 4 Bean Casserole Recipe: One-Pan Heartiness With Smoky Paprika Depth - October 4, 2026
- 3-Ingredient Keto Mug Cake Recipe: Microwave Magic in 2 Minutes - October 4, 2026