
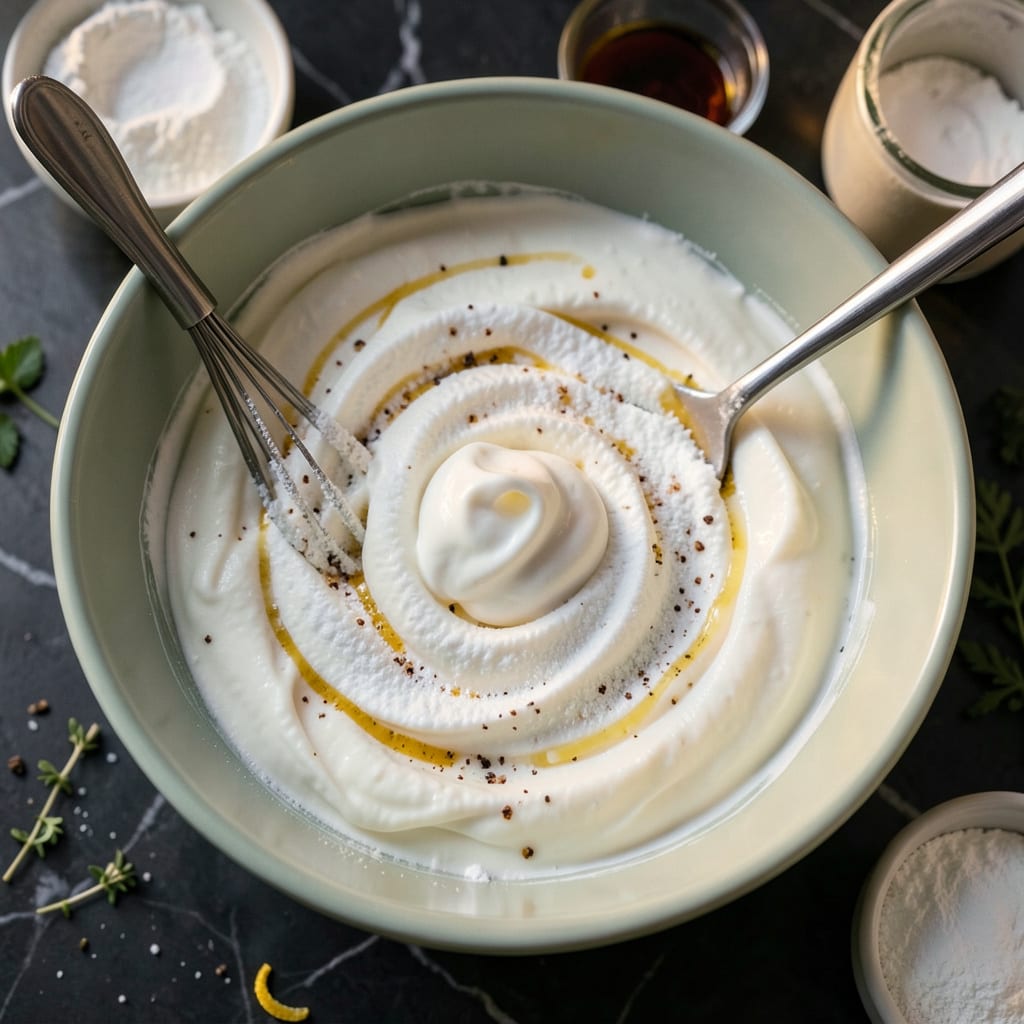
Creating a bakery-quality cake filling at home is simpler than you might think. This recipe delivers the same light, creamy texture that makes Costco cakes so popular, using just a handful of pantry staples. The secret lies in balancing richness with airiness, ensuring your layers stay perfectly moist without becoming heavy.
What sets this filling apart is its versatility—it pairs beautifully with vanilla, chocolate, or even fruit-based cakes. Store it in an airtight container for up to 5 days, or freeze for longer storage. Whether you’re filling a layer cake or cupcakes, this recipe scales easily to match your baking needs.
Ingredients for Costco Cake Filling
Eight simple ingredients transform into that signature light, creamy filling you love from bakery cakes.
| Ingredient | Amount | Notes |
|---|---|---|
| Heavy Whipping Cream 🥛 | 2 cups | Cold for best whipping results |
| Cream Cheese 🧀 | 8 oz | Full-fat, softened to room temperature |
| Powdered Sugar 🍬 | 1 ½ cups | Sifted to prevent lumps |
| Vanilla Extract 🌿 | 2 tsp | Pure extract for best flavor |
| Unsalted Butter 🧈 | ½ cup | Softened to room temperature |
| Sour Cream 🥄 | ¼ cup | Full-fat for creaminess |
| Salt 🧂 | ¼ tsp | Fine sea salt preferred |
| Lemon Juice 🍋 | 1 tsp | Freshly squeezed for brightness |
[recipeingredientscaler]
The cream cheese and butter are the backbone here. Philadelphia cream cheese gives that classic Costco taste, and Land O’Lakes butter has the right fat content. Make sure both are fully softened (leave them out for 2+ hours) or you’ll get lumps. The heavy cream should be ultra-pasteurized—it whips up fluffier and holds its shape better. I grab mine from Costco (ironic, right?) but any grocery store brand works in a pinch.
No sour cream? Full-fat Greek yogurt works at a 1:1 ratio—just strain it first to remove excess liquid. If you’re out of powdered sugar, blend granulated sugar at 1:1.5 ratio (1 cup granulated = 1.5 cups powdered). The lemon juice isn’t just for flavor—it stabilizes the filling, so don’t skip it. For a chocolate version, add 1/4 cup cocoa powder with the powdered sugar.
This keeps beautifully in an airtight container for 5 days in the fridge. Freeze for up to 3 months—thaw overnight before using. If it separates after freezing, just rewhip with a hand mixer. Pro tip: Pipe it into cupcakes or layer cakes straight from the fridge—it holds its shape better when cold.
Why You’ll Love This Recipe
- One-Bowl Magic: I don’t even need to drag out the mixer—just a bowl, a whisk, and 10 minutes while the cream cheese softens. The butter and powdered sugar blend in so smoothly it feels like cheating.
- That Bakery-Style Richness: Here’s what sold me—the whipped cream lightens the cream cheese just enough so it’s not cloying, but still has that thick, velvety texture Costco cakes are famous for. The vanilla? Use the good stuff. It’s the difference between “nice” and “I’ll eat this with a spoon.”
- Fills More Than Cake: Honestly, I’ve stuffed this between graham crackers, swirled it into brownies, and even piped it onto store-bought cupcakes when I needed a last-minute dessert upgrade. It’s my secret weapon for making boxed mixes taste homemade.
- Stays Perfect for Days: Unlike frosting that crusts over or weeps, this holds its shape in the fridge for up to 5 days. I’ll be real: I’ve made a double batch on Sunday and used it to fill everything from crepes to donuts by Wednesday. No waste, no stress.
Step-by-Step Instructions for Costco Cake Filling
Here’s the method I use to create that signature bakery-style filling—smooth, creamy, and perfectly balanced.
Step 1: Whip the Heavy Cream to Soft Peaks
Start with the 2 cups Heavy Whipping Cream straight from the refrigerator. Pour it into a chilled mixing bowl and beat on medium-high speed using the whisk attachment. I always chill my bowl and beaters for 10 minutes beforehand—this helps the cream whip faster and hold its shape better.
Watch closely as the cream transforms. First it will froth, then thicken, and finally form soft peaks that gently curl at the tips. This should take about 3-4 minutes. Be careful not to over-whip—you want soft, billowy peaks, not stiff, buttery-looking cream. The cold temperature is crucial here for achieving that light, airy texture.
Step 2: Cream the Butter, Cream Cheese, and Sugar
In a separate large bowl, beat the 0.5 cup Unsalted Butter and 8 oz Cream Cheese together on medium speed until completely smooth. This usually takes about 2 minutes with a paddle attachment. Make sure both ingredients are properly softened to room temperature—this prevents lumps in your final filling.
Gradually add the 1.5 cups Powdered Sugar while mixing on low speed, then increase to medium once incorporated. Beat for another 2 minutes until light and fluffy. The mixture should be pale and smooth, with no visible sugar granules. This step builds the rich, creamy base that gives the filling its signature bakery quality.
Step 3: Combine All Ingredients for Perfect Balance
Now it’s time to bring everything together. Gently fold the whipped cream into the butter mixture using a silicone spatula. Work in three additions, folding just until combined to maintain as much air as possible. The texture should become lighter and more voluminous with each addition.
Next, add the 2 tsp Vanilla Extract, 0.25 cup Sour Cream, 0.25 tsp Salt, and 1 tsp Lemon Juice. Fold these in gently but thoroughly. The vanilla adds depth, the sour cream contributes tanginess, the salt balances sweetness, and the lemon juice brightens all the flavors. Taste and adjust if needed—this is your chance to perfect the flavor profile.
Step 4: Chill for Optimal Texture and Flavor
Transfer the filling to an airtight container and refrigerate for at least 1 hour before using. This chilling time allows the flavors to meld together and the texture to set properly. The filling should be firm enough to hold its shape when piped but still creamy and spreadable.
When ready to use, give it a quick whisk by hand to restore its smooth consistency. If it seems too stiff after chilling, let it sit at room temperature for 10-15 minutes before using. This filling will keep beautifully in the refrigerator for up to 5 days, making it perfect for advance preparation.
Health Benefits of This costco cake filling
Balanced Nutrition Profile
This filling offers a surprisingly balanced mix of nutrients. The cream cheese and sour cream provide protein and calcium, while the heavy whipping cream delivers healthy fats that help keep you satisfied. A 2-tablespoon serving contains about 3g of protein and 10% of your daily calcium needs. 💪
While it’s certainly a treat, the inclusion of dairy means you’re also getting beneficial nutrients like vitamin D and phosphorus. The lemon juice adds a touch of vitamin C, making this more than just empty calories. I love that we can enjoy something delicious while still getting some nutritional benefits!
Energy Boosting Fats
The healthy fats from butter and cream cheese provide sustained energy rather than a quick sugar crash. These fats are essential for brain function and help your body absorb fat-soluble vitamins. A serving contains about 12g of fat, with a good balance of saturated and unsaturated fats.
What’s great is that these fats contribute to that luxurious mouthfeel we all love in bakery-style fillings. The fat content also helps stabilize blood sugar levels when enjoyed in moderation. I’ve found this makes the filling more satisfying than sugar-heavy alternatives that leave you wanting more.
Protein for Satiety
With about 3g of protein per 2-tablespoon serving, this filling helps keep you feeling full longer. The protein comes primarily from the cream cheese and sour cream, which are complete proteins containing all essential amino acids. This makes it a better choice than many store-bought fillings that rely solely on sugar for flavor.
The protein content also helps balance the carbohydrates from the powdered sugar, preventing rapid blood sugar spikes. I appreciate that this recipe gives us that bakery taste while being more nutritionally balanced than many commercial options.
Bone-Building Calcium
A single serving provides about 10% of your daily calcium needs, thanks to the dairy ingredients. Calcium is crucial for bone health and muscle function. The cream cheese and sour cream are particularly good sources of this essential mineral.
What’s interesting is that the vitamin D from the butter helps your body absorb this calcium more effectively. This makes the filling not just delicious, but also a smart choice for maintaining strong bones and teeth. 🦴
Moderation-Friendly
While rich, this filling is designed to be enjoyed in reasonable portions. A 2-tablespoon serving contains about 150 calories, making it easier to fit into a balanced diet. The recipe makes enough for a standard layer cake, with about 12 servings total.
The combination of protein, fat, and carbohydrates creates a satisfying treat that doesn’t require large portions to feel indulgent. I’ve found that using this filling allows me to enjoy dessert without overdoing it on calories or sugar.
Versatile for Dietary Needs
This recipe can be easily adapted for various dietary preferences. For a lower-fat version, you can substitute neufchâtel cheese for the cream cheese and use light sour cream. The sugar content can also be reduced by up to 25% without significantly affecting texture.
While not naturally gluten-free, this filling contains no gluten ingredients, making it safe for those with gluten sensitivities. The versatility means more people can enjoy this bakery-style treat while still meeting their dietary goals. ✨
Nutrition Facts

- 6 Egg Cake Recipe with Oil: Light as Air With Buttery Moisture - October 4, 2026
- 4 Bean Casserole Recipe: One-Pan Heartiness With Smoky Paprika Depth - October 4, 2026
- 3-Ingredient Keto Mug Cake Recipe: Microwave Magic in 2 Minutes - October 4, 2026