
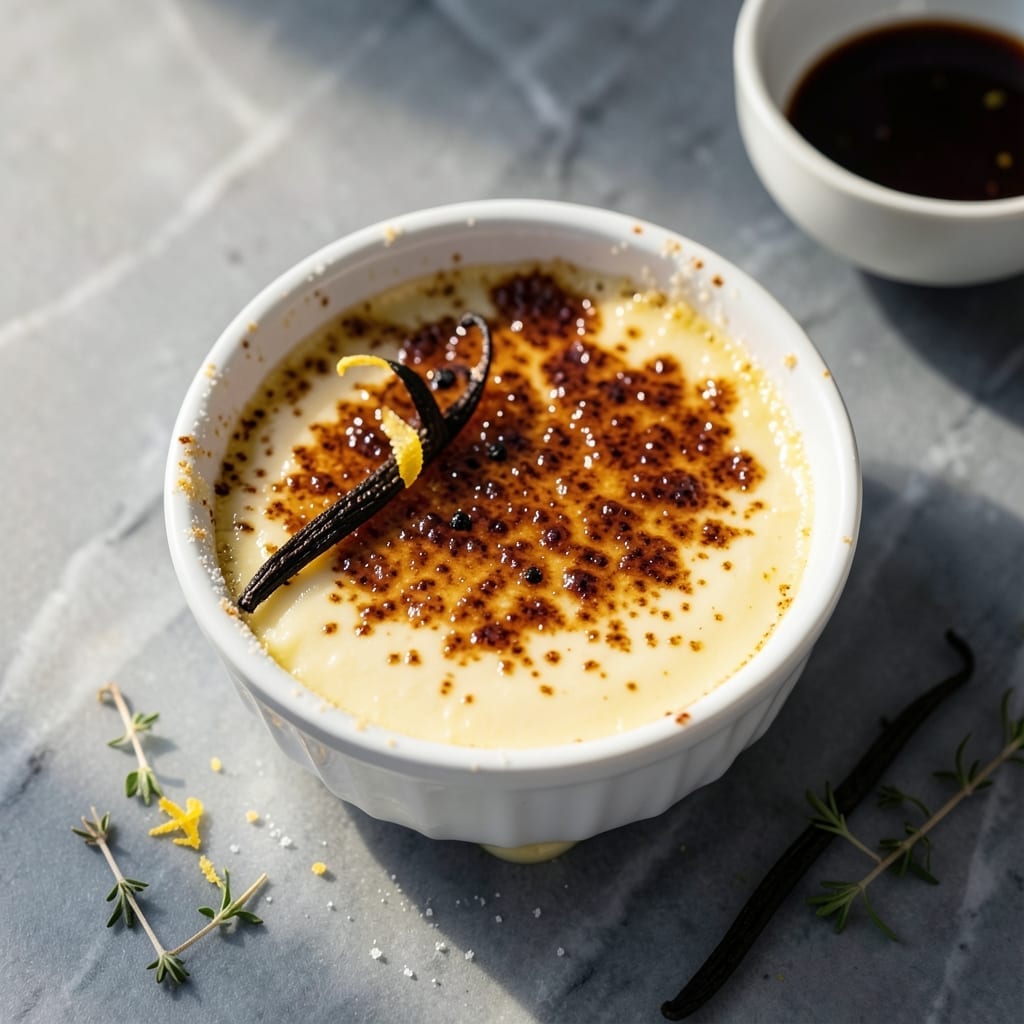
This crème brûlée is my go-to dessert when I want to impress without the stress. The custard comes out silky smooth every time, and that caramelized sugar top? Pure magic.
I’ve streamlined the process so you only need a handful of ingredients and 5 minutes of active prep. The oven does the rest, transforming simple cream and eggs into something extraordinary.
The real star is the torched sugar crust—crackly on the outside, creamy beneath. It’s the kind of dessert that feels fancy but is actually foolproof.
Serve chilled with berries or a sprinkle of flaky salt. Here’s how to nail it.
Ingredients for Creme Brulee Recipe Easy
Just a handful of ingredients for that impressive yet easy dessert.
| Ingredient | Amount | Notes |
|---|---|---|
| Heavy Cream 🥛 | 2 cups | Full-fat for richness |
| Vanilla Bean 🌿 | 1 whole | Split and scraped |
| Granulated Sugar 🧂 | ½ cup | Divided for custard and topping |
| Large Egg Yolks 🥚 | 6 pieces | Room temperature preferred |
| Salt 🧂 | ¼ tsp | Fine grain preferred |
| Vanilla Extract 💧 | 1 tsp | Pure extract for best flavor |
| Hot Water 💧 | 4 cups | For water bath |
The cream is non-negotiable here—full-fat heavy cream is what gives that silky texture. Organic Valley or Horizon are my go-tos, but any good brand works. Vanilla beans are worth the splurge (find them at Whole Foods or Trader Joe’s), but if you’re in a pinch, pure vanilla extract gets the job done. Just avoid imitation vanilla—it tastes like chemicals.
No vanilla bean? Use 1 tablespoon vanilla extract instead. Short on egg yolks? This isn’t the recipe to experiment with substitutes—they’re essential for that custardy richness. The sugar for the topping can be superfine sugar if you want an extra-crisp crust, but regular granulated works fine (just spread it evenly).
The custard keeps beautifully in the fridge for 3-4 days (if it lasts that long). Torch the sugar just before serving—it loses its crackle after a few hours. Leftovers? Cover with plastic wrap pressed directly on the surface to prevent a skin from forming.
Why You’ll Love This Recipe
- 5-Minute Prep: I just whisk the yolks, sugar, and warm cream—no fancy steps, and the oven does the rest.
- Vanilla Bean Magic: The tiny black specks from the scraped vanilla bean make every bite taste like a fancy restaurant dessert.
- Make-Ahead Dessert: I can prep these the morning of a dinner party and torch the sugar right before serving.
- Budget Luxury: Heavy cream is the only splurge here, and it makes six rich servings that feel way more expensive than they are.
Step-by-Step Instructions for Crème Brûlée
This foolproof method delivers rich, creamy custard with that perfect caramelized sugar crust.
Step 1: Infuse the Heavy Cream with Vanilla
In a saucepan, heat the 2 cups Heavy Cream over medium heat until small bubbles form around the edges. Split the 1 whole Vanilla Bean lengthwise, scrape out the seeds, and add both the seeds and pod to the cream. This gentle heating extracts maximum vanilla flavor without scorching.
Let the mixture steep off heat for 10 minutes—you’ll see tiny flecks of vanilla throughout. This infusion is what gives your custard that deep, authentic vanilla taste. Remove the pod before using.
Step 2: Whisk Egg Yolks with Sugar and Temper
In a large bowl, whisk the 6 pieces Large Egg Yolks with 0.5 cup Granulated Sugar and 0.25 tsp Salt until the mixture turns pale yellow and ribbons off the whisk. I always use room-temperature yolks—they incorporate air better for a silky texture.
Slowly pour the warm cream into the yolk mixture while whisking constantly. This tempering step prevents scrambled eggs. Stir in the 1 tsp Vanilla Extract for an extra layer of flavor. The mixture should be smooth with no lumps.
Step 3: Bake in a Water Bath
Divide the custard evenly among ramekins. Place them in a baking dish and carefully pour the 4 cups Hot Water into the dish until it reaches halfway up the ramekins. This water bath ensures gentle, even heat for a creamy—not rubbery—custard.
Bake at 325°F for 40-45 minutes until the edges are set but the centers still jiggle slightly. Overbaking is the biggest mistake here—pull them out when they’re just set.
Step 4: Chill and Caramelize the Sugar
Let the custards cool to room temperature, then refrigerate for at least 4 hours (overnight is best). This chilling step is non-negotiable—it firms up the custard for that perfect contrast with the crisp sugar topping.
Just before serving, sprinkle a thin, even layer of Granulated Sugar on each custard. Use a kitchen torch to melt and caramelize the sugar until it’s deep amber and crackly. If you don’t have a torch, broil for 2-3 minutes—watch closely to avoid burning.
Pro Tips For Making Creme Brulee Recipe Easy
- Temper the Yolks: I learned this the hard way—slowly drizzle the hot cream into the egg yolks while whisking constantly to prevent scrambled eggs. About a minute of patience saves the whole batch.
- Scrape the Vanilla: Don’t just slice the vanilla bean—split it lengthwise and scrape every last speck of those tiny black seeds into the cream. Sounds tedious, but it’s what gives that deep, speckled flavor.
- Skip the Boil: Heat the cream just until it steams, not boils, or it’ll curdle the custard. I burned my first two attempts before realizing 180°F is the sweet spot.
- Chill Overnight: After baking, let the custards set in the fridge for at least 4 hours—preferably overnight. I was skeptical until I tried it, but the texture is so much creamier.
Troubleshooting Great creme brulee recipe easy
Grainy Custard Fix
If your custard turns out grainy, it’s likely because the eggs curdled during tempering. Always whisk constantly while adding the hot cream, and use room-temperature yolks. If it happens, strain the mixture through a fine-mesh sieve before baking to smooth it out. 💡
Undercooked Centers
If the centers wobble too much after baking, they need more time. Return them to the 325°F oven for 5-10 minutes, checking frequently. The custard is done when it jiggles like Jell-O but doesn’t slosh. Overbaking creates rubbery texture, so be patient.
Sugar Won’t Caramelize
For even caramelization, ensure the sugar layer is thin and spread evenly. Use superfine sugar for faster melting. If the torch isn’t hot enough, move closer or switch to broiling. A culinary torch like Iwatani works best for consistent heat.
Water Bath Leaks
Prevent soggy custards by using oven-safe ramekins and placing them in a deep baking dish. I wrap the outside of ramekins with aluminum foil as extra protection. Pour the 4 cups Hot Water after placing ramekins in the dish to avoid spills.
Cracked Top Surface
Cracks form from uneven cooling or overmixing. After baking, let custards cool in the water bath for 30 minutes, then transfer to a rack. Avoid tapping or moving ramekins during chilling. A smooth, unbroken top makes for the perfect caramelized finish.
Torch Troubles
If your sugar burns before melting, hold the torch 3-4 inches away and use circular motions. For broiling, rotate the ramekins every 30 seconds for even browning. The goal is deep amber, not black—stop as soon as it’s glossy and crackly. 🔥
Nutrition Facts
Frequently Asked Questions
What if I don’t have a kitchen torch?
Use your oven’s broiler on high. Sprinkle sugar evenly, then broil for 2-3 minutes watching closely. Rotate ramekins for even caramelization.
Can I make this ahead of time?
The custard keeps in the fridge for 3-4 days. Torch the sugar just before serving for that fresh crackle. Cover tightly to avoid absorbing fridge odors.
Why did my custard turn grainy?
This usually means the eggs curdled. Always temper by slowly whisking hot cream into yolks. Use room-temperature yolks and strain if needed.
Can I use vanilla extract instead of a bean?
Yes! Use 1 tablespoon pure vanilla extract instead of the bean. Add it with the cream while heating for best flavor distribution.

- 6 Egg Cake Recipe with Oil: Light as Air With Buttery Moisture - October 4, 2026
- 4 Bean Casserole Recipe: One-Pan Heartiness With Smoky Paprika Depth - October 4, 2026
- 3-Ingredient Keto Mug Cake Recipe: Microwave Magic in 2 Minutes - October 4, 2026