
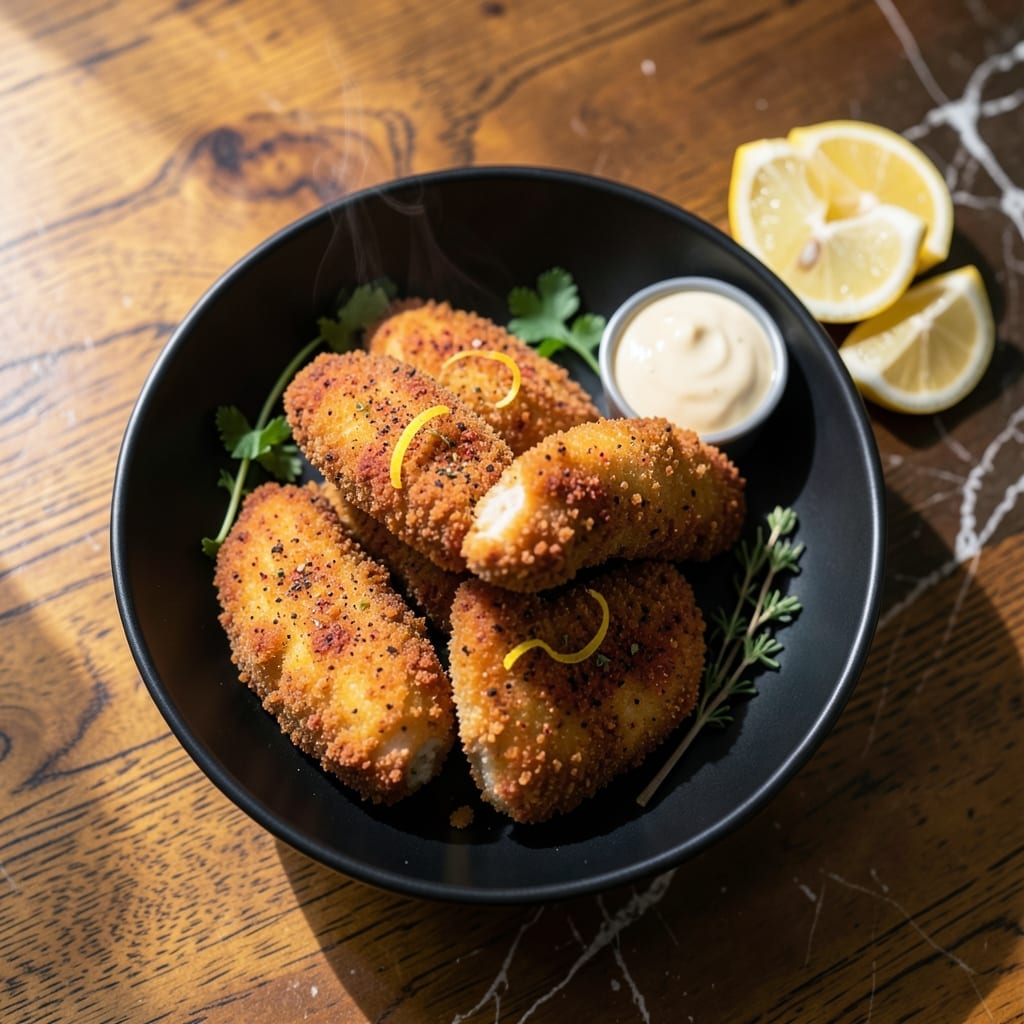
I’ve perfected a method for achieving crispy chicken tenders without relying on buttermilk. The secret lies in a simple swap that still delivers tender meat and a golden, shatteringly crisp exterior.
This approach uses a basic egg wash to bind the coating, ensuring it adheres perfectly for maximum crunch. The double-dredging technique guarantees an extra-thick, crispy layer that stays intact while baking or frying.
What you get is juicy, tender chicken encased in a coating so crispy you’ll hear the crunch from across the table. It’s a foolproof way to satisfy cravings without the dairy.
Ready in under 30 minutes, this dish proves you don’t need buttermilk for restaurant-quality results. Let’s make it happen.
Ingredients for Crispy Chicken Tender Recipe Without Buttermilk
Pantry staples and a few fresh items create that restaurant-quality crunch at home.
| Ingredient | Amount | Notes |
|---|---|---|
| Chicken Tenders 🍗 | 1 ½ lb | Boneless, skinless preferred |
| All-Purpose Flour 🌾 | 1 ½ cups | Divided for dredging and coating |
| Large Eggs 🥚 | 2 whole | Beaten for egg wash |
| Panko Breadcrumbs 🍞 | 2 cups | For extra crunch texture |
| Cornstarch 🌾 | ¼ cup | Mixed with flour for crispiness |
| Paprika 🌶️ | 1 tsp | Sweet or smoked for flavor |
| Garlic Powder 🧄 | 1 tsp | Enhances savory depth |
| Onion Powder 🧅 | 1 tsp | Balances seasoning blend |
| Salt 🧂 | 1 tsp | Kosher or sea salt preferred |
| Black Pepper 🌶️ | ½ tsp | Freshly ground for best results |
| Neutral Cooking Oil 🫒 | 1 cup | Vegetable or canola for frying |
| Cayenne Pepper 🔥 | ¼ tsp | Optional for heat (adjust to taste) |
The chicken quality matters—look for tenders labeled ‘air-chilled’ if your store carries them (they don’t retain as much water). Costco and Whole Foods both have good options. For the coating, Panko breadcrumbs are non-negotiable here (the large flakes create that shatter). If your flour bin is getting low, self-rising flour works in a pinch but skip the extra leavening agents.
No Panko? Crushed cornflakes or Ritz crackers give great crunch (pulse in a food processor for even texture). Out of eggs? Mayonnaise at a 1:1 ratio works as a binder (yes, it sounds weird, but it fries up golden). The cornstarch is doing heavy lifting for crispiness—don’t substitute. Need more heat? Double the cayenne or add hot paprika.
Uncooked tenders keep in the fridge for 1-2 days before breading. Breaded tenders need to be cooked immediately—don’t let them sit. Leftovers? Reheat in a 400°F oven for 10 minutes to revive the crunch. They’ll keep for 3-4 days in the fridge.
Why You’ll Love This Recipe
- No Fuss Coating: I skip the buttermilk soak and go straight to dredging in flour, egg, and panko—clean, fast, and no extra bowls.
- That Crunch: Panko and cornstarch give it a shatter-crust that stays crispy even when I pile them on a plate.
- Weeknight Hero: I throw these together between soccer practice and bedtime. Yes, even on a Tuesday night.
- Leftovers? Better: Honestly, they taste just as good cold the next day in a lunchbox—my kid’s favorite.
Step-by-Step Instructions for Crispy Chicken Tenders
Here’s my foolproof method for achieving maximum crunch without a drop of buttermilk.
Step 1: Season and Dredge the Chicken
Pat the 1.5 lb Chicken Tenders completely dry with paper towels—this is non-negotiable for crispiness. In a shallow bowl, combine 1 cup of the All-Purpose Flour with Cornstarch, Paprika, Garlic Powder, Onion Powder, Salt, Black Pepper, and Cayenne Pepper.
Dredge each tender in the seasoned flour, pressing gently to adhere, then shake off the excess. This first coat creates a sticky base for the egg wash to cling to, ensuring every bite stays extra crispy.
Step 2: Create the Egg Wash and Panko Coating
In a second shallow bowl, beat the 2 whole Large Eggs until frothy. In a third bowl, pour the 2 cups Panko Breadcrumbs. The three-bowl method keeps things organized and prevents cross-contamination.
Dip each floured tender into the egg wash, letting any excess drip off, then roll it in the Panko, pressing firmly so the crumbs adhere in a thick, even layer. Panko’s coarse texture is the secret to that restaurant-style crunch.
Step 3: Fry to Golden Perfection
Heat the 1 cup Neutral Cooking Oil in a large, heavy skillet over medium-high heat until it reaches 350-375°F. To test, drop a pinch of Panko into the oil—it should sizzle immediately and float to the surface.
Working in batches to avoid crowding, carefully place the coated tenders in the hot oil. Fry for 3-4 minutes per side until deep golden brown and the internal temperature reaches 165°F. The oil should bubble steadily around each piece—if it’s smoking, reduce the heat slightly.
Transfer the cooked tenders to a wire rack set over a paper towel-lined plate. This allows air to circulate, keeping them crispy instead of steamy. Sprinkle with a pinch of Salt while hot to enhance the flavor.
Step 4: Rest and Serve Immediately
Let the tenders rest for 2-3 minutes before serving. This brief pause allows the juices to redistribute, ensuring the meat stays tender and moist inside its shatteringly crisp coating.
Serve immediately while still hot—they’re at their absolute best right out of the oil. Any leftovers (though unlikely) can be kept warm in a 200°F oven for up to 15 minutes, but they’re best enjoyed fresh for that ultimate crunch.
Pro Tips For Making Crispy Chicken Tender Recipe Without Buttermilk
- Double Dredge: I learned this the hard way—dip the tenders in flour first, then egg, then panko, and repeat the egg and panko step for a crust that actually stays put and gets extra crispy.
- Dry the Chicken: Pat those tenders bone-dry with a paper towel before dredging. Sounds tedious, but it keeps the coating from sliding off in the pan.
- Hot Oil Check: Drop a pinch of panko in the oil first—if it sizzles immediately, it’s ready. After burning two batches testing this, I now never skip it.
- Cornstarch Boost: Mix 2 tablespoons cornstarch into the panko before breading. It’s the thing that matters most for that shatteringly crisp texture without buttermilk.
Regional Styles of This Recipe
Southern Style
In the South, we often swap Panko for crushed saltine crackers mixed with 1 tbsp cornmeal for extra crunch. The cornmeal adds a gritty texture that’s pure Southern comfort. I like using Ritz crackers for a buttery note.
Nashville Hot
For a Nashville twist, add 2 tbsp cayenne pepper and 1 tbsp brown sugar to your flour mix. After frying, drizzle with hot oil infused with 1 tbsp hot sauce and 1 tsp honey for that signature fiery kick. 🔥
Asian Fusion
Replace 1 cup Panko with crushed rice cereal and add 1 tbsp soy sauce to the egg wash. The rice cereal creates an ultra-crispy coating, while soy sauce adds umami depth. Serve with sweet chili sauce for dipping.
Italian Parmesan
Mix ½ cup grated Parmesan into your Panko for a cheesy upgrade. Add 1 tsp Italian seasoning to the flour for extra herbaceous flavor. The Parmesan browns beautifully, creating a golden, savory crust.
Mexican Spiced
Stir 1 tbsp taco seasoning into your flour mixture and use crushed tortilla chips instead of Panko. The chips add a vibrant color and bold flavor. Serve with lime crema for a fiesta in every bite. 💛
Nutrition Facts
Frequently Asked Questions
What can I use instead of buttermilk for the coating?
An egg wash works perfectly as a buttermilk substitute. Simply beat 2 eggs until frothy for binding the coating. For extra tenderness, you can thin it with 1 tablespoon water or milk.
How do I keep the coating from falling off?
Dredge in flour first, then egg wash, then Panko. Press firmly when coating and let each layer set for 1 minute before frying. The double-dredge method ensures maximum adhesion.
Can I bake these instead of frying?
Yes! Bake at 400°F for 15-20 minutes, flipping halfway. Use a wire rack on a baking sheet for air circulation. Spray with oil before baking for extra crispiness.
Why did my tenders turn out soggy?
Most likely from not drying the chicken thoroughly or overcrowding the pan. Always pat dry and fry in batches at 350-375°F. Rest on a wire rack, not paper towels.

- 6 Egg Cake Recipe with Oil: Light as Air With Buttery Moisture - October 4, 2026
- 4 Bean Casserole Recipe: One-Pan Heartiness With Smoky Paprika Depth - October 4, 2026
- 3-Ingredient Keto Mug Cake Recipe: Microwave Magic in 2 Minutes - October 4, 2026