
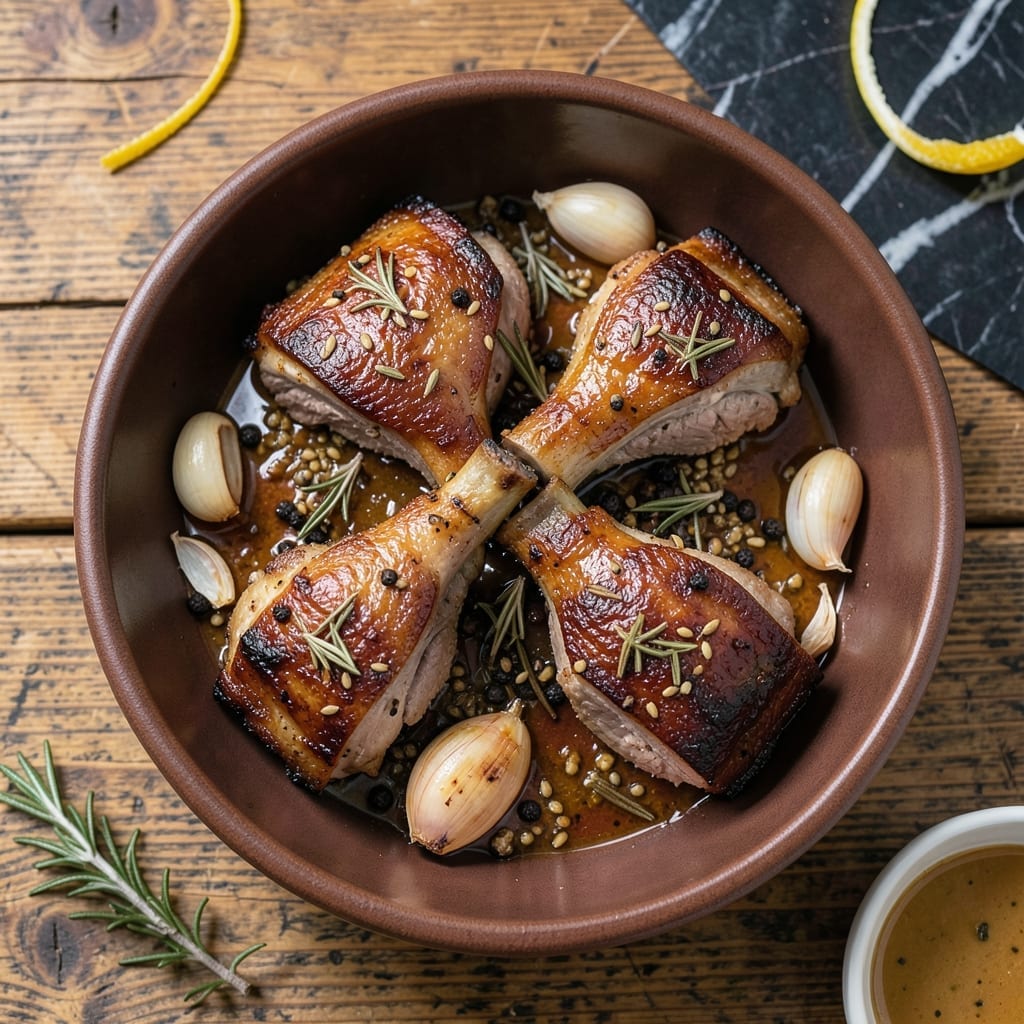
Achieving perfectly crispy pork shank at home is entirely possible with the right technique and patience. This method transforms a humble cut into a showstopping centerpiece with shatteringly crisp skin and tender meat.
The secret lies in slow-roasting at a low temperature before finishing with a high-heat blast. This ensures the fat renders completely while the skin crisps to golden perfection. A dry brine the night before enhances flavor and texture.
What results is fall-off-the-bone meat encased in a crackling exterior that delivers with every bite. The contrast between the crispy skin and succulent flesh is what makes this dish unforgettable.
Serve with your favorite sides for a meal that impresses every time. Here’s how to make it happen.
Ingredients for Crispy Pork Shank
Transform humble pork shanks into a showstopping centerpiece with these carefully selected ingredients.
| Ingredient | Amount | Notes |
|---|---|---|
| Pork Shanks 🍖 | 4 whole | Bone-in, skin-on, about 1.5 lb each |
| Kosher Salt 🧂 | ¼ cup | Diamond Crystal preferred for dry brine |
| Black Peppercorns 🌶️ | 1 tbsp | Freshly cracked for best flavor |
| Fennel Seeds 🌿 | 1 tbsp | Lightly toasted and crushed |
| Dried Rosemary 🍃 | 1 tbsp | Crushed between fingers to release oils |
| Garlic Cloves 🧄 | 6 cloves | Smashed but left whole |
| Bay Leaves 🌿 | 2 whole | Fresh or dried |
| Olive Oil 🫒 | 2 tbsp | Extra-virgin for rubbing |
| White Wine Vinegar 🍷 | 2 tbsp | For acidity balance |
| Honey 🍯 | 2 tbsp | For glaze finish |
| Dijon Mustard 🟡 | 1 tbsp | Smooth variety for binding |
| Chicken Stock 🥣 | 1 cup | Low-sodium preferred for braising |
| Yellow Onion 🧅 | 1 whole | Roughly chopped for aromatics |
| Carrots 🥕 | 2 whole | Cut into large chunks |
| Celery Stalks 🥬 | 2 whole | Cut into large chunks |
The pork shanks are the star—look for bone-in, skin-on cuts weighing about 1.5 lb each. Butcher shops or specialty meat counters at Whole Foods typically carry the best quality. The skin should be thick and intact, as this is what delivers that shatteringly crisp finish. Don’t trim the fat; it renders down beautifully during the slow roast. For the dry brine, Diamond Crystal kosher salt is ideal due to its texture and purity.
No fennel seeds? Caraway seeds at half the amount offer a similar anise note. Fresh rosemary can replace dried at a 3:1 ratio. If you’re out of white wine vinegar, apple cider vinegar works in a pinch. For a deeper glaze, maple syrup can substitute for honey. The Dijon mustard can be swapped for whole-grain mustard for added texture, but avoid yellow mustard—it’s too mild.
Dry-brined shanks can rest uncovered in the fridge for up to 24 hours. Once cooked, the meat keeps well for 4-5 days in the fridge, though the skin loses some crispness. Reheat in the oven at 375°F to revive the texture. The braising liquid can be frozen for up to 3 months for future use.
Why You’ll Love This Recipe
- Set and Forget: Honestly, just rub the shank with salt, peppercorns, fennel, and rosemary, then let the oven do the work.
- Crispy Perfection: That skin cracks like glass, while the meat stays fall-off-the-bone tender—fennel and rosemary make every bite ridiculous.
- Feeds the Crew: One shank stretches to feed four with sides, and it’s just as good sliced for sandwiches the next day.
- Budget Hero: Pork shanks cost less than fancy cuts, but with this method, they taste like a weekend splurge.
Step-by-Step Instructions for Crispy Pork Shank
Achieve fall-off-the-bone tenderness with an irresistibly crispy exterior using this proven method.
Step 1: Dry Brine for Maximum Flavor Penetration
Pat the 4 whole Pork Shanks completely dry with paper towels to ensure optimal crust development. In a small bowl, combine 0.25 cup Kosher Salt, 1 tbsp Black Peppercorns, 1 tbsp Fennel Seeds, and 1 tbsp Dried Rosemary. Lightly crush the fennel seeds and dried rosemary between your fingers to release their aromatic oils as you work.
Rub this mixture evenly over all surfaces of each shank, pressing firmly to adhere. Add the 6 cloves Garlic Cloves and 2 whole Bay Leaves to the bowl and scatter them around the shanks. Place everything on a wire rack set over a baking sheet and refrigerate uncovered for 12-24 hours. This dry brine draws moisture to the surface, which we’ll later convert into that perfect crispy skin.
Step 2: Sear and Build the Braising Foundation
Remove the shanks from the refrigerator and let them sit at room temperature for 30 minutes. Meanwhile, preheat your oven to 325°F. In a large Dutch oven, heat 2 tbsp Olive Oil over medium-high heat until shimmering. Sear the shanks on all sides until deeply browned, about 4-5 minutes per side. You’re looking for a rich, mahogany crust—this builds the flavor base for your braise.
Transfer the shanks to a plate. In the same pot, add the roughly chopped 1 whole Yellow Onion, the 2 whole Carrots cut into large chunks, and the 2 whole Celery Stalks also in chunks. Sauté for 3-4 minutes until the vegetables begin to soften and develop color. This creates the aromatic foundation for your braising liquid.
Step 3: Braise to Tenderness with Aromatic Liquid
Return the shanks to the pot, nestling them among the vegetables. In a small bowl, whisk together 2 tbsp White Wine Vinegar, 2 tbsp Honey, and 1 tbsp Dijon Mustard until smooth. Pour this mixture over the shanks, then add 1 cup Chicken Stock. The liquid should come about halfway up the shanks—add a splash of water if needed to reach this level.
Bring to a gentle simmer, then cover the pot and transfer to the preheated oven. Braise for 2.5-3 hours, turning the shanks every 45 minutes, until the meat is fork-tender and nearly falling off the bone. You’ll know it’s ready when a knife slides in with virtually no resistance.
Step 4: Crisp the Skin to Golden Perfection
Carefully transfer the shanks to a baking sheet, skin-side up. Strain the braising liquid into a saucepan and skim off excess fat—this will become your serving sauce. Increase your oven temperature to 450°F and return the shanks to the oven.
Roast for 15-20 minutes, watching closely, until the skin transforms into a deep golden, crackling crust. The high heat renders the fat and crisps the skin while the interior stays moist from the long braise. Baste the shanks with some of the strained braising liquid once or twice during this final crisping stage for extra flavor and shine.
Pro Tips For Making Crispy Pork Shank
- Dry the Skin: Pat the pork shank skin completely dry before seasoning—any moisture steams instead of crisps. I learned this the hard way after pulling out a pale, rubbery shank that refused to brown.
- Score Deeply: Use a sharp knife to cut 1/4-inch crosshatches into the skin and fat cap. Sounds tedious, but it lets the salt and spices penetrate while creating more surface area for that crackling crust.
- Start High, Finish Low: Roast at 425°F for the first 30 minutes to render fat and jumpstart the crisp, then drop to 300°F to cook through without burning the herbs.
- Rest Before Slicing: Give the shank a solid 15 minutes under loose foil after cooking—this keeps the juices from pooling on your cutting board when you carve. I skip this when I’m hungry, but the meat is noticeably juicier when I don’t.
Common Mistakes When Making This Recipe
Skipping the Dry Brine
I can’t stress this enough—don’t rush the dry brine step. Skipping the 12-24 hour salt treatment means your skin won’t crisp properly. The salt draws moisture to the surface, which is essential for that perfect crackle. I once tried to shortcut this and ended up with chewy, sad skin. 💡
Overcrowding the Pan
When searing, give each shank plenty of space in the Dutch oven. Overcrowding steams the meat instead of browning it, and you’ll lose that rich, mahogany crust. I sear 2 shanks at a time in my 7-quart Le Creuset for the best results.
Insufficient Braising Time
Pork shank is a tough cut that needs 2.5-3 hours at 325°F to become fork-tender. Pulling it out too early means tough, stringy meat. I check for doneness by twisting a fork—if it slides in with no resistance, it’s ready. 🌡️
Neglecting to Skim Fat
Before the final crisping stage, skim the excess fat from the braising liquid. Too much fat in the pan can prevent the skin from crisping properly and may even cause burning. I use a fine-mesh skimmer to remove most of the surface fat.
Final Crisping Mishaps
For that perfect crackle, the oven must be 450°F. Anything lower won’t crisp the skin, and anything higher risks burning it. I rotate the baking sheet halfway through for even browning. Watch closely—it can go from golden to burnt in 2-3 minutes.
Nutrition Facts
Frequently Asked Questions
How long should I dry brine the shanks?
Dry brine for 12-24 hours uncovered in the fridge. This step is crucial for flavor and that perfect crackling skin. Don’t rush it—longer brining yields better results.
Can I use a different cut of pork?
For best results, stick with bone-in, skin-on pork shanks. The fat and collagen break down beautifully during braising. Other cuts won’t give you the same texture or crispy finish.
Why isn’t my skin getting crispy?
Pat the skin completely dry before the final roast and ensure your oven reaches 450°F. Too much moisture or low heat prevents proper crisping. Baste once with braising liquid for extra shine.
How do I store leftovers?
Refrigerate in an airtight container for up to 4-5 days. Reheat in the oven at 375°F to revive the skin’s crispness. Freeze braising liquid separately for up to 3 months.

- 6 Egg Cake Recipe with Oil: Light as Air With Buttery Moisture - October 4, 2026
- 4 Bean Casserole Recipe: One-Pan Heartiness With Smoky Paprika Depth - October 4, 2026
- 3-Ingredient Keto Mug Cake Recipe: Microwave Magic in 2 Minutes - October 4, 2026