
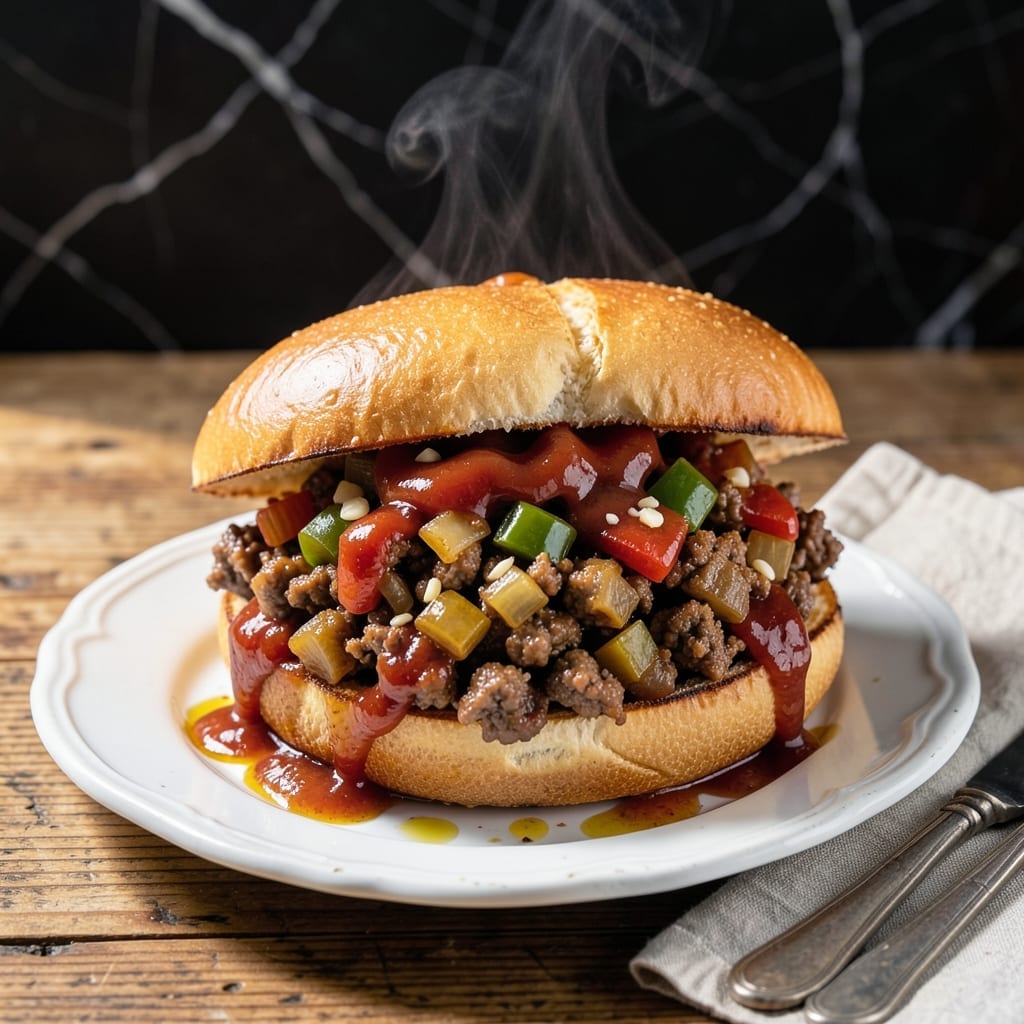
This recipe recreates the nostalgic taste of Dairy Queen’s iconic sloppy joes with a homemade twist. The secret lies in the balanced sweet-tangy sauce that coats the ground beef perfectly.
I’ve refined this version to match the fast-food favorite while keeping it simple for home cooks. A few pantry staples and 15 minutes of simmering deliver that signature saucy texture.
The result is tender, flavorful beef with just the right amount of thickness to stay put on a soft bun. It’s a copycat that tastes even better than the original.
Serve these sandwiches for a quick weeknight meal or casual gathering. Here’s how to make them.
Ingredients for Dairy Queen Sloppy Joe
Pantry staples plus a pound of beef. Simple ingredients, iconic flavor.
| Ingredient | Amount | Notes |
|---|---|---|
| Ground Beef 🥩 | 1 lb | 80/20 fat ratio preferred |
| Yellow Onion 🧅 | 1 whole | Finely diced for texture |
| Green Bell Pepper 🌶️ | 1 whole | Small dice, stems removed |
| Garlic Cloves 🧄 | 3 cloves | Minced for even distribution |
| Tomato Sauce 🍅 | 1 cup | Plain, no herbs added |
| Ketchup 🍅 | ¾ cup | Classic American style |
| Yellow Mustard 🟡 | 2 tbsp | Prepared, not powdered |
| Worcestershire Sauce 🫒 | 1 tbsp | Lea & Perrins preferred |
| Apple Cider Vinegar 🍏 | 1 tbsp | For tangy balance |
| Brown Sugar 🟤 | 2 tbsp | Light or dark works |
| Chili Powder 🌶️ | 1 tsp | Mild or medium heat |
| Salt 🧂 | 1 tsp | Adjust to taste |
| Black Pepper 🌶️ | ½ tsp | Freshly ground preferred |
| Hamburger Buns 🍞 | 4 pieces | Soft, slightly toasted |
The beef is everything here. 80/20 ground chuck gives you the right fat for flavor and texture—leaner blends dry out. I grab mine from Costco for bulk savings, but any supermarket’s store brand works. The onion and bell pepper should be fresh (not pre-diced from a bag) for the best crunch. Lea & Perrins Worcestershire is the go-to for that deep umami kick.
No Worcestershire? Soy sauce plus a dash of vinegar gets you close. Ketchup can be swapped for tomato paste thinned with water if you’re out. For extra heat, add half a teaspoon of cayenne (or a pinch of red pepper flakes). The brown sugar can be replaced with maple syrup at one-third the amount. Pre-shredded cheese? Not needed here, but if you’re topping, melt it yourself.
Sauce thickens as it cools, so don’t stress if it seems thin while simmering. Leftovers keep 4-5 days in the fridge or freeze for 3 months (portion before freezing for easy reheating). The buns? Toast just before serving—no one likes a soggy sandwich.
Why You’ll Love This Recipe
- One Pot Wonder: I brown the beef, toss in the onions, peppers, and garlic, then let the tomato sauce do the rest—minimal dishes, maximum flavor.
- That Nostalgic Taste: The mix of sweet tomato sauce with the savory beef and a hint of garlic brings back all the classic Dairy Queen sloppy joe vibes I loved as a kid.
- Feeds the Whole Crew: I make a big batch for game nights or lazy Sundays, and it’s always a hit with both kids and adults.
- Budget Stretch: Ground beef and pantry staples keep this dish cheap, and leftovers taste even better the next day for lunch.
Step-by-Step Instructions for Copycat Saucy Ground Beef Sandwiches
Here’s the method. Straightforward, tested, works every time.
Step 1: Sauté Aromatics and Brown the Ground Beef
Heat a large skillet over medium heat. Add the 1 lb Ground Beef, breaking it up with a wooden spoon as it browns. I like to let it sit undisturbed for the first 2 minutes to develop a good crust on some of the meat—this adds depth to the final dish.
Once the beef is about halfway browned, add the finely diced 1 whole Yellow Onion and small-diced 1 whole Green Bell Pepper. Cook for another 5-6 minutes until the beef is fully browned and the vegetables have softened. Drain off excess fat if needed, but leave about 1 tablespoon in the pan for flavor.
Step 2: Build the Flavor Base with Garlic and Wet Ingredients
Add the minced 3 cloves Garlic Cloves to the skillet and cook for 30 seconds until fragrant. Here’s the thing—don’t let the garlic burn or it’ll turn bitter. Stir constantly during this short cook time.
Pour in the 1 cup Tomato Sauce, 0.75 cup Ketchup, 2 tbsp Yellow Mustard, 1 tbsp Worcestershire Sauce, and 1 tbsp Apple Cider Vinegar. Stir well to combine, scraping up any browned bits from the bottom of the pan. These bits are packed with flavor and will dissolve into your sauce.
Step 3: Sweeten, Season, and Simmer to Perfection
Sprinkle in the 2 tbsp Brown Sugar, 1 tsp Chili Powder, 1 tsp Salt, and 0.5 tsp Black Pepper. Stir thoroughly to distribute the seasonings evenly throughout the mixture.
Reduce the heat to low and let the mixture simmer uncovered for 10-12 minutes. You want it to thicken slightly but still remain saucy—the consistency should coat the back of a spoon but drip off slowly. Stir occasionally to prevent sticking, and taste after 8 minutes to adjust seasoning if needed.
Step 4: Toast Buns and Assemble the Sandwiches
While the beef mixture simmers, lightly toast the 4 pieces Hamburger Buns if desired. I prefer mine just warm and slightly crisp on the edges—this prevents them from turning soggy when loaded with the saucy beef mixture.
Spoon a generous portion of the beef mixture onto the bottom half of each bun. For that true copycat experience, pile it high—about ½ cup of the mixture per sandwich. Top with the remaining bun halves and serve immediately while hot. The sauce should be thick enough to stay on the sandwich but still have that signature sloppy quality.
Pro Tips For Making Dairy Queen Sloppy Joe
- Brown the Beef Well: Cook the ground beef over medium-high heat until deeply browned, not just gray—this builds the rich flavor base that makes Dairy Queen’s version stand out. I used to pull it off too early and wondered why mine tasted flat.
- Dice Veggies Small: Finely chop the yellow onion and green bell pepper (about 1/4-inch pieces) so they melt into the sauce. After burning a batch with chunky peppers, I learned small pieces cook down faster and blend right in.
- Skip the Pre-Salting: Resist the urge to salt the beef before browning—it draws out moisture and steams instead of searing. My grandmother swore by this, and she was right: wait until after it’s browned to season.
- Simmer Uncovered: Let the mixture simmer uncovered for 10-15 minutes to thicken the tomato sauce naturally. Sounds weird, but it works: covering traps steam and leaves you with a watery mess.
Storing and Reheating This Dish
Refrigerator Storage
Transfer cooled leftovers to airtight containers—I love using glass Pyrex with snap-tight lids. They’ll keep for 4-5 days at 40°F or below. The flavors actually deepen overnight as the sauce continues to meld. ❄️
Freezer Storage
Freeze in quart-size freezer bags laid flat to save space. Portion into single-serving sizes for easy reheating. The mixture stays fresh for up to 3 months without losing quality. Squeeze out excess air to prevent freezer burn.
Stovetop Reheating
Warm in a skillet over medium-low heat with 2 tbsp water to restore moisture. Stir occasionally for 5-7 minutes until heated through. This method keeps the texture closest to freshly made. 🔥
Microwave Reheating
Place in a microwave-safe dish, cover with a damp paper towel, and heat on 70% power for 2-3 minutes. Stir, then continue in 30-second bursts until reaching 165°F. Add a splash of water if needed.
Nutrition Facts
Frequently Asked Questions
What kind of beef works best?
80/20 ground chuck is ideal for flavor and moisture. Leaner blends like 90/10 can dry out during cooking. For best results, avoid pre-formed patties.
Can I make this ahead of time?
Yes! The sauce actually improves after 24 hours in the fridge. Store in an airtight container and reheat gently with a splash of water to restore texture.
Why does my mixture seem too thin?
Simmer uncovered for the full 10-12 minutes. If still thin, mix 1 tsp cornstarch with water and stir in. The sauce thickens as it cools.
What can I serve with these sandwiches?
Classic pairings include crispy fries, coleslaw, or pickles. For a lighter option, try a simple green salad with tangy dressing.

- 6 Egg Cake Recipe with Oil: Light as Air With Buttery Moisture - October 4, 2026
- 4 Bean Casserole Recipe: One-Pan Heartiness With Smoky Paprika Depth - October 4, 2026
- 3-Ingredient Keto Mug Cake Recipe: Microwave Magic in 2 Minutes - October 4, 2026