
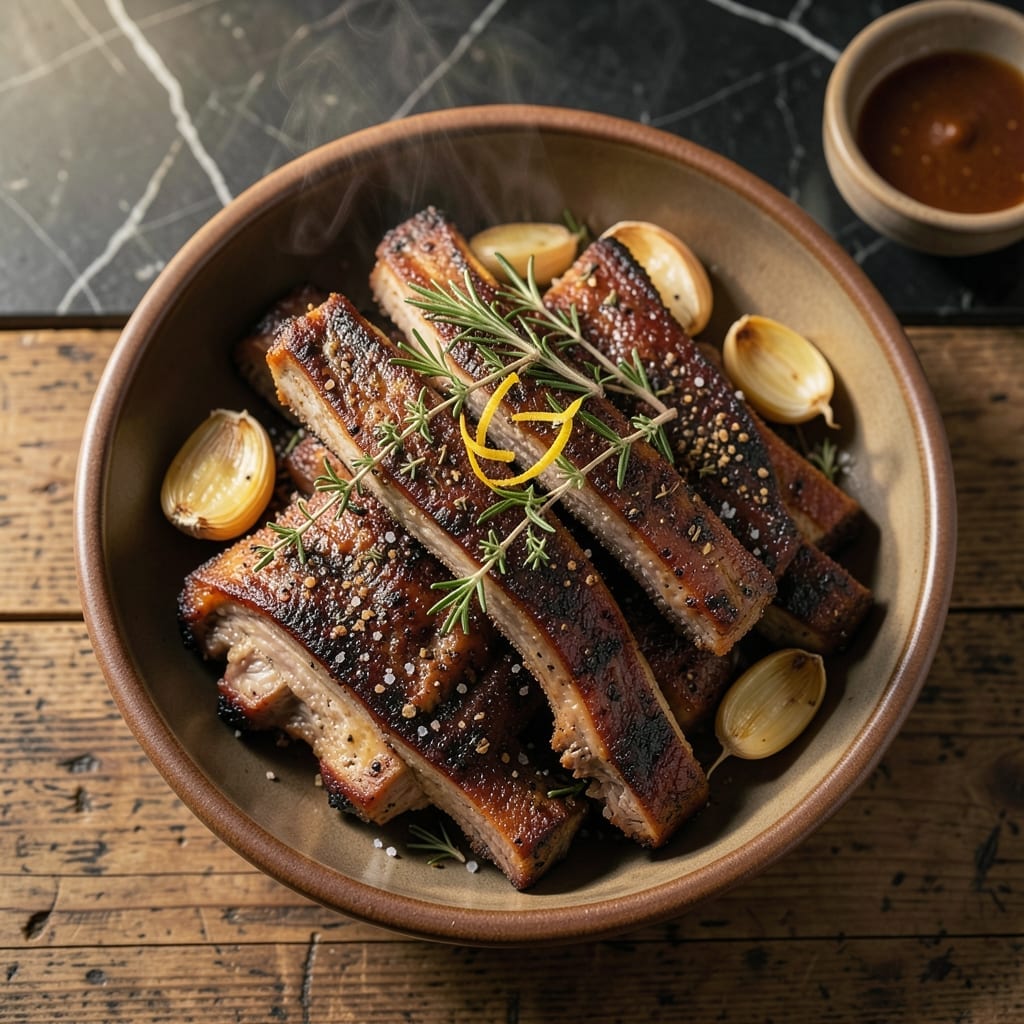
This oven method transforms deer ribs into a tender, flavorful masterpiece with minimal effort. The slow-roasting process allows the connective tissue to break down gradually, ensuring meat that literally falls off the bone.
I developed this technique after years of experimenting with different cooking methods. The key is maintaining a consistent low temperature—around 275°F—and allowing enough time for the ribs to become perfectly tender.
What you’ll achieve is meat so soft it separates with just a nudge, infused with the deep, rich flavors of your chosen seasonings. The oven does most of the work while you prepare the rest of your meal.
This approach delivers restaurant-quality results at home, with the added benefit of filling your kitchen with an irresistible aroma. Here’s how to make it happen.
Ingredients for Deer Ribs Recipe Oven
Simple ingredients, bold flavors. The venison does the heavy lifting here.
| Ingredient | Amount | Notes |
|---|---|---|
| Venison Ribs 🦌 | 4 lb | Bone-in, trimmed of excess fat |
| Kosher Salt 🧂 | 2 tbsp | Diamond Crystal preferred for even seasoning |
| Freshly Ground Black Pepper 🌶️ | 2 tsp | Coarse grind for texture |
| Garlic Powder 🧄 | 1 ½ tbsp | Not garlic salt for pure flavor |
| Smoked Paprika 🌶️ | 1 tbsp | Adds depth and color |
| Dried Thyme 🌿 | 1 tbsp | Rubbed between fingers to release oils |
| Dried Rosemary 🍃 | 1 tbsp | Crushed lightly before using |
| Olive Oil 🫒 | ¼ cup | Extra-virgin for richness |
| Apple Cider Vinegar 🍏 | 2 tbsp | Balances the richness of the meat |
| Brown Sugar 🍚 | 2 tbsp | Light or dark, packed |
| Beef Broth 🥩 | 1 cup | Low-sodium to control seasoning |
| Yellow Onion 🧅 | 1 whole | Thinly sliced for braising liquid |
| Carrots 🥕 | 2 whole | Peeled, cut into chunks |
| Celery Stalks 🌿 | 2 whole | Cut into large pieces |
The venison ribs are the star—look for fresh, deep-red meat with good marbling. Your local butcher or specialty game meat supplier is ideal, but some well-stocked Whole Foods locations carry it seasonally. Ask for the ribs to be cut into manageable pieces if they aren’t already. The fat cap should be trimmed but not completely removed (it adds flavor). If you’re sourcing from a hunter, make sure the meat has been properly aged.
No venison? Beef short ribs work in a pinch, but reduce cooking time by about one-third. Swap apple cider vinegar for red wine vinegar if that’s what you’ve got. Brown sugar can be replaced with maple syrup at half the amount. For the broth, vegetable broth works but won’t be as rich. The spices are flexible—add a pinch of cayenne if you like heat (worth the extra minute).
The ribs reheat surprisingly well—shred the meat and toss it into tacos or sandwiches within 4-5 days. Leftovers freeze beautifully for up to 3 months. Store the cooked ribs in their juices to keep them moist (don’t skip this part).
Why You’ll Love This Recipe
- One Pan Magic: I just season, pop in the oven, and let the smoked paprika and garlic powder work their magic—no babysitting required.
- Smoky Depth: The venison ribs soak up that garlic and smoked paprika flavor, giving every bite this rich, woodsy taste that’s hard to beat.
- Crowd Pleaser: Between us, even the picky eaters at my last gathering went back for seconds on these ribs.
- Budget Win: Venison ribs are often cheaper than beef, and a little goes a long way—leftovers taste just as good the next day.
Step-by-Step Instructions for Deer Ribs Oven
Here’s the method that turns these ribs into melt-in-your-mouth perfection every time.
Step 1: Create the Flavor-Packed Rub
In a small bowl, combine the 2 tbsp Kosher Salt, 2 tsp Freshly Ground Black Pepper, 1.5 tbsp Garlic Powder, 1 tbsp Smoked Paprika, 1 tbsp Dried Thyme, and 1 tbsp Dried Rosemary. I always rub the thyme and rosemary between my fingers first to release their aromatic oils.
This blend creates a crust that locks in moisture while adding layers of savory depth. The smoked paprika gives a subtle hint of campfire that complements the venison beautifully. Don’t be tempted to skip this step—it’s the foundation of all that flavor.
Step 2: Season and Sear the Venison Ribs
Pat the 4 lb Venison Ribs completely dry with paper towels. This ensures the rub adheres properly and helps create a beautiful crust. Coat the ribs generously with the spice blend, pressing it into the meat so it forms a thick, even layer on all sides.
Heat the 0.25 cup Olive Oil in a large Dutch oven over medium-high heat. Sear the ribs on all sides for 2-3 minutes per side until deeply browned. You’re looking for a rich, dark crust that signals the Maillard reaction is working its magic. This step builds the base flavor that will develop during the slow roast.
Step 3: Build the Braising Liquid
Remove the ribs to a plate and reduce the heat to medium. Add the 1 whole Yellow Onion (thinly sliced), 2 whole Carrots (peeled and cut into chunks), and 2 whole Celery Stalks (cut into large pieces) to the pot. Cook for 3-4 minutes until the vegetables begin to soften and develop some color.
Pour in the 2 tbsp Apple Cider Vinegar and 2 tbsp Brown Sugar, stirring to deglaze the pan and scrape up all those flavorful browned bits. The vinegar adds a bright tang that cuts through the richness, while the brown sugar brings a touch of caramelized sweetness. Add the 1 cup Beef Broth and stir to combine all these elements into a fragrant braising liquid.
Step 4: Slow-Roast to Fall-Off-the-Bone Tenderness
Return the ribs to the Dutch oven, nestling them into the vegetables and liquid. Cover tightly with the lid and transfer to a preheated 325°F oven. Let them braise undisturbed for 2.5 to 3 hours—this low-and-slow approach is non-negotiable for achieving that promised tenderness.
You’ll know they’re done when the meat pulls away from the bone with just a gentle tug. The ribs should be so tender that they nearly collapse under their own weight. If you check at the 2.5-hour mark and they’re not quite there, give them more time—venison can be stubborn and needs that full cooking window to become truly succulent.
Step 5: Rest and Serve
Carefully remove the ribs from the oven and let them rest in the braising liquid for 10-15 minutes. This allows the juices to redistribute throughout the meat, ensuring every bite is as moist and flavorful as possible.
Serve the ribs with plenty of the braising liquid spooned over the top. The vegetables will have broken down into a rich, flavorful sauce that’s perfect for mopping up with crusty bread. The meat should be so tender it falls off the bone at the slightest touch, delivering on that promise of perfect tenderness in every bite.
Pro Tips For Making Deer Ribs Recipe Oven
- Low and Slow Wins: Set your oven to 275°F and let those venison ribs cook for 3-4 hours—any hotter and they’ll toughen up before they get tender. I learned this the hard way after pulling out chewy ribs that looked done but fought back with every bite.
- Dry the Ribs First: Pat the venison ribs bone-dry with paper towels before seasoning; excess moisture steams instead of sears, and you’ll lose that deep, spiced crust from the smoked paprika and garlic powder.
- Skip the Over-Salting: Venison is leaner than pork, so start with 1 teaspoon of kosher salt per pound—you can always add more, but you can’t take it out once it’s in there.
- Rest Before Serving: Pull the ribs out and tent them with foil for 10 minutes; it lets the juices redistribute, so your first bite isn’t a dry disappointment. Sounds weird, but it works.
Health Benefits of These Flavors
Lean Protein Power
Venison ribs pack about 22 grams of protein per 3-ounce serving with only 2-3 grams of fat. This lean profile makes them ideal for muscle maintenance and weight management. I appreciate that I can enjoy rich flavor without the heaviness of pork ribs. 💪
Rich in Iron
A 3-ounce serving provides about 20% of your daily iron needs, which is particularly valuable for energy levels and oxygen transport in the body. Venison is one of the best natural sources of this essential mineral.
B Vitamin Boost
You’ll get excellent amounts of vitamin B12 and niacin from venison, supporting metabolism and nervous system health. A single serving covers about 30% of your daily B12 requirements, which is crucial for red blood cell formation.
Low Calorie Option
At roughly 140 calories per 3-ounce serving, these ribs let you indulge without overdoing it. The slow-roasting process preserves nutrients while breaking down connective tissue for maximum absorption. 🥗
Zinc for Immunity
Venison provides about 5mg of zinc per serving, supporting your immune system and wound healing. This is particularly beneficial during colder months when immune support is most needed.
Omega-3 Benefits
Wild game like venison contains more omega-3 fatty acids than grain-fed alternatives. These healthy fats support heart health and reduce inflammation, making this a heart-smart choice.
Nutrition Facts
Frequently Asked Questions
What temperature should I use for oven cooking?
Preheat your oven to 325°F for slow-roasting. This gentle heat breaks down the connective tissue without drying out the meat. Patience is key—this isn’t a high-heat recipe.
How do I know when the ribs are done?
The meat should pull away from the bone with minimal effort. If they resist at 2.5 hours, give them up to 3 hours. The ribs are ready when they nearly collapse under their own weight.
Can I substitute beef ribs if I can’t find venison?
Yes, but reduce cooking time by about one-third. Beef ribs cook faster and can become mushy if overdone. Keep the same seasoning and braising liquid for best results.
What’s the best way to store leftovers?
Store cooked ribs in their juices in an airtight container for up to 5 days. They reheat beautifully and can be frozen for up to 3 months. The braising liquid keeps them moist.

- 6 Egg Cake Recipe with Oil: Light as Air With Buttery Moisture - October 4, 2026
- 4 Bean Casserole Recipe: One-Pan Heartiness With Smoky Paprika Depth - October 4, 2026
- 3-Ingredient Keto Mug Cake Recipe: Microwave Magic in 2 Minutes - October 4, 2026