
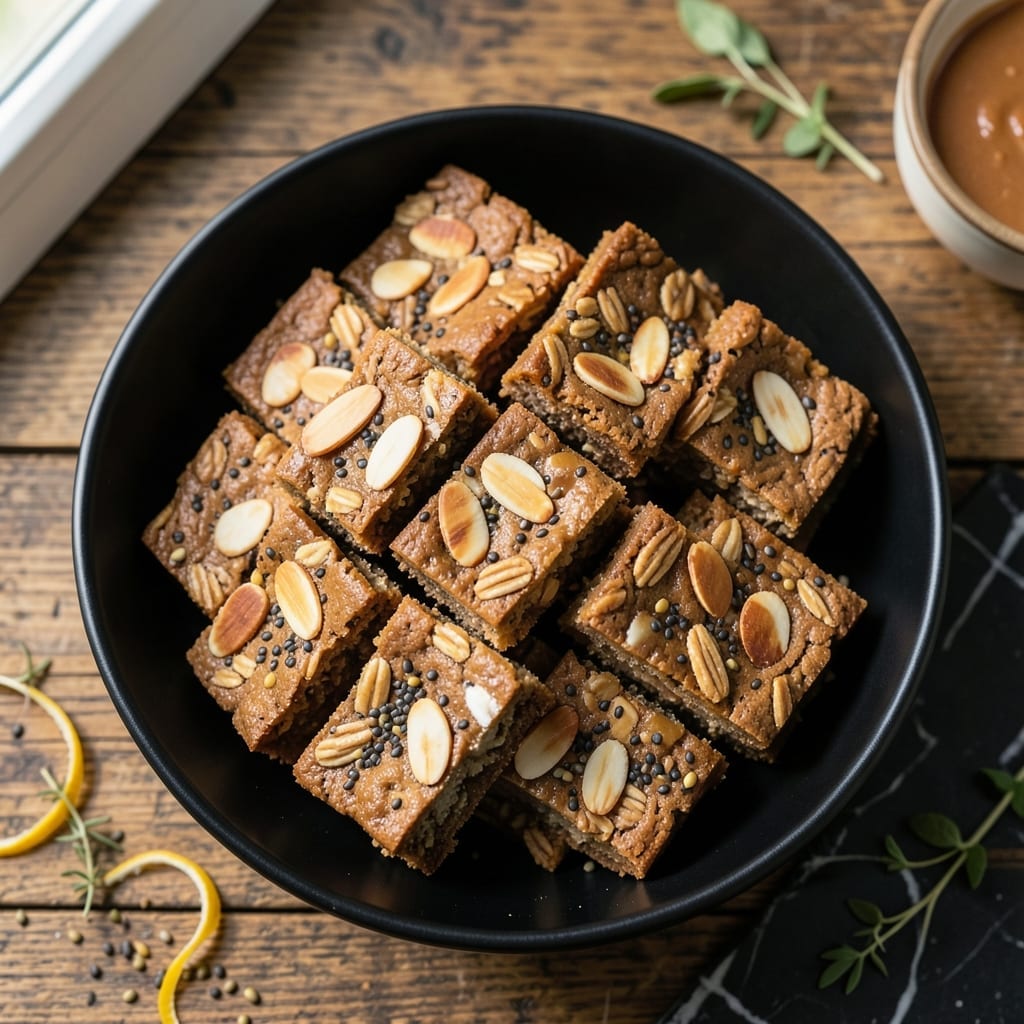
I developed this no-bake solution for a protein-packed snack that fits diabetic dietary needs without sacrificing flavor or texture. These bars deliver sustained energy through carefully selected ingredients.
The base combines nuts, seeds, and protein powder with a sugar-free binder that holds everything together. A touch of vanilla and cinnamon adds warmth without spiking blood sugar levels.
Each bar offers a satisfying chew with a slightly crisp exterior, packed with protein to keep you full. The recipe avoids artificial sweeteners while maintaining great taste.
Perfect for meal prep or on-the-go energy when you need a nutritious option. Here’s how to make them.
Ingredients for Diabetic Protein Bars
No oven, no problem. These bars pack protein and flavor without the sugar spike.
| Ingredient | Amount | Notes |
|---|---|---|
| Old-Fashioned Rolled Oats 🌾 | 2 cups | Gluten-free if needed |
| Almond Butter 🥜 | ¾ cup | Unsweetened, creamy |
| Vanilla Protein Powder 💪 | ½ cup | Whey or plant-based |
| Chia Seeds 🌱 | 2 tbsp | For fiber and omega-3s |
| Flaxseeds 🌰 | 2 tbsp | Ground or whole |
| Sliced Almonds 🌰 | ½ cup | Lightly toasted optional |
| Pumpkin Seeds 🎃 | ¼ cup | Raw or roasted |
| Sugar-Free Maple Syrup 🍁 | ⅓ cup | Or monk fruit syrup |
| Vanilla Extract 🌿 | 1 tsp | Pure for best flavor |
| Ground Cinnamon 🌿 | 1 tsp | Freshly ground preferred |
| Pinch of Salt 🧂 | 1 pinch | Enhances all flavors |
| Unsweetened Coconut Flakes 🥥 | ¼ cup | For texture and crunch |
The protein powder is doing the heavy lifting here. Whey isolate gives the cleanest flavor, but plant-based works fine if you’re dairy-free. NOW or Orgain are solid brands. The oats should be old-fashioned rolled—not quick or steel-cut. I grab mine in bulk at Whole Foods to save a few bucks. Almond butter can be subbed with cashew or peanut, but check for no added sugar (the good stuff, not the sweetened kind).
No protein powder? Ground sunflower seeds or hemp seeds add protein and binding, but you’ll need to adjust the liquid. Swap maple syrup for sugar-free honey substitute or a splash of almond milk if you’re out. The chia and flax are flexible—use one or the other if that’s what you’ve got. Cinnamon is non-negotiable though (worth the extra minute to measure right).
These keep 1 week at room temp in an airtight container, or 1 month in the fridge. Freeze for 3 months if you’re batching. Let them come to room temp before cutting—clean slices, no crumbles (don’t skip this part).
Why You’ll Love This Recipe
- No-Bake Magic: I just mix, press, and chill—no oven, no fuss, and they’re ready in an hour.
- Rich Nutty Crunch: The almond butter and chia seeds give this satisfying depth that beats store-bought bars.
- Grab-and-Go Fuel: I pack these for hikes, workouts, or that 3 PM energy slump.
- Pantry Stretchers: Honestly, oats, flax, and protein powder are kitchen staples I always have on hand.
Step-by-Step Instructions for Diabetic Protein Bars
These no-bake bars come together fast with just a bowl and some elbow grease.
Step 1: Mix Dry Ingredients for the Base
In a large mixing bowl, combine the 2 cups Old-Fashioned Rolled Oats, 0.5 cup Vanilla Protein Powder, 2 tbsp Chia Seeds, and 2 tbsp Flaxseeds. I like to use a wooden spoon to break up any clumps in the protein powder so everything blends evenly.
Add the 1 tsp Ground Cinnamon and 1 pinch Pinch of Salt, stirring until the spices are fully distributed. This dry mix forms the structural foundation for your bars, so make sure it’s uniform before adding the wet ingredients. The cinnamon adds warmth, while the salt enhances all the other flavors.
Step 2: Incorporate Wet Ingredients and Nuts
Add the 0.75 cup Almond Butter, 0.33 cup Sugar-Free Maple Syrup, and 1 tsp Vanilla Extract to the dry mixture. The almond butter should be creamy and easy to stir—if it’s too thick, microwave it for 10-15 seconds to loosen it up.
Mix thoroughly until the dry ingredients are completely moistened and the mixture starts to clump together. Fold in the 0.5 cup Sliced Almonds, 0.25 cup Pumpkin Seeds, and 0.25 cup Unsweetened Coconut Flakes. These add texture and crunch, so distribute them evenly throughout the mixture.
Step 3: Press into Pan and Chill
Line an 8×8-inch baking dish with parchment paper, leaving some overhang on the sides for easy removal. Transfer the mixture to the prepared pan and press it down firmly and evenly with the back of a spoon or your hands. I use a measuring cup to press and level the top for a smooth finish.
The mixture should be compact and hold together when pressed—if it feels too dry, add a touch more sugar-free maple syrup. Place the pan in the refrigerator and chill for at least 1 hour, or until the bars are set and firm to the touch. This chilling step is crucial for the bars to hold their shape when sliced.
Step 4: Slice and Store
Once fully chilled, lift the bars out of the pan using the parchment paper overhang. Place them on a cutting board and slice into 4 equal portions (or smaller bars if you prefer). Use a sharp knife for clean cuts, and you can briefly warm the knife under hot water if the mixture sticks.
Store the bars in an airtight container in the refrigerator for up to 1 week, or freeze for longer storage. These bars soften slightly at room temperature, so keep them chilled until ready to eat. The texture should be firm yet chewy, with a satisfying crunch from the nuts and seeds.
Pro Tips For Making Diabetic Protein Bars
- Chill the Mixture: After mixing all ingredients, refrigerate for at least 30 minutes—this keeps the almond butter from making the bars too soft when cut. I learned this the hard way after my first batch turned into a gooey mess.
- Toast the Oats: Spread the rolled oats on a baking sheet and toast at 350°F for 8-10 minutes until golden. Sounds weird, but it works: it deepens the flavor and removes excess moisture that can make bars crumbly.
- Measure Protein Powder: Scoop your vanilla protein powder lightly, not packed—using too much can make the bars dry and chalky. After burning three batches, I finally figured out that precision here matters more than you’d think.
- Use Warm Almond Butter: Microwave the almond butter for 20-30 seconds to soften before mixing. This makes a real difference in blending everything smoothly without overworking the dough.
Common Mistakes When Making This Recipe
Skipping the Chill
Cutting the bars too soon is the most common mistake. They need at least 1 hour in the fridge to firm up properly. I once tried slicing after 30 minutes—disaster. The mixture crumbled apart, wasting all that effort. 💡
Dry Mixture Problems
If your mix feels crumbly, don’t panic. Add 1-2 tbsp more of sugar-free maple syrup and mix thoroughly. The almond butter should coat all dry ingredients completely before pressing. A well-combined mix holds together better.
Using Wrong Oats
Quick oats or steel-cut won’t work here. Stick to old-fashioned rolled oats for the right texture. The larger flakes provide structure and chew. I learned this the hard way when my first batch turned to mush.
Overpacking the Pan
Press firmly but don’t compact like concrete. Over-pressing makes the bars too dense and hard. Use the back of a spoon or measuring cup for even pressure. The mixture should hold together but still have some give.
Storage Temperature
These bars soften at room temperature. Always store them chilled in an airtight container. For longer storage, freeze for up to 3 months. Let them warm slightly before eating for the best texture.
Ignoring Ingredient Temp
Cold almond butter straight from the fridge can be difficult to mix. If yours is thick, microwave it for 10-15 seconds to soften. This makes incorporation much easier and prevents dry pockets in your bars.
Nutrition Facts
Frequently Asked Questions
Can I use a different nut butter?
Cashew or peanut butter work well as substitutes. Just ensure they’re unsweetened to keep the sugar content low.
How do I make these vegan?
Use a plant-based protein powder and swap almond butter for sunflower seed butter. All other ingredients are already vegan-friendly.
Why did my bars fall apart?
They likely needed more binding time. Chill for at least 1 hour and ensure your almond butter is fresh and creamy.
Can I add chocolate chips?
Yes, but use sugar-free chocolate chips to maintain the diabetic-friendly profile. Add 1/4 cup to the mixture.

- 6 Egg Cake Recipe with Oil: Light as Air With Buttery Moisture - October 4, 2026
- 4 Bean Casserole Recipe: One-Pan Heartiness With Smoky Paprika Depth - October 4, 2026
- 3-Ingredient Keto Mug Cake Recipe: Microwave Magic in 2 Minutes - October 4, 2026