
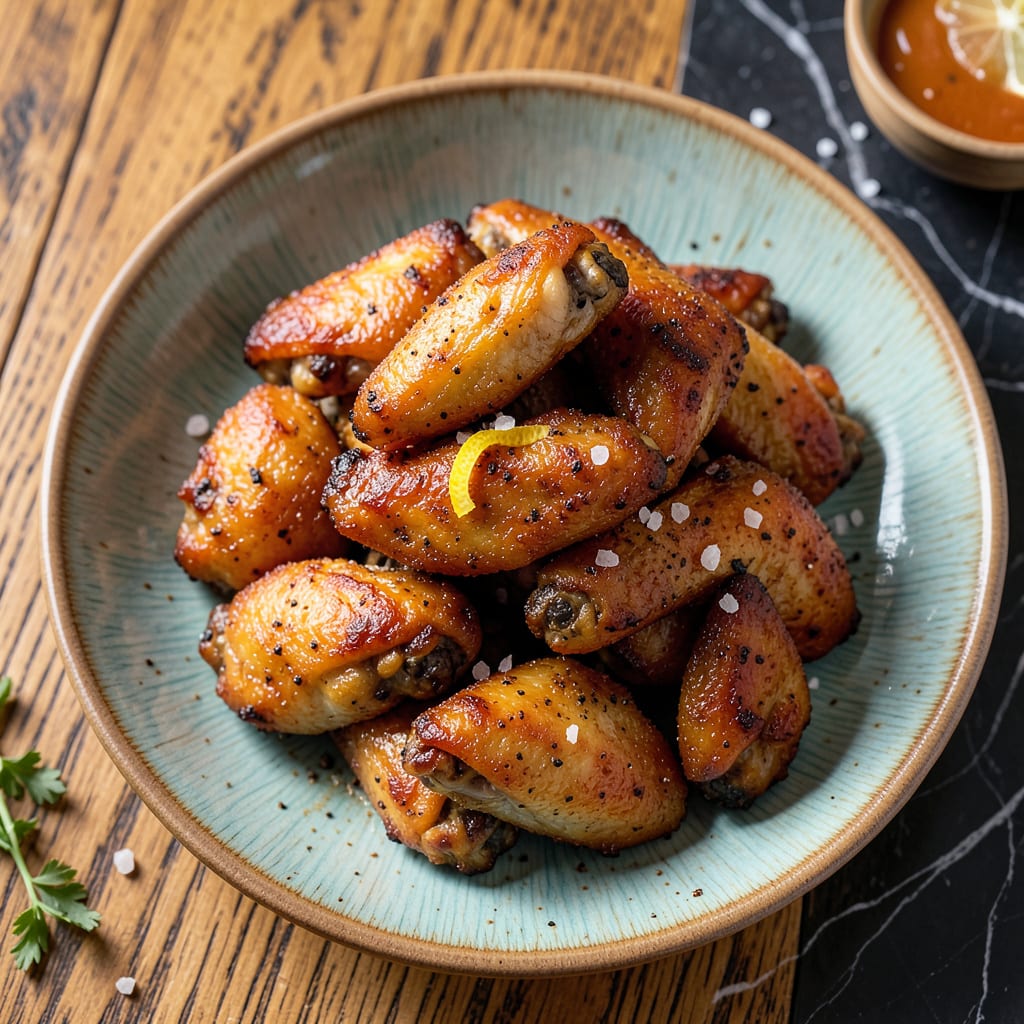
Achieving perfect chicken wings at home comes down to one game-changing technique: dry brining. This method transforms ordinary wings into restaurant-quality results with minimal effort. By salting the wings in advance, you create juicy meat and crispy skin that stays shatteringly crisp even after saucing.
The process is simple but precise. A 12-hour rest in the refrigerator allows the salt to penetrate deeply while drying the skin surface—critical for that coveted crunch. Whether you bake, air-fry, or grill, this preparation ensures wings that impress every time. No soggy skin, no bland bites—just consistently delicious results.
Ingredients for Dry Brine Chicken Wings
These carefully selected ingredients transform ordinary wings into restaurant-quality results through precise dry brining technique.
| Ingredient | Amount | Notes |
|---|---|---|
| Chicken Wings 🍗 | 3 lb | Split into drumettes and flats |
| Diamond Crystal Kosher Salt 🧂 | 1 tbsp | Critical for dry brining ratio |
| Baking Powder 🧂 | 2 tsp | Aluminum-free for crispiness |
| Black Pepper 🌶️ | 1 tsp | Freshly ground preferred |
| Garlic Powder 🧄 | 1 tsp | Granulated for even distribution |
| Onion Powder 🧅 | 1 tsp | Fine grind recommended |
| Smoked Paprika 🌶️ | ½ tsp | For depth of flavor |
| Cayenne Pepper 🔥 | ¼ tsp | Adjust for heat preference |
| Neutral Oil 🫒 | 1 tbsp | Avocado or grapeseed preferred |
| Buffalo Sauce 🍗 | ½ cup | Quality brand recommended |
| Unsalted Butter 🧈 | 4 tbsp | For sauce emulsification |
| Fresh Parsley 🌿 | ¼ cup | Finely chopped for garnish |
| Ranch Dressing 🥣 | ½ cup | Store-bought or homemade |
| Carrot Sticks 🥕 | 2 cups | Cut into 3-inch pieces |
| Celery Sticks 🌿 | 2 cups | Cut into 3-inch pieces |
The chicken wings and kosher salt are non-negotiable for optimal results. Diamond Crystal kosher salt is preferred for its clean flavor and precise measurement properties—table salt will over-season. Baking powder (aluminum-free) creates the signature crispiness by raising skin pH. For the wings, air-chilled varieties yield superior texture compared to water-chilled. Most quality butchers or Whole Foods carry them, though standard supermarket wings work adequately. The 12-hour dry brine timing is critical; plan accordingly for this essential step.
For the buffalo sauce, Frank’s RedHot remains the gold standard, but any vinegar-based hot sauce works. The unsalted butter must be properly emulsified—melt it slowly to prevent separation. If avoiding dairy, vegan butter substitutes effectively. The smoked paprika can be replaced with regular paprika (reduce quantity by half), though flavor complexity will diminish. Cayenne adjustments should be made cautiously—start with half the recommended amount for sensitive palates. The vegetable accompaniments (carrots/celery) are traditional but optional; cucumber sticks offer a refreshing alternative.
Dry-brined wings should be refrigerated uncovered on a wire rack for optimal airflow during the 12-hour period. Post-cooking, wings maintain crispness for 2 hours at room temperature or 3 days refrigerated in a single layer. Reheat in a 400°F oven for 8-10 minutes to restore texture. Buffalo sauce can be prepared 3 days ahead and stored separately. Always bring refrigerated wings to room temperature before reheating to prevent sogginess.
Why You’ll Love This Recipe
- No Fuss Prep: I just pat the wings dry, toss them with salt and baking powder, and let the fridge do the work. No marinade mess, no last-minute scrambling—just 10 minutes of hands-on time before they bake to golden perfection.
- That Crispy Magic: Here’s what sold me—the baking powder reacts like a secret weapon, giving wings that crackly, pub-style crust without frying. The garlic powder clings to every nook, so each bite’s packed with savory punch.
- Game Day to Tuesday: Honestly, I’ve served these at Super Bowl parties and slapped them on meal-prep containers for lunches. They’re equally at home with blue cheese dip or stuffed into a pita with ranch and shredded lettuce.
- Budget-Friendly Crowd Pleaser: A 3-pound bag of wings costs less than takeout, and the pantry staples (salt, baking powder, garlic) stretch forever. Leftovers? Toss ’em in the air fryer for 3 minutes—they’re better than fresh.
Step-by-Step Instructions for Dry Brine Chicken Wings
This method ensures perfectly crispy, juicy wings with minimal effort and maximum flavor.
Step 1: Prepare and Dry Brine the Wings
Pat the 3 lb Chicken Wings completely dry with paper towels, ensuring no moisture remains on the skin. This step is crucial for achieving maximum crispiness. Place the wings in a large bowl and sprinkle evenly with the 1 tbsp Diamond Crystal Kosher Salt, 2 tsp Baking Powder, 1 tsp Black Pepper, 1 tsp Garlic Powder, 1 tsp Onion Powder, 0.5 tsp Smoked Paprika, and 0.25 tsp Cayenne Pepper.
The baking powder creates micro-bubbles on the skin during cooking, which leads to exceptional crispiness. Toss the wings thoroughly until every piece is evenly coated with the seasoning mixture. Arrange the wings on a wire rack set over a baking sheet, leaving space between each piece for air circulation. Refrigerate uncovered for at least 12 hours or up to 24 hours to allow the dry brine to penetrate and the skin to dry completely.
Step 2: Roast the Wings to Crispy Perfection
Preheat your oven to 425°F and position a rack in the upper-middle position. Remove the wings from the refrigerator and let them sit at room temperature for 15 minutes. Drizzle the wings with the 1 tbsp Neutral Oil and toss gently to coat. This thin layer of oil enhances browning without making the wings greasy.
Roast the wings for 45-50 minutes, flipping halfway through the cooking time. You’re looking for deep golden-brown color and crispy skin that sounds hollow when tapped. The baking powder in the dry brine will create visible bubbles on the surface – this is exactly what you want for that perfect crunch. The internal temperature should reach 195°F when measured at the thickest part of the wing.
Step 3: Prepare the Buffalo Sauce
While the wings roast, make the buffalo sauce. In a small saucepan over medium heat, melt the 4 tbsp Unsalted Butter. Once melted, whisk in the 0.5 cup Buffalo Sauce and simmer for 2-3 minutes, stirring constantly. The sauce should come together into a smooth, glossy emulsion.
Remove the sauce from heat and let it cool slightly. The butter helps mellow the heat of the buffalo sauce while adding richness. If you prefer a smoother sauce, you can strain it through a fine-mesh sieve to remove any solids, though I prefer the texture with all ingredients incorporated.
Step 4: Toss and Serve the Wings
Transfer the crispy wings to a large bowl. Pour the warm buffalo sauce over the wings and toss gently but thoroughly until every piece is evenly coated. The sauce should cling to the crispy skin without making the wings soggy. If the sauce seems too thick, you can thin it with 1-2 teaspoons of water before tossing.
Arrange the wings on a serving platter and sprinkle with the 0.25 cup Fresh Parsley, finely chopped. The fresh parsley adds a bright, herbal contrast to the rich, spicy wings. Serve immediately with the 0.5 cup Ranch Dressing, 2 cups Carrot Sticks, and 2 cups Celery Sticks on the side for the complete wing experience.
Best Sauces and Condiments for These Flavors
Classic Buffalo Sauce
The perfect balance of heat and tang comes from Frank’s RedHot combined with 4 tbsp unsalted butter. The butter mellows the vinegar’s sharpness while creating a velvety texture that clings beautifully to your crispy wings. I always whisk continuously while heating to prevent separation. 🔥
For extra depth, try adding 1 tsp Worcestershire sauce or ½ tsp garlic powder to the mixture. The sauce should coat the back of a spoon but still be pourable. If it thickens too much, a splash of water brings it back to the ideal consistency.
Honey Garlic Glaze
This sweet-savory alternative uses ¼ cup honey, 3 tbsp soy sauce, and 2 minced garlic cloves simmered until slightly reduced. The honey caramelizes beautifully on the crispy wings, creating an irresistible sticky coating. I recommend using local honey for superior flavor complexity.
Finish with 1 tsp sesame seeds and sliced green onions for visual appeal. The contrast between the sweet glaze and spicy wings creates a flavor explosion. This pairs exceptionally well with the ranch dressing you already have prepared.
Lemon Pepper Dry Rub
For non-sauced wings, mix 1 tbsp lemon zest, 1 tbsp coarse black pepper, and ½ tsp salt. Toss the hot wings in this mixture immediately after cooking while the oil is still glistening. The citrus brightens the rich, meaty flavor of the wings.
I love adding ½ tsp dried thyme for an herbal note. This version stays crispy longer than sauced wings, making it ideal for parties. Serve with extra lemon wedges for guests to squeeze fresh juice over their wings.
Spicy Mango Habanero
Blend 1 ripe mango, 1 habanero pepper (seeds removed), 2 tbsp lime juice, and 1 tbsp honey until smooth. The tropical sweetness balances the habanero’s intense heat. Strain through a fine-mesh sieve for a silky texture.
Toss the wings gently to avoid breaking the crispy skin. The vibrant orange color makes these wings visually stunning. I recommend making this sauce 24 hours ahead to allow flavors to meld completely. ✨
Blue Cheese Dressing
For a sophisticated alternative to ranch, whisk together ½ cup mayonnaise, ¼ cup sour cream, ¼ cup crumbled blue cheese, and 1 tbsp lemon juice. The tangy blue cheese cuts through the richness of the wings perfectly.
Let the dressing sit for 30 minutes before serving to allow flavors to develop. I prefer Maytag Blue Cheese for its bold, creamy texture. Thin with milk if needed, but the dressing should remain thick enough to cling to your celery sticks.
Dry Ranch Seasoning
Combine 1 tbsp dried dill, 1 tsp onion powder, 1 tsp garlic powder, and ½ tsp dried parsley. Sprinkle this over wings right after cooking for a mess-free alternative to liquid ranch. The flavors penetrate the crispy skin beautifully.
This works particularly well with the buffalo sauce version, giving you all the ranch flavor without the dipping. Store extra seasoning in an airtight container for up to 3 months. Perfect for when you want finger-licking flavor without sticky hands!
Nutrition Facts

- 6 Egg Cake Recipe with Oil: Light as Air With Buttery Moisture - October 4, 2026
- 4 Bean Casserole Recipe: One-Pan Heartiness With Smoky Paprika Depth - October 4, 2026
- 3-Ingredient Keto Mug Cake Recipe: Microwave Magic in 2 Minutes - October 4, 2026