
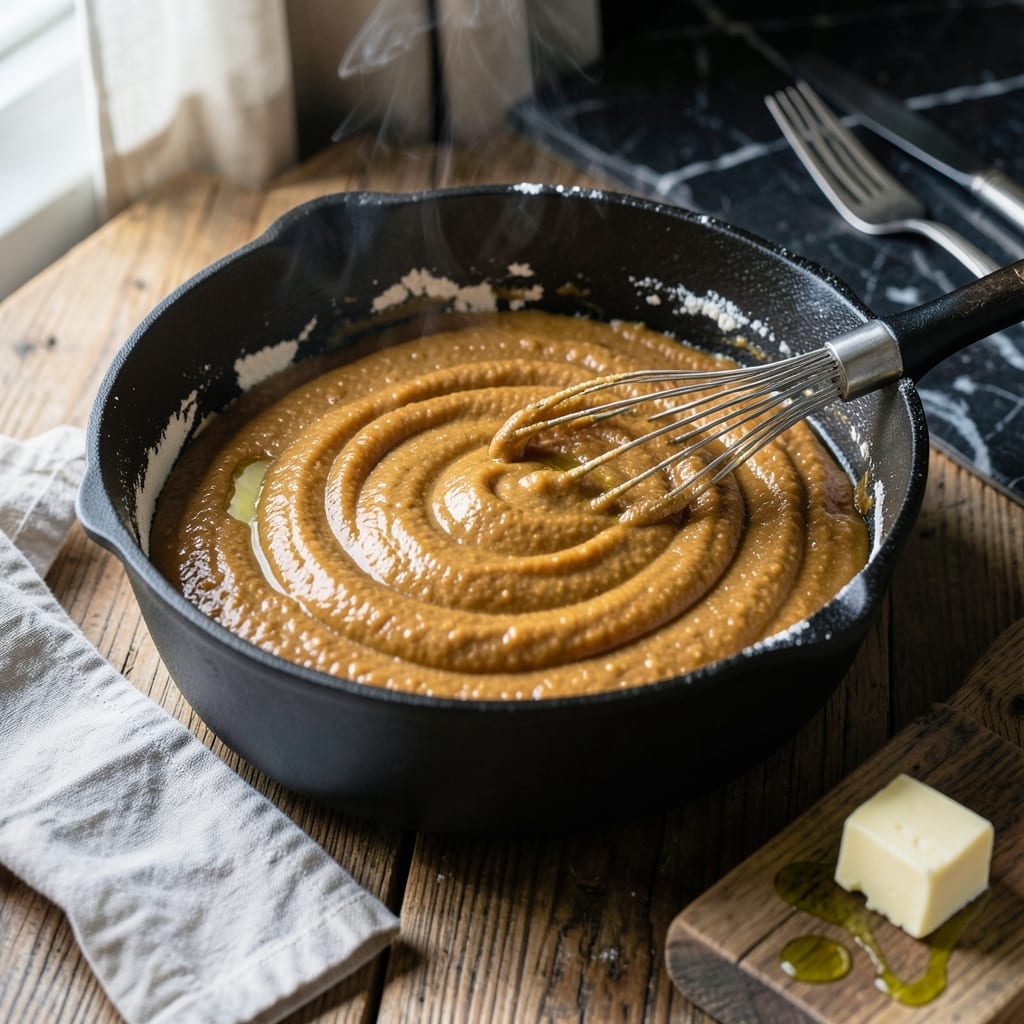
A proper dry roux is the backbone of countless rich sauces and stews, transforming simple flour and fat into a deeply flavorful base. This technique builds layers of nutty, toasty complexity that store-bought thickeners simply can’t match.
The process requires patience and attention as you cook equal parts fat and flour over medium heat, stirring constantly until it reaches your desired color. Each shade—from pale blonde to deep chocolate brown—brings different flavor profiles to your finished dish.
What you’ll achieve is a versatile thickening agent that adds body and depth to everything from gumbo to béchamel. The key is controlling the heat to prevent burning while developing maximum flavor through careful browning.
Master this fundamental technique and you’ll elevate your sauce-making to professional levels with every batch you create.
Ingredients for Dry Roux
Four ingredients transform into the nutty, toasty foundation for countless rich sauces and stews.
| Ingredient | Amount | Notes |
|---|---|---|
| All-Purpose Flour 🌾 | 1 cup | Sifted for smooth consistency |
| Unsalted Butter 🧈 | 1 cup | Melted, for neutral flavor base |
| Vegetable Oil 🫒 | ½ cup | Neutral-flavored like canola or grapeseed |
| Kosher Salt 🧂 | ½ tsp | Diamond Crystal preferred for even seasoning |
The fat choice matters most here. Unsalted butter gives classic flavor, but vegetable oil works for higher-heat roux (and keeps it vegetarian). I always use Diamond Crystal kosher salt—it dissolves evenly and won’t over-season. For best results, use a heavy-bottomed pan (enamel cast iron is ideal) to prevent hot spots and burning.
Need a dairy-free version? All vegetable oil at a 1:1 ratio replaces butter perfectly. No all-purpose flour? Bread flour works in a pinch but may brown faster. The key is equal parts fat and flour by weight, not volume (1 cup flour = ~4.5 oz, 1 cup butter = 8 oz). For gluten-free, rice flour or sweet rice flour creates a smooth roux.
Roux keeps for 1 week refrigerated in an airtight container. For longer storage, freeze in ice cube trays (up to 3 months). Reheat gently in a saucepan before adding liquids—it’ll re-melt beautifully and incorporate smoothly into your dish.
Why You’ll Love This Recipe
- One Bowl Wonder: I just stir flour and oil, then bake—no standing over a hot stove whisking for ages.
- Rich, Toasty Depth: The butter and flour brown to a nutty, caramelized flavor that gumbo dreams are made of.
- Endless Gumbo Base: I double the batch and freeze half for next month’s seafood stew or chicken étouffée.
- Pantry Staples Only: Flour, butter, oil, salt—things I always have, so I can start a roux anytime the craving hits.
Step-by-Step Instructions for a Dry Roux
This method delivers a deeply nutty, toasted base that transforms your sauces and stews.
Step 1: Combine Flour and Fat for Even Cooking
In a heavy-bottomed pot or Dutch oven, whisk together the 1 cup All-Purpose Flour and 1 cup Unsalted Butter. The melted butter should be warm but not hot—this prevents the flour from clumping and ensures even distribution. I prefer using a flat whisk for this step to break up any lumps.
If the mixture looks too thick, add the 0.5 cup Vegetable Oil gradually while whisking. The oil helps thin the mixture slightly and raises the smoke point, allowing for longer, more controlled browning. You’re aiming for a smooth, paste-like consistency—think thick pancake batter.
Step 2: Cook Over Medium Heat Until Bubbly
Place the pot over medium heat and stir constantly with a wooden spoon. Within 3-5 minutes, the mixture will begin to bubble and foam as the moisture cooks out. This is your first visual cue that the roux is developing.
Keep the heat steady—too high, and the flour will burn; too low, and it’ll take forever to brown. You’ll notice the color starting to shift from pale yellow to a light tan. This stage is all about patience and vigilance. Don’t walk away, even for a second.
Step 3: Monitor Closely as the Color Deepens
After 10-12 minutes, the roux will take on a peanuty aroma, and the color will deepen to a rich amber. Stir continuously, scraping the bottom and sides of the pot to prevent hot spots. The roux will thicken slightly as it cooks, but it should still be pourable.
Here’s the thing—this is the most critical phase. The difference between a blond roux and a nutty, dark roux is just a few minutes. If you see black flecks, you’ve gone too far. Lower the heat slightly if it’s browning too quickly, and keep stirring.
Step 4: Achieve the Perfect Nutty Brown Color
Continue cooking for another 5-8 minutes until the roux reaches a deep, milk-chocolate brown. At this point, it will smell intensely nutty and toasty, almost like popcorn. This is the ideal stage for gumbo, stews, or any dish where you want a rich, complex base.
Remove the pot from heat immediately once it hits this color. The roux will continue to cook from the residual heat, so acting fast prevents it from burning. Sprinkle in the 0.5 tsp Kosher Salt and stir to combine—this balances the deep, toasted flavors.
Let it cool slightly before using. If you’re not using it right away, transfer it to a heatproof bowl to stop the cooking process. This roux will keep in the fridge for up to 2 weeks.
Pro Tips For Making Dry Roux
- Stir Constantly: After burning two batches, I finally learned that walking away for even 30 seconds can turn your roux from golden to burnt. Keep a wooden spoon in hand the whole time.
- Use Equal Parts: Sounds obvious, but 1:1 flour to fat by weight (not volume) guarantees consistency. I measure 4 oz flour to 4 oz butter or oil—no guesswork.
- Skip High Heat: Medium-low is your friend here. I used to crank it up, thinking it would go faster, but that just leads to hot spots and uneven browning.
- Add Salt Late: Salt can draw moisture, so I wait until the roux hits a peanut butter color before sprinkling in the kosher salt. It keeps the texture right.
Health Benefits of dry roux
Rich in B Vitamins
This creation provides a surprising boost of B vitamins, particularly thiamine and folate from the enriched all-purpose flour. These nutrients support energy metabolism and nervous system health. A single serving contributes meaningfully to your daily needs. 💪
Healthy Fats Source
The unsalted butter and vegetable oil provide a mix of saturated and unsaturated fats. While moderation is key, these fats help your body absorb fat-soluble vitamins A, D, E, and K from other foods in your meal. I prefer using grapeseed oil for its heart-healthy profile.
Gluten Considerations
Made with all-purpose flour, this contains gluten, which may not suit everyone. For gluten-free versions, rice flour or sweet rice flour work well as substitutes. They create a smooth texture while maintaining the thickening power.
Low in Sugar
With no added sugars and only trace amounts naturally present in the ingredients, this is an excellent option for those monitoring their sugar intake. The kosher salt enhances flavor without adding sweetness.
Energy Boost
The combination of flour and fat provides a concentrated source of calories, making this ideal for adding richness to dishes when you need sustained energy. A 2-tbsp serving packs about 120 calories, mostly from healthy fats. ✨
Versatile Nutrition
While not a significant source of protein or fiber, this serves as a flavorful base that can be paired with nutrient-dense ingredients like vegetables, lean meats, or legumes to create balanced meals. I love how it transforms simple dishes into something extraordinary.
Nutrition Facts
Frequently Asked Questions
What’s the best pan for making it?
Use a heavy-bottomed pot or Dutch oven to prevent hot spots. Enamel cast iron works best for even heat distribution and easy stirring.
How do I fix a burnt one?
Toss it and start over—burnt roux tastes bitter and ruins your dish. Lower heat and stir constantly next time to prevent burning.
Can I make it ahead and store it?
Yes! Store in an airtight container in the fridge for up to 2 weeks or freeze for 3 months. Reheat gently before using.
Why does mine look grainy?
Lumps form if flour isn’t fully whisked into the fat. Use a flat whisk and warm (not hot) butter to create a smooth paste.

- 6 Egg Cake Recipe with Oil: Light as Air With Buttery Moisture - October 4, 2026
- 4 Bean Casserole Recipe: One-Pan Heartiness With Smoky Paprika Depth - October 4, 2026
- 3-Ingredient Keto Mug Cake Recipe: Microwave Magic in 2 Minutes - October 4, 2026