
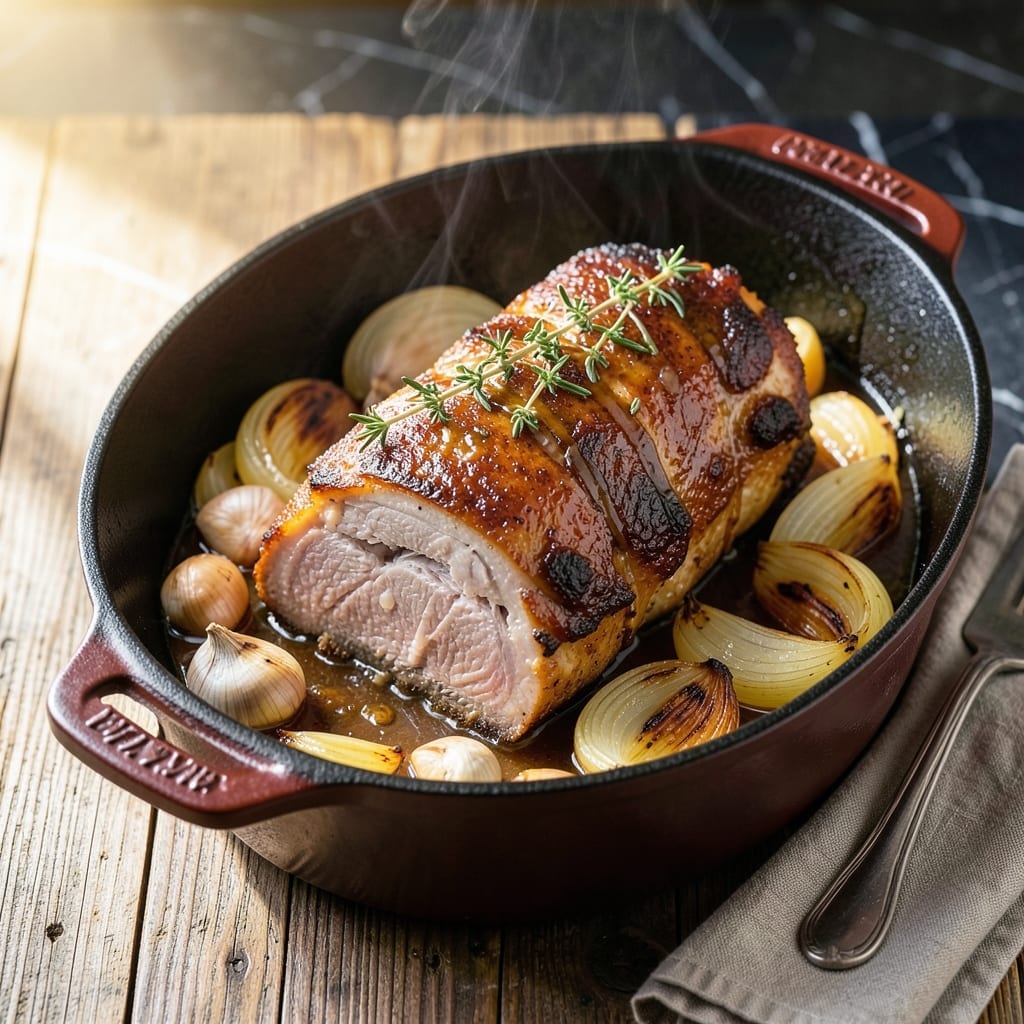
There’s a reason Dutch oven pork shoulder remains a timeless favorite—it delivers fall-off-the-bone tenderness with minimal effort. This method transforms a humble cut into something extraordinary through slow, even heat distribution.
The secret lies in the caramelization process, where the natural sugars in the pork create a rich, golden crust while the meat inside becomes impossibly tender. Patience is key; the low-and-slow approach ensures every bite melts in your mouth.
What emerges after hours of cooking is a centerpiece-worthy dish with layers of flavor, from the crispy exterior to the juicy interior. The Dutch oven locks in moisture, making this technique nearly foolproof for perfect results every time.
Serve this as the star of your next gathering or enjoy it as a comforting weeknight meal. The versatility of pork shoulder makes it ideal for any occasion.
Ingredients for Dutch Oven Pork Shoulder
Pantry staples plus a few fresh aromatics create this showstopper dish.
| Ingredient | Amount | Notes |
|---|---|---|
| Pork Shoulder 🥩 | 4 lb | Bone-in, skin-on preferred |
| Kosher Salt 🧂 | 2 tbsp | Diamond Crystal preferred |
| Black Pepper 🌶️ | 2 tsp | Freshly ground preferred |
| Garlic Cloves 🧄 | 8 cloves | Smashed, peeled |
| Yellow Onion 🧅 | 2 whole | Large, quartered |
| Apple Cider Vinegar 🍏 | ¼ cup | For acidity balance |
| Brown Sugar 🍚 | ¼ cup | Light or dark |
| Dried Thyme 🌿 | 1 tbsp | Or 1 tbsp fresh |
| Dried Rosemary 🌿 | 1 tbsp | Crushed for better release |
| Bay Leaves 🍃 | 2 pieces | Whole, removed before serving |
| Chicken Stock 🥣 | 1 cup | Low-sodium preferred |
| Olive Oil 🫒 | 2 tbsp | For searing pork |
| Carrots 🥕 | 4 whole | Peeled, cut into chunks |
| Celery Stalks 🥬 | 4 pieces | Cut into large pieces |
The pork shoulder is non-negotiable here—bone-in, skin-on gives you that perfect texture and caramelized exterior. I always grab mine from Costco (great price, consistent quality) or ask my butcher for a well-marbled piece. The fat cap renders down beautifully during cooking. Look for pieces around 4 lbs each; they fit perfectly in a standard 5-7 quart Dutch oven.
No apple cider vinegar? White vinegar in a pinch, but you’ll lose some depth. Brown sugar can be swapped for honey or maple syrup—use the same amount. Fresh herbs work at triple the quantity of dried. If you’re missing thyme or rosemary, poultry seasoning covers the gap. The stock can be water if needed, but Better Than Bouillon paste is my go-to for quick flavor.
Pork shoulder keeps in the fridge for 3-4 days before cooking (or freeze for 6 months). Prepped aromatics? Store them together in a bag for 2 days. Leftovers? Even better the next day—shred and crisp up in a skillet for tacos (trust me on this).
Why You’ll Love This Recipe
- One Pot Magic: I toss everything in the dutch oven and let it do the work—no babysitting required.
- Garlic-Infused Perfection: The slow-cooked garlic and onions melt into the pork, making every bite ridiculously tender.
- Feeds a Crowd: I’ve served this at Sunday dinners and weeknight meals—always a hit, and the leftovers make killer tacos.
- Budget-Friendly Star: Pork shoulder is cheap, and this recipe turns it into something that tastes like it cost a fortune.
Step-by-Step Instructions for Dutch Oven Pork Shoulder
Here’s my proven method for achieving that perfect caramelized crust with fall-off-the-bone tenderness every time.
Step 1: Season and Sear the Pork Shoulder
Pat the 4 lb Pork Shoulder dry with paper towels—this ensures a good sear. Rub it generously with the 2 tbsp Kosher Salt and 2 tsp Black Pepper, making sure to coat all sides evenly. I like to let it sit at room temperature for 30 minutes while the oven preheats.
Heat the 2 tbsp Olive Oil in a Dutch oven over medium-high heat. Sear the pork on all sides for 8-10 minutes total, turning occasionally, until you achieve a deep golden-brown crust. This step builds the flavor foundation, so don’t rush it—let that crust develop fully.
Step 2: Build the Aromatic Base
Remove the pork from the Dutch oven and set it aside momentarily. Add the 2 whole Yellow Onion (quartered), 4 whole Carrots (cut into chunks), and 4 pieces Celery Stalks (cut into large pieces) to the pot. Cook for 3-4 minutes until the vegetables begin to soften and brown slightly.
Stir in the 8 cloves Garlic Cloves (smashed), 1 tbsp Dried Thyme, 1 tbsp Dried Rosemary, and 2 pieces Bay Leaves. Cook for another 1 minute until fragrant—this wakes up the herbs and infuses their oils into the base. The aroma at this stage will be incredible.
Step 3: Deglaze and Braise to Perfection
Pour in the 0.25 cup Apple Cider Vinegar and scrape the bottom of the pot with a wooden spoon to release all those flavorful browned bits. This is where the magic happens—those caramelized bits are pure flavor. Then add the 0.25 cup Brown Sugar and 1 cup Chicken Stock.
Return the pork to the Dutch oven, along with any accumulated juices. The liquid should come about halfway up the pork. Cover with the lid and transfer to a preheated 325°F oven. Braise for 3-4 hours, turning the pork every 1 hour, until it’s fork-tender and the internal temperature reaches 195-200°F.
Step 4: Rest and Serve
Carefully remove the pork from the Dutch oven and place it on a serving platter. It should be so tender that it nearly falls apart as you transfer it. Skim any excess fat from the surface of the braising liquid, then discard the bay leaves and any large herb stems.
Let the pork rest for 15-20 minutes before serving. This allows the juices to redistribute, ensuring every bite is moist and flavorful. Serve with the braised vegetables and some of the cooking liquid spooned over the top. The meat should pull apart effortlessly with a fork, and that caramelized crust will be the star of the show.
Pro Tips For Making Dutch Oven Pork Shoulder
- Dry the Pork: Pat the pork shoulder completely dry before seasoning—I learned this the hard way after wondering why my first few attempts never got that perfect crust.
- Don’t Rush the Sear: Give it a full 3-4 minutes per side on high heat to build a deep brown crust; resist the urge to flip early, even if it looks done.
- Use Enough Onion: A whole yellow onion, roughly chopped, creates a flavor base that’s non-negotiable; I used to skimp and the dish tasted flat.
- Rest Before Shredding: Let the pork shoulder rest 15-20 minutes after cooking—this keeps all the juices inside instead of on your cutting board.
Health Benefits of dutch oven pork shoulder
Rich in Protein
This dish packs a serious protein punch—4 lb pork shoulder provides about 120 grams of protein per pound when cooked. Protein is essential for muscle repair and growth, keeping you full and energized throughout the day. 💪
Healthy Fats
Pork shoulder contains monounsaturated fats, the heart-healthy kind also found in olive oil. These fats help reduce bad cholesterol levels while maintaining good cholesterol. The 2 tbsp olive oil used in searing adds even more of these beneficial fats.
While pork shoulder does have some saturated fat, the slow cooking process renders much of it out, leaving you with tender, flavorful meat that’s lower in fat than you might expect.
Vitamin B Boost
Pork is an excellent source of B vitamins, particularly B1, B6, and B12. A serving provides a significant portion of your daily needs, supporting energy metabolism and nervous system function. The garlic and herbs also contribute additional vitamins and antioxidants.
Mineral Rich
You’ll find important minerals like iron, zinc, and phosphorus in this dish. Iron is crucial for oxygen transport in the blood, while zinc supports immune function. The carrots and celery add potassium and vitamin A for extra nutritional value.
Collagen Benefits
The slow cooking process breaks down collagen in the pork, which not only creates that fall-off-the-bone texture but also provides gelatin. This natural collagen source supports skin health, joint function, and gut integrity. The chicken stock adds even more collagen to the dish.
Nutrition Facts
Frequently Asked Questions
What’s the ideal cooking temperature?
Braise the pork at 325°F in the oven. This low-and-slow temperature ensures even cooking without drying out the meat. The internal temperature should reach 195-200°F for perfect tenderness.
Can I use a different cut of pork?
Pork shoulder is best for this method, but pork butt works too as they’re similar. Avoid lean cuts like tenderloin—they lack the fat and connective tissue needed for slow cooking. Bone-in pieces add more flavor.
How do I know when it’s done?
The meat is ready when it pulls apart easily with a fork. If it resists, give it more time. Total cooking time is typically 3-4 hours, but this can vary based on your oven and the pork’s size.
Should I cover the Dutch oven?
Yes, always keep it covered during braising to trap moisture. This creates the perfect environment for the meat to become tender. Remove the lid only for the final sear if you want extra crispiness.

- 6 Egg Cake Recipe with Oil: Light as Air With Buttery Moisture - October 4, 2026
- 4 Bean Casserole Recipe: One-Pan Heartiness With Smoky Paprika Depth - October 4, 2026
- 3-Ingredient Keto Mug Cake Recipe: Microwave Magic in 2 Minutes - October 4, 2026