
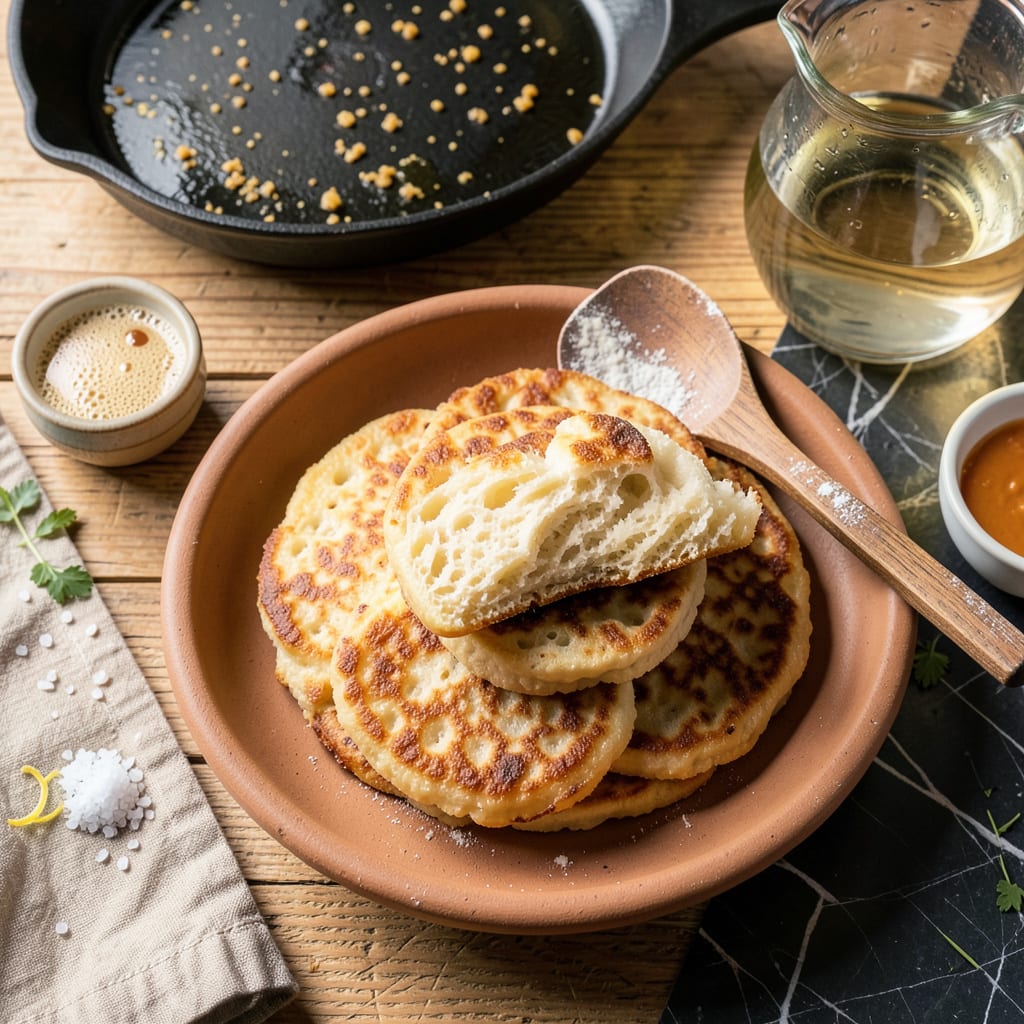
Creating perfect fry bread without baking powder is simpler than you might expect. This recipe relies on a straightforward technique that delivers fluffy, golden rounds with minimal ingredients. The secret lies in proper dough resting and precise frying temperature—no special equipment required.
You’ll achieve restaurant-quality results with just 5 basic ingredients and about 20 minutes of active time. The dough comes together quickly, then transforms in hot oil into puffy, crisp-edged bread that’s versatile enough for sweet or savory toppings. Every batch turns out consistently light and airy when you follow these proven steps.
Ingredients for Easy Fry Bread Recipe Without Baking Powder
Five fundamental ingredients transform into golden, fluffy fry bread with proper technique and minimal effort.
| Ingredient | Amount | Notes |
|---|---|---|
| All-Purpose Flour 🌾 | 2 cups | Unbleached preferred for texture |
| Fine Sea Salt 🧂 | 1 tsp | Adjust to taste preference |
| Warm Water 💧 | ¾ cup | 110°F for optimal activation |
| Vegetable Oil 🫒 | 2 cups | For frying, neutral high-smoke point |
| Active Dry Yeast 🍞 | 1 tsp | Ensure fresh for proper rise |
The flour quality directly impacts texture—King Arthur Unbleached All-Purpose yields optimal results due to its consistent protein content (11.7%). Yeast freshness is non-negotiable; test by proofing in warm water with a pinch of sugar—active yeast should foam within 5 minutes. For the oil, refined peanut oil or sunflower oil provides the necessary high smoke point (450°F+) without imparting flavor. Measure water temperature precisely: 110°F activates yeast without killing it (use an instant-read thermometer for accuracy).
No active dry yeast? Substitute instant yeast at 25% less quantity (0.75 tsp), mixing directly into dry ingredients. For a whole-grain variation, replace up to 25% of all-purpose flour with bread flour for enhanced structure. Salt alternatives include kosher salt at double the volume (2 tsp), though fine sea salt distributes more evenly. Frying oil substitutes: avocado oil (higher cost, similar performance) or shortening (traditional but requires temperature monitoring).
Store dry ingredients (flour, yeast, salt) in airtight containers in a cool, dark pantry for maximum shelf life: flour (6-12 months), yeast (4 months refrigerated), salt (indefinite). Prepared dough rests optimally at room temperature (70-75°F) for 30-45 minutes—avoid refrigeration, which inhibits yeast activity. Fried bread maintains quality for 2 days at room temperature in paper bags (plastic traps moisture); reheat in a 350°F oven for 5 minutes to restore crispness.
Why You’ll Love This Recipe
- No Fuss Dough: I’ve made this with just flour, salt, yeast, and warm water—no last-minute grocery runs for baking powder. The dough comes together faster than my coffee brews, and honestly, the yeast gives it that extra little rise without the extra effort.
- That Golden Crunch: Here’s what sold me—the way the vegetable oil fries it up crispy outside while staying soft and pillowy inside. It’s like the best parts of a donut and fresh bread had a baby, but with zero fancy techniques.
- Blank Canvas Magic: I’ve served this as breakfast with honey, stuffed it with taco fixings for dinner, and even used leftovers for next-day sandwiches. Between us, my picky nephew only eats it with Nutella, but he still asks for it weekly.
- Pennywise Winner: A batch costs me under $2, feeds four, and leftovers reheat beautifully in a dry skillet. I’ll be real: this is my “payday’s next week but we still need to eat well” secret weapon.
Step-by-Step Instructions for Easy Fry Bread
This straightforward method delivers perfectly golden, fluffy fry bread with minimal effort and no special ingredients.
Step 1: Activate the Yeast Mixture
Begin by combining the 1 teaspoon active dry yeast with the 0.75 cup warm water in a small bowl. The water should be precisely 110°F—too hot will kill the yeast, too cool won’t activate it. I recommend using an instant-read thermometer for accuracy.
Let the mixture sit undisturbed for 5-7 minutes until it becomes foamy with small bubbles forming on the surface. This visual confirmation ensures your yeast is active and ready to leaven the dough. If no foam appears, your yeast may be expired or the water temperature was incorrect.
Step 2: Form and Knead the Dough
In a large mixing bowl, whisk together the 2 cups all-purpose flour and 1 teaspoon fine sea salt. Create a well in the center and pour in the activated yeast mixture. Using a wooden spoon, gradually incorporate the flour into the liquid until a shaggy dough forms.
Turn the dough onto a lightly floured surface and knead for 5-7 minutes until smooth and elastic. The dough should be slightly tacky but not sticky—if it adheres to your hands, sprinkle with additional flour 1 teaspoon at a time. Proper kneading develops gluten for structure while maintaining tenderness.
Step 3: Rest and Portion the Dough
Return the kneaded dough to the bowl, cover with a clean kitchen towel, and let rest at room temperature for 30 minutes. This brief fermentation allows the yeast to begin working while relaxing the gluten for easier shaping.
After resting, divide the dough into 8 equal portions (about 2 ounces each). Roll each piece into a smooth ball, then flatten gently with your palm to create ½-inch thick discs. Place them on a parchment-lined tray while you heat the oil.
Step 4: Fry to Golden Perfection
In a deep, heavy-bottomed skillet, heat the 2 cups vegetable oil over medium-high heat to 350°F. Use a deep-fry thermometer for precision—the oil must maintain consistent temperature for even cooking. The oil is ready when a small piece of dough sizzles immediately upon contact.
Carefully slide 2-3 discs into the hot oil, avoiding overcrowding. Fry for 2-3 minutes per side until deep golden brown with puffed centers. Use tongs to flip once—the bread should rise dramatically during cooking. Transfer to a paper towel-lined plate to drain excess oil.
Step 5: Serve Warm with Preferred Toppings
Fry bread is best enjoyed immediately while still warm and crisp. The ideal texture combines a crisp exterior with a soft, airy interior. For traditional presentation, serve with honey butter or savory toppings like taco-style ground beef.
To maintain quality if serving later, keep fried bread in a 200°F oven for up to 30 minutes. Avoid stacking while warm, as this creates steam that softens the crust. Each serving should yield two pieces of fry bread with the given quantities.
Serving Suggestions for Leftovers
Sweet Breakfast Treat
Nothing beats warm fry bread drizzled with honey and sprinkled with powdered sugar. I love adding a pat of salted butter that melts into every nook—it creates that perfect sweet-salty balance. For extra indulgence, top with fresh strawberries or banana slices when in season. 💛
Taco Night Base
Use these golden rounds as a sturdy foundation for Indian tacos or Navajo-style fry bread tacos. Pile on seasoned ground beef, shredded iceberg lettuce, diced tomatoes, and a dollop of sour cream. The contrast of crispy bread with savory toppings is unbeatable. I always make extra for leftovers!
Dessert Nachos
Cut the fried bread into wedges and arrange like nachos on a platter. Drizzle with chocolate sauce and caramel, then add mini marshmallows and crushed pecans. Broil for 1-2 minutes to toast the marshmallows slightly. This creative twist disappears fast at gatherings!
Soup Sidekick
Serve alongside hearty chilis or creamy soups for dipping. The bread’s crisp edges hold up well to soaking, while the soft center provides perfect texture contrast. I particularly love pairing it with white bean chili or tomato bisque during cooler months.
Breakfast Sandwich
Split warm fry bread horizontally to create a breakfast sandwich. Layer with scrambled eggs, crispy bacon, and melted cheddar cheese. The bread’s sturdy structure handles all the fillings without falling apart. Add a drizzle of hot honey for a sweet-spicy kick.
Ice Cream Vessel
Use slightly cooled fry bread as an edible bowl for vanilla ice cream. Top with berries, whipped cream, and a sprinkle of cinnamon. The warm-cold contrast creates an amazing texture experience. This was my kids’ favorite discovery when I first made this recipe! ✨
Nutrition Facts

- 6 Egg Cake Recipe with Oil: Light as Air With Buttery Moisture - October 4, 2026
- 4 Bean Casserole Recipe: One-Pan Heartiness With Smoky Paprika Depth - October 4, 2026
- 3-Ingredient Keto Mug Cake Recipe: Microwave Magic in 2 Minutes - October 4, 2026