
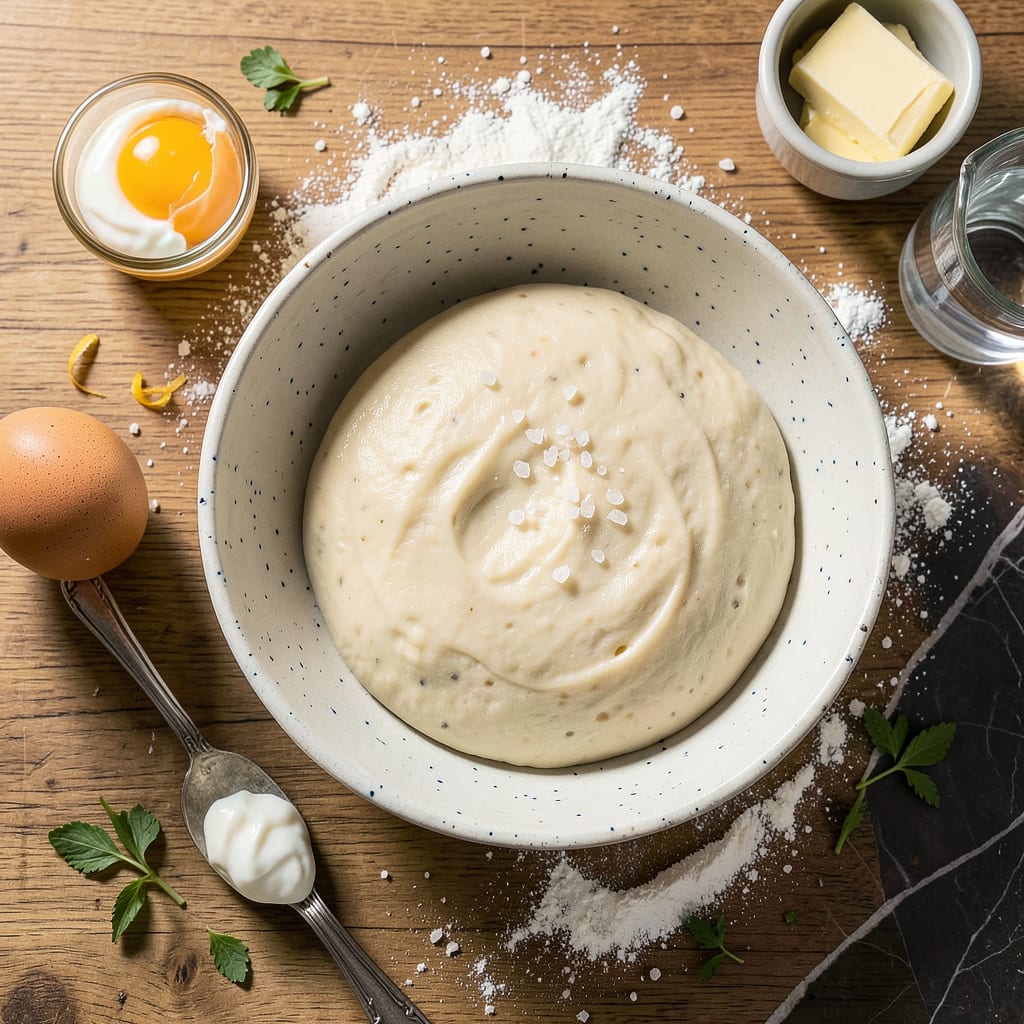
Creating the perfect pierogi starts with mastering the dough—tender yet sturdy enough to hold any filling without tearing. This recipe delivers foolproof results every time, using simple pantry ingredients and a straightforward technique that ensures flaky, elastic wrappers. After years of testing ratios and resting times, I’ve landed on a method that eliminates guesswork.
The secret lies in the balance of flour, eggs, and just enough water to form a smooth, workable dough. A brief resting period relaxes the gluten, making rolling effortless and ensuring the dough stays pliable. Whether you’re filling them with classic potato-cheese or experimenting with sweet fruit versions, this foundation guarantees professional-quality pierogi with minimal effort.
Ingredients for Easy Pierogi Dough
Seven pantry staples form the foundation for this foolproof pierogi dough, delivering flaky yet sturdy wrappers every time.
| Ingredient | Amount | Notes |
|---|---|---|
| All-Purpose Flour 🌾 | 3 cups | Unbleached, spooned and leveled |
| Large Eggs 🥚 | 2 whole | Room temperature for smooth integration |
| Sour Cream 🥛 | ½ cup | Full-fat for optimal tenderness |
| Unsalted Butter 🧈 | 4 tbsp | Melted and cooled slightly |
| Warm Water 💧 | ¼ cup | Approximately 110°F for activation |
| Diamond Crystal Kosher Salt 🧂 | 1 tsp | Precise measurement for balance |
| Neutral-Flavored Oil 🫒 | 1 tsp | For dough handling and rolling |
The flour quality is paramount for this recipe. King Arthur Unbleached All-Purpose provides consistent protein content (11.7%) for optimal elasticity without toughness. Eggs must be at room temperature—cold eggs create uneven dough texture. For the sour cream, full-fat Daisy brand yields superior tenderness compared to reduced-fat alternatives. Butter should be melted just until liquid (160°F max) to prevent protein denaturation. Water temperature is critical: use an instant-read thermometer to verify 110°F—too hot kills yeast activity if adding to leavened versions, too cold inhibits gluten development.
For dietary substitutions, replace eggs with 1/4 cup unsweetened applesauce per egg (vegan option), though texture will be slightly less elastic. Sour cream can be substituted with Greek yogurt at equal volume, or coconut cream for dairy-free needs. Butter alternatives include refined coconut oil (1:1 ratio) or vegan butter sticks (Miyoko’s recommended). In gluten-free adaptations, replace flour with Cup4Cup multipurpose blend—add 1/2 tsp xanthan gum per cup for structure. All substitutions may require slight water adjustments during kneading.
Dough rests best at 70°F ambient temperature for 30 minutes, covered with a damp towel to prevent surface drying. Prepared dough can be refrigerated for 24 hours (wrap tightly in plastic) or frozen for 3 months (divide into portions, vacuum-seal). For make-ahead convenience, roll dough to 1/8-inch thickness between parchment sheets, stack with wax paper separators, and refrigerate for up to 48 hours. Always bring chilled dough to room temperature before filling to prevent cracking during assembly.
Why You’ll Love This Recipe
- No Fuss Mixing: I dump everything—flour, eggs, sour cream, melted butter—into one bowl, stir with a fork, and boom. No stand mixer, no fancy tools, just my hands and five minutes of effort before the dough rests while I prep the filling.
- That Sour Cream Magic: Here’s what sold me—the sour cream makes the dough tender but sturdy enough to hold cheesy potatoes or sauerkraut without tearing. And the butter? It gives just enough richness that even plain dough tastes like something special.
- Freezer Best Friend: Honestly, I double the batch every time because this dough freezes beautifully. Roll it out, cut circles, and stack them with parchment—then I’ve got homemade pierogi ready to boil straight from the freezer on those “I forgot to meal plan” nights.
- Budget Stretch: A pound of flour, a stick of butter, and a tub of sour cream feed my family of four twice (with fillings we already have). No exotic ingredients, no last-minute grocery runs—just pantry staples turning into a meal that feels like a treat.
Step-by-Step Instructions for Pierogi Dough
This straightforward method ensures tender, elastic dough that rolls out beautifully and holds fillings securely.
Step 1: Combine Dry Ingredients and Prepare Wet Mixture
In a large mixing bowl, whisk together the 3 cups All-Purpose Flour and 1 tsp Diamond Crystal Kosher Salt until thoroughly combined. The salt enhances flavor and strengthens the gluten structure slightly for better handling. Create a well in the center of the flour mixture—this will contain your wet ingredients and prevent spillage during mixing.
In a separate bowl, whisk together the 2 whole Large Eggs, 0.5 cup Sour Cream, 4 tbsp Unsalted Butter, and 1 tsp Neutral-Flavored Oil until fully emulsified. The sour cream adds tenderness while the butter contributes richness. Ensure the melted butter has cooled slightly to prevent cooking the eggs when combined.
Step 2: Form the Dough and Establish Proper Texture
Pour the wet mixture into the well of dry ingredients. Using a silicone spatula, gradually incorporate the flour from the edges into the wet center until a shaggy dough begins to form. The mixture will appear rough and uneven at this stage—this is normal and indicates proper hydration levels.
Add the 0.25 cup Warm Water (approximately 110°F) in 1-tablespoon increments, mixing between each addition. The dough should come together into a cohesive mass that pulls away from the bowl sides but remains slightly tacky. Avoid overworking at this stage to prevent developing excess gluten, which would make the dough tough.
Step 3: Knead to Develop Optimal Elasticity
Turn the dough onto a lightly floured surface and knead gently for 3-4 minutes until smooth and elastic. The dough should feel supple but not sticky—if it adheres to your hands, dust with additional flour sparingly. Proper kneading develops just enough gluten to create structure while maintaining tenderness.
To test for readiness, press your finger into the dough—it should spring back slowly, leaving a slight indentation. If it springs back immediately, you’ve over-kneaded; if it doesn’t spring back at all, continue kneading for another 30-60 seconds. The ideal texture resembles a soft earlobe when gently pressed.
Step 4: Rest for Maximum Workability
Shape the dough into a disk and wrap tightly in plastic wrap. Let it rest at room temperature for 30 minutes or refrigerate for up to 24 hours. This resting period allows the gluten to relax, making the dough easier to roll thin without shrinking back.
During resting, the dough will become noticeably more pliable. When ready to use, it should roll out smoothly to ⅛-inch thickness without tearing or resisting. If refrigerated, allow the dough to sit at room temperature for 15 minutes before rolling to prevent cracking during shaping.
Step 5: Roll and Cut for Perfect Wrappers
Divide the rested dough into four equal portions for easier handling. On a lightly floured surface, roll one portion at a time to ⅛-inch thickness, rotating the dough 90 degrees after each roll to maintain an even circle. The edges should remain smooth without cracking.
Use a 3-inch round cutter to stamp out circles, rerolling scraps only once to maintain tenderness. Each wrapper should be uniform in thickness with no thin spots that might tear during filling. Cover unused dough with a damp towel to prevent drying while you work with individual wrappers.
Best Sauces and Condiments for This easy pierogi dough
Classic Butter Sauce
Nothing beats the simplicity of melted butter for showcasing your pierogi. I melt 4 tbsp unsalted butter in a small saucepan over low heat until just golden, then stir in 1 minced garlic clove and 1 tbsp fresh parsley. The nutty aroma of browned butter complements both savory and sweet fillings perfectly. 🧈
Sour Cream Topping
Full-fat sour cream is the traditional pierogi companion. I recommend Daisy brand for its rich texture and slight tang that cuts through rich fillings. For extra flair, mix in 1 tsp lemon zest and ½ tsp smoked paprika before dolloping over hot pierogi. The cool creaminess balances the warm dumplings beautifully.
Caramelized Onion Gravy
Slow-cook 2 large yellow onions in 2 tbsp butter over medium-low heat for 30 minutes until deep golden. Deglaze with ¼ cup vegetable broth and simmer until syrupy. This sweet-savory topping transforms simple potato-cheese pierogi into a gourmet experience. The onions’ natural sugars caramelize to create incredible depth.
Spicy Tomato Sauce
For a bolder option, simmer 1 cup crushed San Marzano tomatoes with 1 tbsp tomato paste, ½ tsp red pepper flakes, and 1 tsp dried oregano for 15 minutes. I finish with 1 tbsp heavy cream to mellow the acidity. This vibrant sauce pairs especially well with mushroom or meat-filled pierogi. 🌶️
Sweet Fruit Compote
Blueberry or cherry compote makes dessert pierogi shine. Simmer 1 cup frozen berries with 2 tbsp sugar and 1 tsp lemon juice until thickened. The bright fruit flavors contrast beautifully with sweet cheese fillings. I love using Wild Blueberries for their intense flavor concentration.
Herbed Yogurt Dip
Combine 1 cup Greek yogurt with 1 tbsp fresh dill, 1 tsp garlic powder, and ½ tsp lemon juice. This lighter alternative to sour cream adds protein while keeping the creamy texture. The fresh herbs brighten up hearty pierogi fillings like sauerkraut or ground meat. ✨
Nutrition Facts

- 6 Egg Cake Recipe with Oil: Light as Air With Buttery Moisture - October 4, 2026
- 4 Bean Casserole Recipe: One-Pan Heartiness With Smoky Paprika Depth - October 4, 2026
- 3-Ingredient Keto Mug Cake Recipe: Microwave Magic in 2 Minutes - October 4, 2026